 |
| Hello to one and all and Welcome Back! As you can see from the photo above, the staircase handrail has been installed and assent to the 3rd floor is now safely possible. It took me a while to settle on a course of action prior to constructing the handrail, but I must say that I am pretty darned pleased with its final outcome. Even so, you may have to view this post with one eye shut, because I made plenty of mistakes along the way, and although I've disguised most of them I realize that some of them are still obvious. 🙄 In any case my staircase ordeal is over, and I'm ready to move up to the 3rd floor leaving behind only a few minor details to be finished on the second- ❧❧❧❧ I'll begin by explaining how I constructed my iron handrail: |
 |
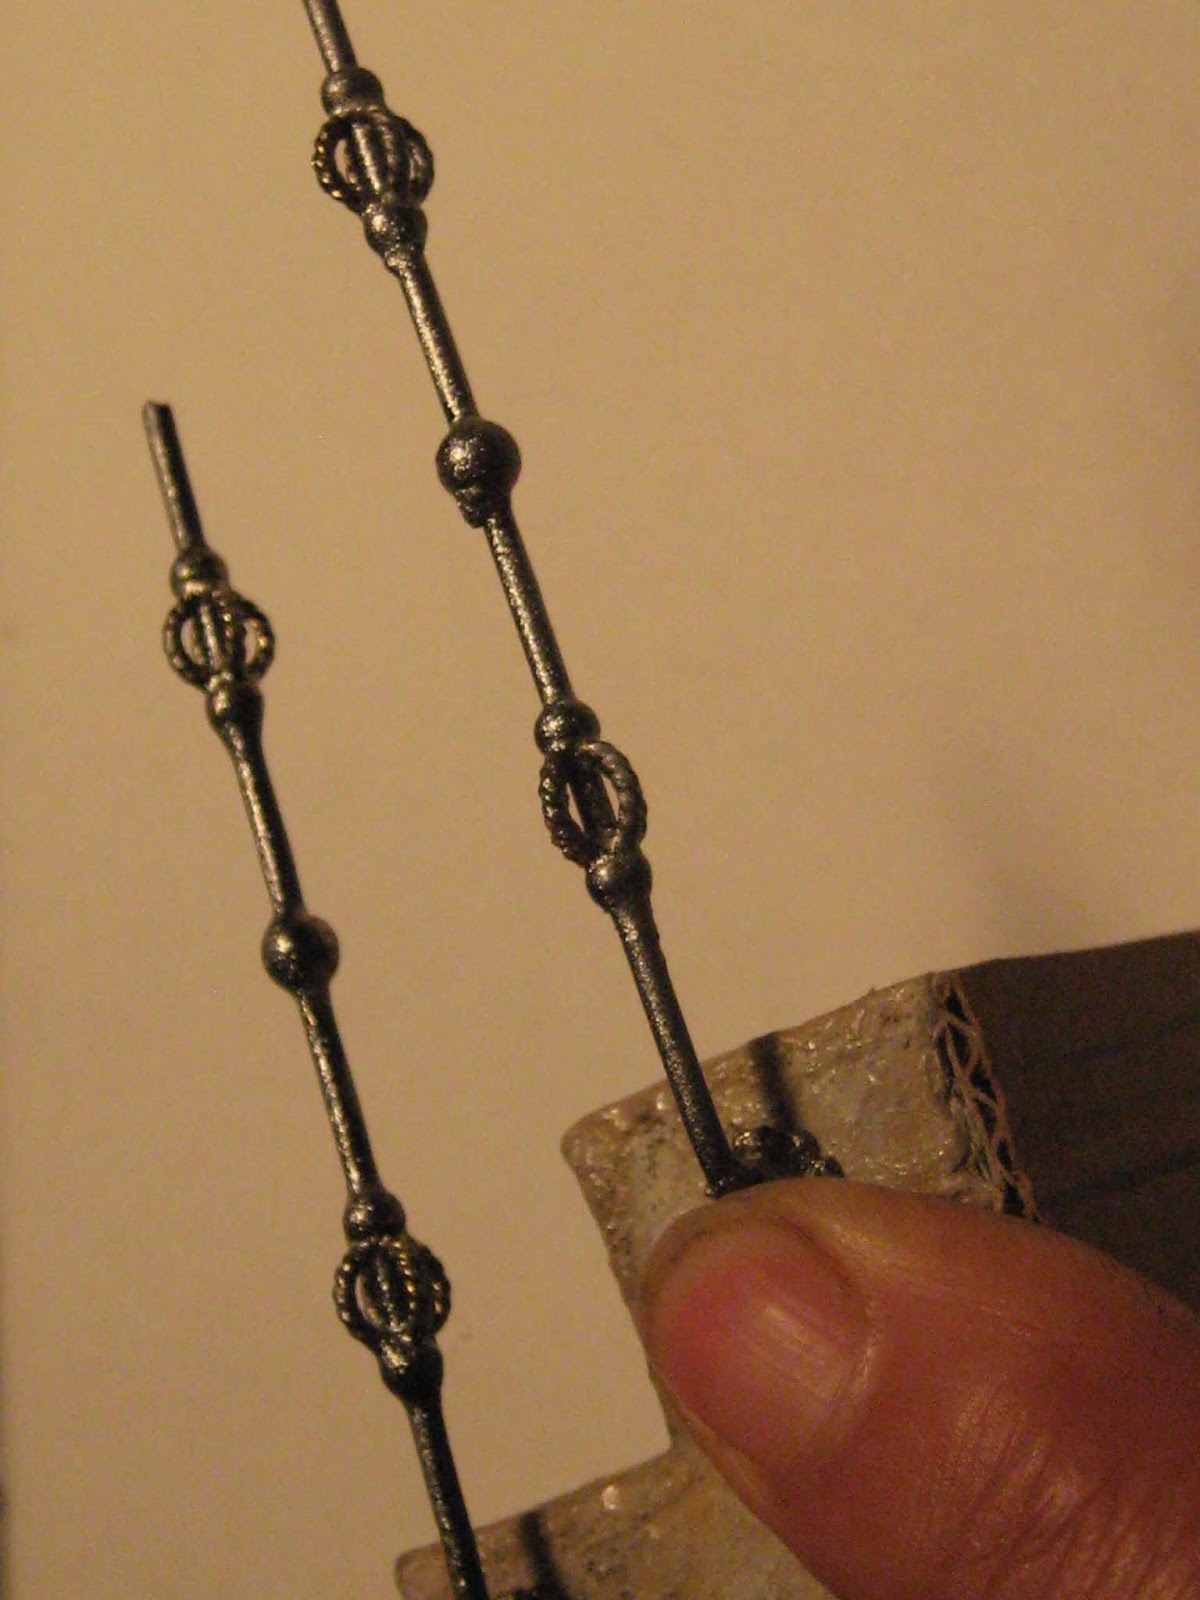
| It's made from 16 gage stem wire which I already had. I chose it because it seemed sturdy enough to support a handrail, and also because it fit through the holes of various beads I'd chosen for it. I referred to the directions in Lea Fisoni's The BIG BOOK of a MINIATURE HOUSE https://atelier-de-lea.blogspot.com/2018/10/le-grand-livre-de-la-maison-miniature.html and cut equal lengths of 7 cm stem wire, as per her instructions. I also found an equal supply of half-round bead spacers in my stash which I glued onto the bent ends of the metal rods. I did this to by-pass drilling individual holes into the side of the staircase, as Lea had done with hers. |
 |
| Once the spacer/supports were secured I then slid more metal beads onto each of the wire stems. |
 |
| I adjusted the beads as needed and then glued them in place with a drop of Zap-a-Gap glue. |
 |
| As you can see below I didn't get the ornamentation lined up properly but was able to correct it before I proceeded to the next step. |

 |
| To even out the colour I was going to spray paint the metal with a black BBQ spray paint. but unfortunately I had run out of it😕 and so I used a hammered metal spray paint as a base coat instead. To affix the posts to the staircase, I used a combination of white glue and super glue however, the connection was brittle and unstable and the posts kept snapping off of the staircase with very little provocation. sooooo I ended up using E600 Glue to tightly bond the spindles to the staircase and IT worked beautifully! |
 |
 |
| once the glue had set I was able to paint the rods with flat black acrylic paint. |
 |
| For the handrail I found a length of wood-channel in my stash which was narrow enough to stabilize the rods as well as substantial enough to support the visual weight of the staircase. |
 |
| I painted the wood with a metallic black acrylic paint then lightly sanded down the hard edges along its length to give it some additional wear. |
 |
E6000 glue was added to the tops of each rod before the handrail was positioned over them and into place.  |


 |
| I aged everything with several layers of thin, brown transparent washes. |
 |
| Finally I glued the staircase and rail unit into place. Any gaps between the wall and the stringer were filled in with drywall patch and when that was dry; the hall wall was also aged. Now that I have reviewed this photo below, I may have to add a ball finial to the end of the rail- what do you think? |
 |
Once the stairs were permanently installed, I finished the backside of them with the baroque Music Room wallpaper as outlined in a previous post. I blocked up the area under the stairs, then impulsively decided to wrap the paper around the side and- YUK! I DIDN'T LIKE IT AT ALL! |
 |
| SOooooo to fix it- I applied a thick layer of dry-wall patch with my finger and a pallet knife and completely obliterated the offending paper. |
 |
| To fill the void and to add some textural interest, I cut some scrolly sections, from an old plastic doily and imbedded them into the wet putty. When everything was dry, I re-painted the entire side section of the staircase to make it look cohesive with its new bottom. The painting of it proved to be challenging since I was working in a very tight space, and struggling to match it with the existing stone on the opposite side of the hall. All I'll say is that I did my best and since you can only see one side of the hall at a time... it IS, what IT is. |

 |
| After I'd had a look at the photo above I touched up each of the rods with more flat black acrylic paint to tidy them up. |
 |
| above are the end results of the finished staircase; top, side and bottom. And once again, I see something I'll need to correct ie. the end of the stub wall should be more defined. *sigh* ❧❧❧❧❧❧ Even though the wallpaper in the Music Room had already been sprayed with Matte Acrylic Sealer, I sprayed it again with Stiffen Stuff fabric stiffener, which I quickly dried down with a heat gun. I did this to hopefully protect the colour from fading and to give the paper itself, some added resilience. My remaining "big" task was to construct an inside window frame for the Music Room. However, I wanted something romantically Italian hmmmm?... what should I do?... 🤔 I KNOW! How about SOMETHING MADE OF STONE?!😩 Well, why not? I've already had LOTS of practice! 🤪 and since I had plenty of unused pieces from the Willowcrest kit, I decided to make the interior window frame by modifying one of its door frames. I cut through the centre section, and removed about 1/4 inch from the curve, shortened it, then re-glued the two sections back together to fit the width of the window opening. below is the raw wood door frame |
 |
| Once the frame was textured and painted to look like stone, I repeated the same colours on the insert so that it matched the finish of the inside frame and sill. below is the finished Music Room window with casing  ❧❧❧ For the ceiling of the Music Room I deliberately peeled, patched, painted, stained and roughed up the yellow ceiling paper to try and make it look more old world. The main reason I did this was to disguise an obvious join between the ceiling paper in the hall and the ceiling paper in the Music Room. hmmm? I may have to try this out on the bedroom ceiling too and I thought that I was "FINISHED!" 😤 |
 |
| The overhead light fixture was made from an ethnic necklace found at my local thrift store. It is studded all around with tiny pink pearls and is very ornate. I glued the light to a ceiling medallion (formerly a backplate of a dresser drawer-pull.) |
 |
For Pepper's little table I found a small rug printed on suede paper, rescued from another project of mine. I added some fringe to one end, and draped the rug to fall over half of the tabletop. I sprayed the rug with the Siffen Stuff to seal the colour, then I lightly aged it some more by with coloured chalks blending them in with my fingers. I Really Like the softness and warmth which the rug adds to the room. |


 |
| Another Change was with the accessories on top of the chest of drawers. Although I liked the original arrangement, I thought that some of my coloured glassware should be on display to represent Venice and it's world famous Murano glassworks. The new table-scape is simpler and more formal. and Thanks to Drora's delighfully easy cookie tutorial http://drorasminimundo.blogspot.com/2018/11/a-very-easy-no-clay-cookies-and-serving.html I made some tiny sandwich cookies arranged on the glass plate then I filled a cranberry glass compote with mandarin oranges and pears. Just a little something for the music teacher and/or her students to enjoy after practice. |
 |
| wouldja look at that waxy buildup - how in the world did I miss cleaning that up? |
 |

 |
 |
 On the opposite side of the room under the staircase, I decided to remove the long lidded chest. I pushed the draped table against the wall under the mirror and installed a second chair next to it. |
 |
| This new more practical arrangement gave me a little more floor space and visually unified both sides of the room. |
 |
 |
I LOVE the depth of field in the photo above-  The Music Room was an interesting room to construct. And despite it's odd size and obvious limitations, (namely "ME") I feel that it has managed to turn out pretty good! |
 |
So that's a wrap!
Villa Leone's second floor is "done"
Villa Leone's second floor is "done"
and
I'm not sorry to be leaving it behind.
I feel I have been stuck between floors,
for far too long.
 |
| "Time to say goodbye" to the stairs and to the Music Room and so- goodbye!😎 |
 |
elizabeth https://www.youtube.com/watch?v=4L_yCwFD6Jo |


.jpg)

