Showing posts with label Italy. Show all posts

Saturday, 4 November 2017

Leone gets a FACELIFT

Welcome Back!
Ben tornati!

In my last post, I stated that I would be starting on 
Villa Leone's kitchen.
and I have been.

BUT
It took me a week 
just to empty the entire house of its contents before I actually began. 
Yes, 
there WAS a lot of junk and stuff inside the house, 
but what made me drag my feet 
was because I was reluctant to start on
"the kitchen". 
I was uninspired and the room itself, 
was uninspiring.

Let me preface this post by saying,
 that I'd NEVER  been happy with the designated kitchen space because of the ugly sight-line 
leading from 
the Morning Room 
through the stone arched doorway. 
What you saw was a dark flat window, 
on a useless wall. 
I say "useless" 
because nothing could be placed against the wall 
 under the window,
unless it was moved far back into the corner.  

Added to this gloomy aspect was 
 the darkness of the grilled window alongside the general darkness of the front entry.
mama mia
What was I thinking???
 I liked the wallpaper well enough 
even if
I wasn't thrilled with it, 
and although
I'd considered papering over it, 
deep down I knew that wouldn't really solve anything 
because the problem was still
That Annoying FLAT Window

So with the window staring me in the face, 
I thought I'd tackle that very thing which
I disliked the most

I've always wanted a window ledge,
and so why not try and make one?

 So this is where
Leone's FACELIFT
began.

To make the inside non-opening window 
look more important, 
and to add some interest to a boring outside wall,
I LIFTED OFF THE FRONT FACE PANEL
on the 
 the exterior of the Villa, and then bumped it out 
 a Half Inch. 
I framed in around the inside perimeters of the window opening, then
 around the outside of the frame of the face panel
using lengths of thick balsa wood. 

Then the face panel was re-glued over the exterior opening so that it stood proud from the surface of the  exterior wall. 
 After it the glue had dried, 
the joins and seams were sealed, 
 with some wall putty and paint.

It is now securely re-affixed into place.

I'm sorry that I didn't take any pictures of the process, 
but this is how the front face panel looks now that it is 
 almost finished.
The front looks the same head on
but the profile is better.


This looks far more interesting on the outside 
and 
 it's providing me with an inside window ledge;
Hip Hip Hooray! 


The window and the window ledge 
are still unfinished,
however, 
it was right after I had re-adjusted the window, 
that everything else about this room 
began changing -

rapidly! 

I decided to switch the kitchen door from the left side of the wall to the Right


This new door placement was good on several counts:
1)  It would give me a straight view into the Main Entry from the patio
2) The foot traffic from the garden did not have to pass through the kitchen to get to the rest of the house
3) The kitchen itself would be self contained 
and would look more 
"Old World".
  This was the set-up I decided upon for 
the kitchen interior. 
  I felt happier with this particular arrangement.

However,

 after I'd examined the photo above, 
the thought came to mind that perhaps I should differentiate 
the floor of the corridor 
from that of the kitchen: 

 So I laid down a scrap piece
of tile paper to see how the two floors looked together, 


and I decided I'd go for it

I'll be honest,
I had to do
 then re-do the tile floor  
TWICE. 
☹
The first time I laid the paper down
 crooked.
It was just a fraction off but it.  
 REALLY BUGGED ME 
>< 
I was all out of the original scrapbook tile paper,
 so 
I had to use a photocopy of it 
for the second attempt. 
The photocopy tile was SuperWHITE  with 
a wishy- washy Black.  
So then I had to try and match the tile color with those in the Main Entry... 
ARRRGGH !
><
Well, it is what it is
which is not great, 
so don't look too close,
 okay? 

The tiles look better from a distance
and the view from the staircase window 
Is Much More Interesting
now that there is actually 
Something 
Worth Seeing! 

A 
(rather dark)
side by side shot of
The Morning Room and Main Entry on the left,
 with the passage and small kitchen on the right.
Not sure what to cover the kitchen walls with yet..

The FOLLOWING PHOTOS ARE MOCKUPS OF THE KITCHEN
please keep in mind that
everything may ( and probably will) change again tomorrow

PLAY TIME! 


Veggie Basket
was made by Janine
back in the 90's
FINALLY, it will get Pride of Place!

For the tiles behind the stove,
I am thinking to use a photocopy of a
French Rug.
The Baroque pattern and pretty colors are just what I am looking for.
I'm still not certain about if I should have a stove hood or not.
I have an inspiration picture of one which I might try
 anyway,
just so that I can see what it will look like with everything else before I finalize my decision.

The Elizabeth Causeret covered casserole was a gift from Linda when she and Janine were at the
2017 SIMP SHOW
:D
the Roma Tomatoes 

are plastic berries from a
Christmas Wreath


Morrel Mushrooms
were made by Irina Timoshkevich 
of 
Irina Miniatures
https://www.etsy.com/ca/shop/Irinaminiatures


 TheBlackPainted wooden box
 will eventually become 
the fridge and the wine jug on top was a gift which Fats
made me for my birthday last year.  
The fab pottery pieces are more gifts from both Linda Park and
from Fatima
This will give you the general feeling of how the kitchen is developing.
After I build the permanent walls and install the arch,
I shall be adding, cupboards and shelves and perhaps, over head beams as well.
I'll need some additional counter space on either side of the Red Range, 

and 
More Herbs 
for the window sill.

I am using this large"iron" urn as a temporary sink
however the more I look at it, the more I like it.
May have to rethink
The Sink
Next to the sink,
is my new chopping block by
Weston Miniatures

https://www.etsy.com/ca/shop/WestonMiniature
It's PERFECT!
Thanks Matthew! 


                   Erzebet of Hungarian Miniatures 
                        made the Parmesan cheese and the grater.
https://www.etsy.com/ca/shop/hungarianminiatures?ref=listing-shop2-all-items-count#items
                        Jar of Tomato preserves by
                               Irina Timoshkevich
                                                    Irina miniatures
                     https://www.etsy.com/ca/shop/Irinaminiatures


Additional Items displayed on the chopping block include:
 pepper grinder, bottle of Chianti, bowl of eggs, the garlic and the whisk made by me.

Janine bought me
the Elizabeth Causeret country style dish
also from the 2017 SIMP show;
I tell you,
I have some of the BEST-EST Best Friends!
:D
The onion and garlic braids were also made by Fats!
:D
The above photo lets you see the temporary set up in the kitchen and how it relates to the Morning Room.
It will all change again,

 when the walls are papered, the shelves go up 
and the light fixture are put in place.

In conclusion:
It was FUN to be able to play with some of these kitchen accessories again, 


especially after all of 
the re-thinking and re-construction.

And even though I'm not finished yet,
I got a good bit done this past week
even if most of it consisted of
 Painting... Painting... and more Painting

miles left to go
but I feel I'm actually making some progress
because to me -
It's looks like someone lives here!
☺


Thank you so much for coming to visit 

I'll see you to your gondola


 goodbye, 
goodbye

until we meet again

♥♥ ♥

elizabeth


Friday, 28 April 2017

The Morning Room/ Villa Leone


 THE above photo is the current "Morning Room" in Villa Leone.  Right now is all free-standing, in that NONE of the interior walls, floors, columns, windows, door, or stairs are secured and/or glued into their permanent position.  
It is good thing too, because I am not finished with the stairs or the entry hall, and to add all of the required finishing trims would be impossible if the walls were glued in place.  So therefore, what you're seeing in the photos is, temporary!
  This will be a rather long post primarily because of the pictorial demonstrations which I've included for the purpose of further clarification.

        The Morning Room of Villa Leone.

This room began with my finding 2 sheets of gold embossed scrapbook paper which changed my mind regarding the original direction of the dining room. 


Because the walls were not glued in to place, I cut the paper to the size of the panels and let it free stand against them to see if I actually liked it or not. 


I LOVED IT!  
BUT
it had One Tiny Problem which I hadn't foreseen

As soon as direct light hits it, 
it looked like molten gold running down the walls. 
Not good and not pretty.
I was disappointed because it looked cheap and Angry that now I was going to have to look for a replacement.
Upon giving it some further thought, I decided to try to see if I could salvage it.  

I glued the paper onto the wall panels and then coated the surfaces with MATT MOD PODGE hoping that it would flatten down the gold.
If you compare the photo above with the one below, you can see that it did work at cutting down some of the shine, 

and if it still wasn't GREAT, at least it was Better.
I took a picture to see how the light reacted with it and discovered that it although the gold paper looked okay, the aqua paper on the wall in the entry looked as dull as dishwater. 


I wanted the entry to look old but, when positioned  behind the gold, it looked derelict.
After much auditioning of other wallpaper possibilities, I spotted the jacket cover on a book of Italian Art which looked intriguing.
I photocopied it and held it up agains the wall.
This is the jacket from
"The Book of Art"
Volume 2- Italian Art to 1850
the cover detail depicts Botticelli's
"The Allegory of Spring"  

perfectly appropriate for an Italian villa 
I glued it to some cardstock which I sealed with
Matte Mod Podge
I cut out the door opening and glued the print over top of the old wallpaper, secured it with spring loaded clips and let it dry overnight.
This solution was in keeping with the theme of the villa and it was much more interesting to look at than the solid color.
But with every plus there comes a minus, and perhaps you'll spot the problem sooner than I did. 

The left side of the door looks just as I had hoped it would.  I decided to make it look more plaster-like and brushed on a slurry solution to soften the colors and give the paper some additional texture.  
Below you can see both sides of the muted mural. 


And here's the problem
The original print has 3 nymphs dancing together, but by eliminating the 2 in the center to accommodate the door, I now had One Nymph with 2 arms, 

with a third arm sprouting from her ribcage!
Arrrggggg!  

This was, 
as Jodi of My Miniature Madness, called it a
"rookie mistake"
I'm still uncertain if I am going to attempt to correct it by overlaying it with another panel, 

OR
leave it be and put something in front of it.
For the time being, I'm leaving it be, because I've run out of Mojo.

Meanwhile, I decided to see if the slurry method would work for the gold wallpaper too.
So I brushed on a thin coat of drywall compound mixed with enough water to make it soupy.
The mix is white-ish when it's first applied, then dries to a hazy transparency.
To set it, I sprayed the panels with hair spray.

Once the panels were dry, I re-positioned them inside to form the room.
WHAT A DIFFERENCE!
The walls no longer appear as if they're sweating gold bullion.

such a relief!
 ~
I hung the carved gilt mirror by attaching it to a cord hung over a nail.  This'll keep the mirror from continuously falling off the wall.

The room was morphing from the more masculine dining room/ study which I had originally intended, and was looking increasingly more feminine, so 
I removed the credenza and rethought the furniture placement.
  I decided to play around with some furniture I had on hand and see if I could come up with something more satisfying. 
I found a print of a Persian rug which was the right colors, size and shape.  Later, I will be transferring the rug print onto fabric.
The carved fireplace I've had for a few years, but I painted it dark, and wanted an over-mantle which extended to the ceiling so I had to construct one.

I made the base from heavy card stock glued to a wood frame, as well as thin cardboard and an old window frame from some past Greenleaf kit.

Once I got this far, I left it alone until I knew how to finish the rest. 
 I found a sofa which I had buried in a drawer.  I had reupholstered this piece 20 years ago but never had a place to put it. 
It turned out to be A Perfect Fit, inside the window alcove where the credenza used to be.
I chose 2 of Linda Park's Fabulous needlepoint cushions 

and later I added a laser cut linen doily from 
JEAN DAY MINIATURES 
to the back of the sofa

I took more photos to see how things were working together  


Initially I used the Adorable little barley twist table which I'd won from Pepper's Mitchymoo Miniatures Giveaway
and I was going to leave it at that
because the resulting room was looking very peaceful.
"Serenity Now"

thinking that the room arrangement was 
"completed"
I got back to work on finishing the fireplace.  
I found a medallion which I'd painted to look like stone which Janine had given me way back in the 1990's.  I have been wanting to use it for the longest time and the fireplace over-mantle provided an ideal location.
The medallion gave me the idea of how to finish the rest of the fireplace.

I wanted to make it look heavily carved, so I went to my storage boxes of metal bits and bobs.
I have a large collection of cherubs and angels which I find periodically in the jewelry section at second hand stores.  I found a pair of cherubs facing each other that would work along with 4 smaller single ones and glued them into position above the medallion and then added metal beads and bits of wood trims; building up the design until I was satisfied.  

I used a cluster of three angels on either side of the panel.

Beads and metal filigree were added to the top and bottom, as well as extra wood trims.
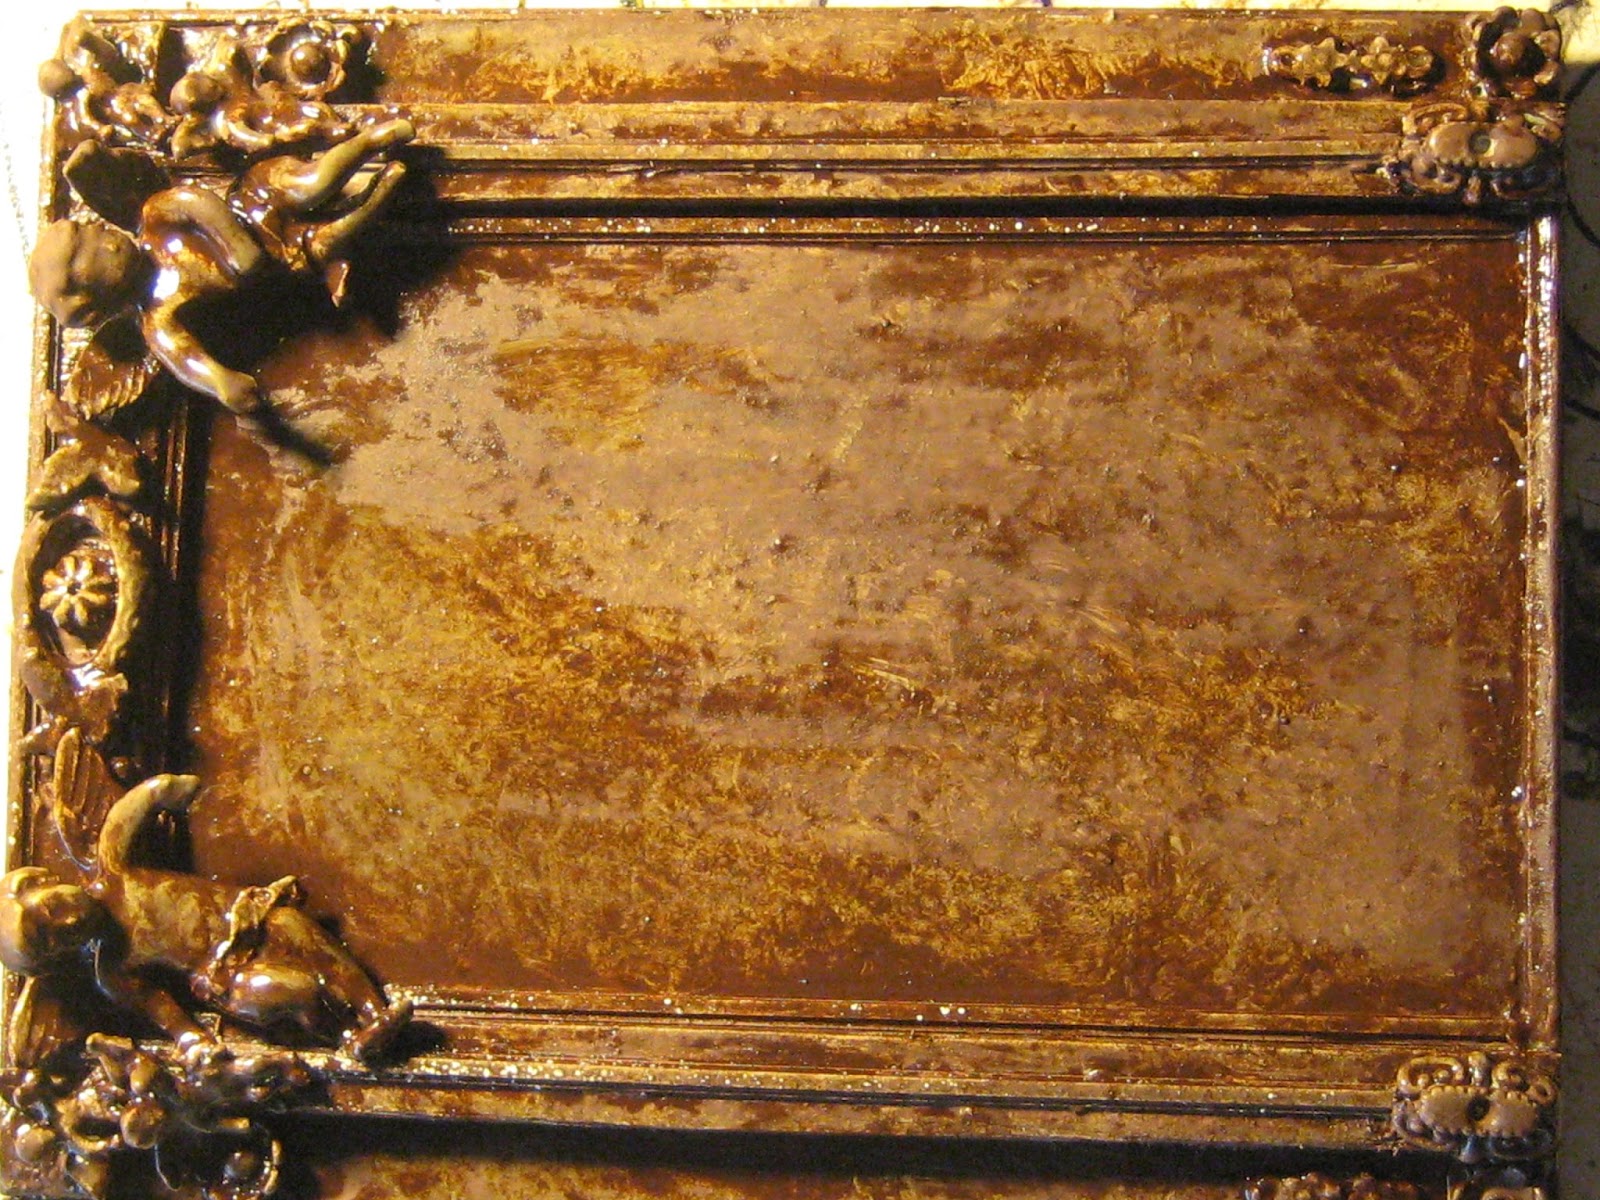
First I sprayed the panel white and then grey.
When it was nearly dry, I covered the entire panel with a chocolate brown water-based acrylic paint.


I adde a layer of Antique Brown oil-based stain with a brush and sponged off the excess with a tissue.


 this is the results.
I would have left it at this stage except that I needed the panel to match the fireplace so it had to be darkened further.

I painted over the oil stain with a water-based BLACK gel stain, sponged it off and touched up any areas with additional color.
To speed up the drying I went over it with my crafter's heat tool.

 I've used this technique of mixing layers of oil stains on top of wet water based paints, for many years. Each time I do it, the results will vary depending on the paints and stains I've used and how wet or dry each layer is before the next one is applied.  For this project, I also used Gold and Silver metal pulvers made by
Eberharb Faber
these are Very Messy powders, especially if you happen to spill some, but they added a fine metallic highlight to this project.

Below is the installed panel


 MORE COLOR. 
 I chose a pair of blue and white (bead) jars and and Janine-made lacquered blue vase.  These tied in nicely with Linda's embroidered cushions on the sofa.
The orange tulips I made from dried plant materials. The orange repeats the color of the fabric on the sofa.
The trumpet was formerly a broach pin. 


This gives you an idea of how all of it will look with an  LED fire blazing inside.  
A close up of the tulips


To use the"Morning Room"as a dining room, I cobbled this table together by using the cloth covered top from the patio table, and placed it on a night stand.  I've got an HOM round table of the same diameter which I'll assemble as a future replacement.
  
I set the table for a light breakfast of croissants and coffee.  
I had a plastic violin as well as a cello which wouldn't fit anywhere in the room except behind the table.  I found some sheet music which I placed on the tabletop with the food.
(obviously one of the occupants of the villa is a musician)
   

Eventually, I would like to scale down sheet music from Vivaldi's " The Four Seasons" but I already had these mini scores in a drawer, and they'll do fine for now.

the foot warmer came from my friend Bettie Smith

This is the table set for morning coffee, 
 with 
JEAN DAY MINIATURE'S
laser cut linen doilies as place mats

 Time for tea! featuring Linda Park's gift
of a Wonderful needlepoint blue & white tea cosy!

The teacups are Bespaq and the Chinese teapot is by a Seattle artisan from the early 1990's 
Lori O'Halleran 
Dressing the hall table
 with urns
Contented Cat by Sarah Hendry
overview of the unfinished entry

In conclusion, I hadn't expected that
this room would turn out to be as formal as it has.
I'm not unhappy about it either, other than I think I'll need to find a way to Age It Gracefully so that it's consistent with the story.


Still undecided on what to do with the ceilings.
I would LOVE to do a sky painted ceiling such as what Betsy at About My Dollhouses, has done in the living room of her 'Folly', but painted beamed ceilings are also on my list of ceiling possibilities.
ah decisions decisions...


This room has already gone through a number of major transition from what my original intent for it was. 


Below is how the dining room was originally going to look

And this is what it currently looks like

I hope you've enjoyed seeing the changes in the villa. 

Wishing everyone a Terrific Weekend
and
Oh LOOK!
The 3 armed nymph is also waving you goodbye
♥
ciao for now


elizabeth


DO OVERS! a Glencroft Living room redecoration

    Back in April of 2022, I made up a storyline for my Glencroft renovations, which went something like this...   "After due considera...