 |
| Inspiration can come from many different sources. As I was writing this blog, the theme song from the movie The Full Monty was looping through my head- hence the blog's title: "You Can Leave Your Hat On" In a way, it was an appropriate choice in that throughout the making of the STOVE HOOD, I kept putting things ON, only to |
But once again, I am getting way ahead of my story. so Let me begin it this way *** When working on the left side of Villa Leone's kitchen my original muse was a MINWORKS blogpost from several years ago. |
http://minworks.blogspot.ca/search?updated-max=2012-01- 09T10:48:00-08:00&max-results=7
Janine and her hubby Bruce,

 It's shape of it reminded me of a hat.
Funny thing is that what I both Liked and Disliked about the shade, was it's unique hat-like shape, however I didn't want it to continue looking like a hat once it was installed in the kitchen.
But another reason that I thought the shade might work as a hood, was that the plastic was easy to drill through, and since it was already hollow, adding lights and hiding the wires inside it would be pretty easy.
I was eager to try it out with my FANTASTIC- NEW-TOTALLY GORGEOUS 8 gas burners, double oven, MOLLY SUE MINIATURES
ITALIAN STOVE. http://www.mollysueminiatures.com/
 I cut some wood trim to bulk up the base, then tried it out with the doll "cooking" at the stove.
UGG!
What I had was a plastic hat with a wooden brim. Clearly additional work was required.
 To make it look more interesting, I cut up a plastic picture frame to add some carving.
It was very heavy- looking carving and Naturally, I thought I could "lighten it up" with Even MORE HEAVY CARVING


I randomly brushed a gold nail polish over the black paint which gave the hood metallic highlights.
Off came the top!

 I tested the lights before gluing the hood to the wall
The I glued the tiles to the wall,
with the hood positioned above.
Interest in the kitchen, suddenly "bumped and grind" to to a halt.
I felt like slinking off stage.
In my frustration, I was going give up on the kitchen and go to work on the second floor of the villa instead, since nothing I did; helped, and I could no longer pretend to like-
| had produced a Fab Hall Lantern for her Award winning French House, by gluing together 2 night lights from the dollar store to form a single hanging fixture. |
Remembering what they had done, had me cruising the aisles of different dollar stores,
looking more closely at what night lights had to offer.
Last year I stumbled across this one which I thought might one day make a pretty good stove hood.


Funny thing is that what I both Liked and Disliked about the shade, was it's unique hat-like shape, however I didn't want it to continue looking like a hat once it was installed in the kitchen.
But another reason that I thought the shade might work as a hood, was that the plastic was easy to drill through, and since it was already hollow, adding lights and hiding the wires inside it would be pretty easy.
I was eager to try it out with my FANTASTIC- NEW-TOTALLY GORGEOUS 8 gas burners, double oven, MOLLY SUE MINIATURES
ITALIAN STOVE. http://www.mollysueminiatures.com/
 |
| I could see the potential of a beautiful relationship between the two, so I decided to proceed with the hood as planned. I would need a tiled wall behind the stove, so I dug through my "used- to- be-organized- but- is- now- really- messy" stash of building supplies, and located some leftover plastic embossed "tin tile" which I would paint and install beneath the hood. I used an earlier tutorial of mine for painting these particular plastic tiles "Big Tiles- try- try again" http://studioeminiatures.blogspot.ca/2015/02/big-tiles-try-try-again.html To widened the base of the hood I cut a rectangle of foam core board to equal the width of the stove, and glued 2 wooden corbels to the underside for supports. These I'd also found in my messy stash. |

UGG!
What I had was a plastic hat with a wooden brim. Clearly additional work was required.

It was very heavy- looking carving and Naturally, I thought I could "lighten it up" with Even MORE HEAVY CARVING


 |
| I kept on adding things: a lion head, a plastic circle, rhinestones, and metal bits and more wood trim. hmmm? "maybe it will look better, once it's painted" |
 |
| Base coat on |
 |
| then 2 finish coats of black acrylic paint. |
 |
| Hmmmm? And although wouldn't admit it out loud, I thought it looked like a halloween witch hat, however, I persisted in the belief that I could fix it up by adding still more to it. |
The general idea was to make it appear in harmony with the brass trims on the Italian stove.
However, no matter what I did
it still wasn't doing it for me.
This was THE Moment
my career as
A Stripper began.
 |
Off came the top!
 |
| to bad for me- the crowd WASN'T going wild Perhaps once it is actually installed in the kitchen?... *sigh* so I was back to putting things on again "BABY TURN ON THE LIGHTS- ALLLL THE LIGHTS" (lyrics from the song) so I drilled two holes into the plastic bottom of the night light hood, then I added two gold glass buttons I'd found in my stash. I threaded the bulbs through the buttons, then gathered the wires into the hood, which were then fed through the kitchen wall and hooked up to the transformer. At the back of the hood, I covered over the hole with filigree right where the shade would have attached to the night light bulb, this became the hood's Exhaust Fan. |


 |
| The buttons make the lights HUGE! |
 |
| SCORE! I remembered I had some brass strips and some brass doweling. I cut the brass trims to fit the hood then glued them both in place. |
with the hood positioned above.
 |
| I couldn't get a crisp a bend at the corners with the brass, but it still looked better than I'd expected. I was stoked about both the brass and the tiles. |
 |
| The copper fry pan was a Christmas gift from Linda Park! ♥ and since I'd made hooks for utensil bar, I was able to hang up her pan right away and ♥ LOved it! ♥ Linda emailed me, asking about how things in the kitchen were progressing. I had been on a roll- I had already done a lot- and I liked it a lot - well mostly BUT I WAS STILL NOT LIKING THE Top of the HOOD! To me My dollar store night light still resembled a hat- specifically- a tall Top Hat wearing a lot of brass! |
I felt like slinking off stage.
In my frustration, I was going give up on the kitchen and go to work on the second floor of the villa instead, since nothing I did; helped, and I could no longer pretend to like-
THE HAT!
However, working on the second floor of the villa meant working on the second floor staircase- Arrgggh!!!-
nooooo, I'm not ready for that yet either!
So, I put on my thinking cap to try and come up with an viable solution; because having glued the hood to the wall, I had no other choice but to leave the hat on.
 Then a light switched on!... I had an idea
What if- I lowered the ceiling height to hide the hat?
i.e. like a burlesque FAN DANCER, it's still behind there, but you just can't see it
I tried out a section of wood across the top of the hood to see if it would work and what it would look like.
but first I had to pry off that lion medallion
I added the ceiling beams for a little Venetian character
and permanently affixed the lantern to the ceiling.
To finish off the top of the hood, I cut 2 strips of self-stick gold ribbon, doubled up, and glued them to the top of the hood to form a thick band to cover the gap at the cut out.
I chose to use ribbon because it was flexible and would easily conform to the contours of the hood AND because I had lots of it, therefore, IF I made a mistake,
which I usually do;
I could try again.
This gold lame ribbon has a fuzzy texture like velcro
However, working on the second floor of the villa meant working on the second floor staircase- Arrgggh!!!-
nooooo, I'm not ready for that yet either!
So, I put on my thinking cap to try and come up with an viable solution; because having glued the hood to the wall, I had no other choice but to leave the hat on.

What if- I lowered the ceiling height to hide the hat?
i.e. like a burlesque FAN DANCER, it's still behind there, but you just can't see it
I tried out a section of wood across the top of the hood to see if it would work and what it would look like.
 |
| "YES-I think that I could live with this" |
 |
| Sudden Exposure- (you can see it's undies!) then I made second hat to cover the first hat |
 |
| I cut a length of foam insulation to span the width of the wall, which I then covered with wallpapered cardstock on the narrow front face as well as on the underside. Then the new hat was glued in place right over the old black hoodie. |
and permanently affixed the lantern to the ceiling.
 |
I chose to use ribbon because it was flexible and would easily conform to the contours of the hood AND because I had lots of it, therefore, IF I made a mistake,
which I usually do;
I could try again.
This gold lame ribbon has a fuzzy texture like velcro
 |
| I applied the first of 2 layers |
 |
| I used my finger to smear a layer of drywall putty over the surface of the gold ribbon which I had painted black. |
 |
 |
| I smoothed drywall putty over the ribbon and let it dry. |
 |
| I cleaned off the overage and waited until the putty had set. When it was dry to the touch, I painted it again with black acrylic paints. |
 |
| then highlighted it with more gold nail polish. |
 |
| FINALLY!!!! |
Everything was
Looking good and
The crowd was going wild!!!🎉


https://www.etsy.com/ca/shop/Irinaminiatures
elizabeth
The crowd was going wild!!!🎉
| ||
Ta Dah!
|

 |
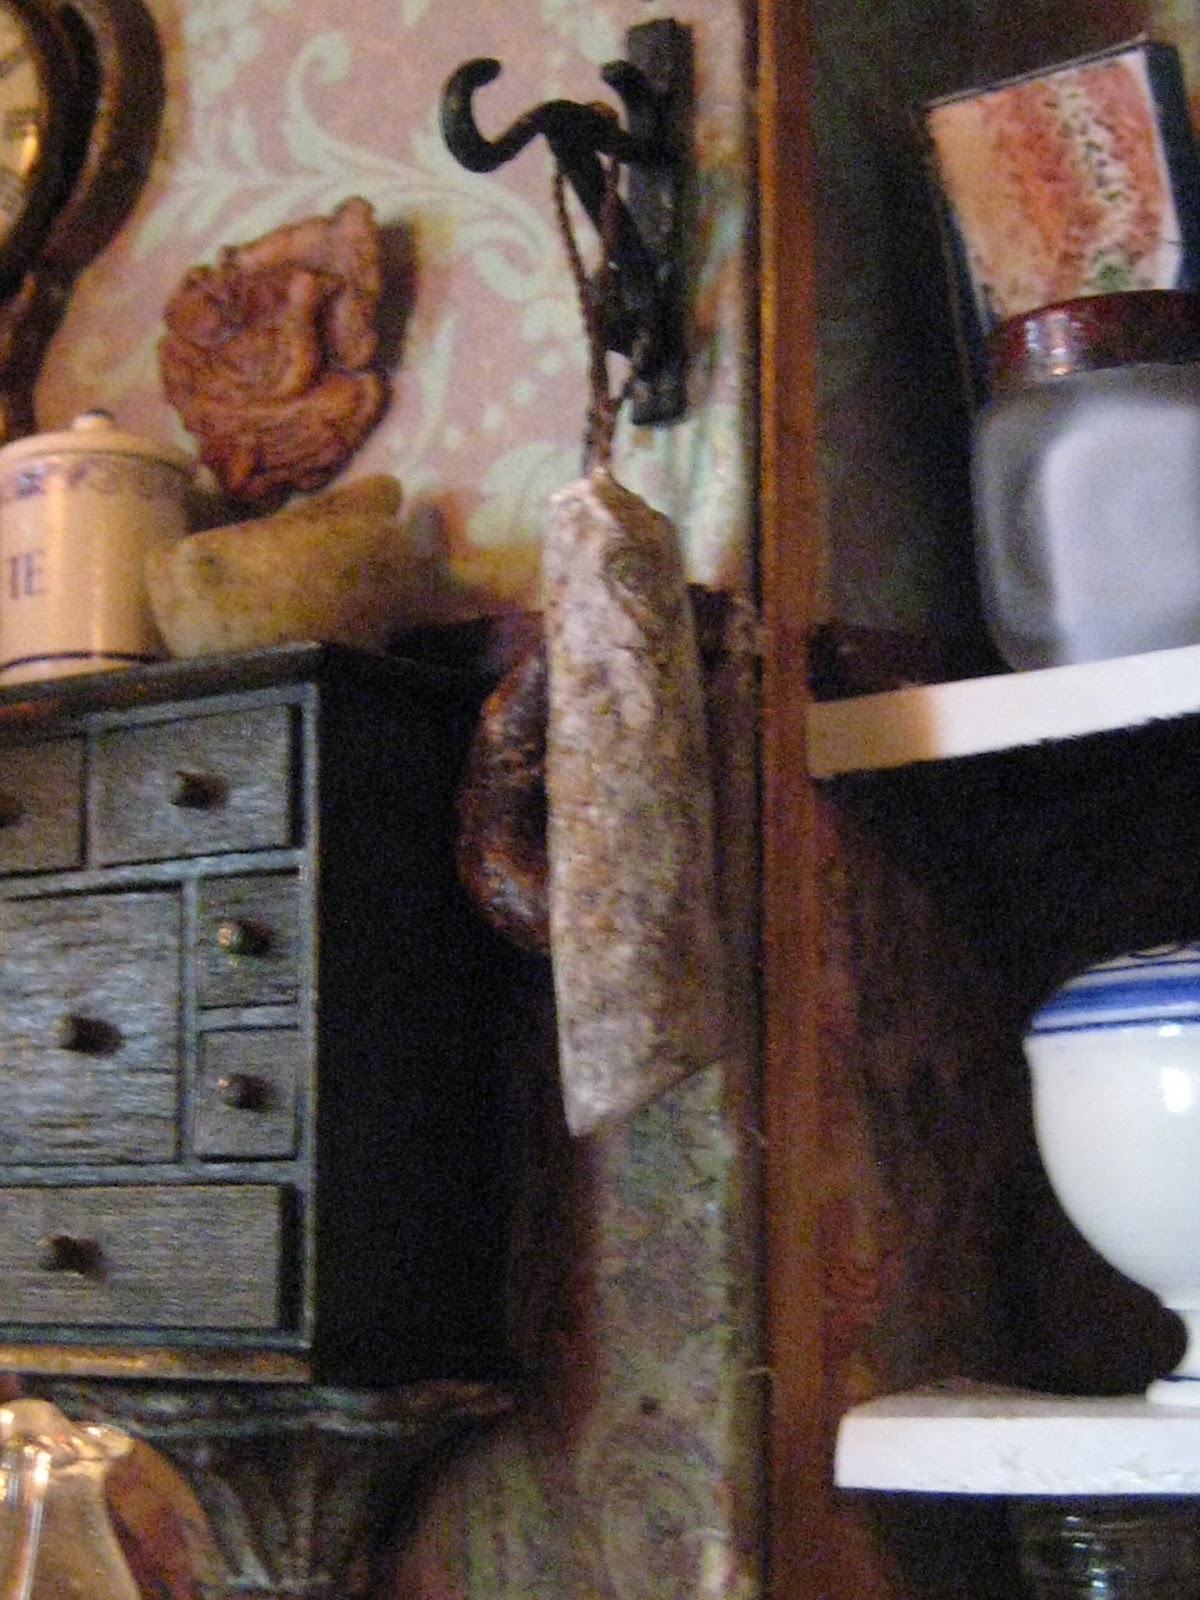
| In the photos above and below, you can see that I've placed the sewing box which I won last year as part of a multi- Giveaway from Pepper's MitchyMoo Miniatures blogspot https://mitchymoominiatures.blogspot.ca/search?updated-max=2017-04-16T16:47:00%2B02:00&max-results=20&start=12&by-date=false I'm treating it in the kitchen as a Spice Box. |
 |
 |
| Here's a view of both sides of Leone's kitchen |

 |
| Cannelloni! |
 |
| Sauteed mushrooms in butter |
| Irina Miniatures |
 |
| I LOVE cooking on my new Italian stove |
| and Oh, by the way- would you like to stay for dinner? YES?! Well then, "take off your coat" but... |
 | ||
| I think You know the rest
and thus ends my brief career as a Stripper.
rated "G" for all audiences take it away Tom
|
elizabeth


.jpg)

