 |
| Late last December I thought I'd better get serious about working on the 3rd floor of Villa Leone. I actually began by enlarging the attic window at the front of the kit, using a couple of left over kit window frames from the lower floors. |
I made the front window Wider and Taller to make it easier to see inside, since I had worked out a floor plan of angles and hidden corners for the bathroom. So using my utility knife, I began hacking out the shape of the frame, and a right mess I made of it too, so there was no going back once I'd started.
Below is the enlarged exterior ATTIC window in its VERY RAW condition.
 |
| I also enlarged the arched opening on the opposite side of the front wall and "squared" it off. The walls are lined with foam board and the sub floor is cardboard. |

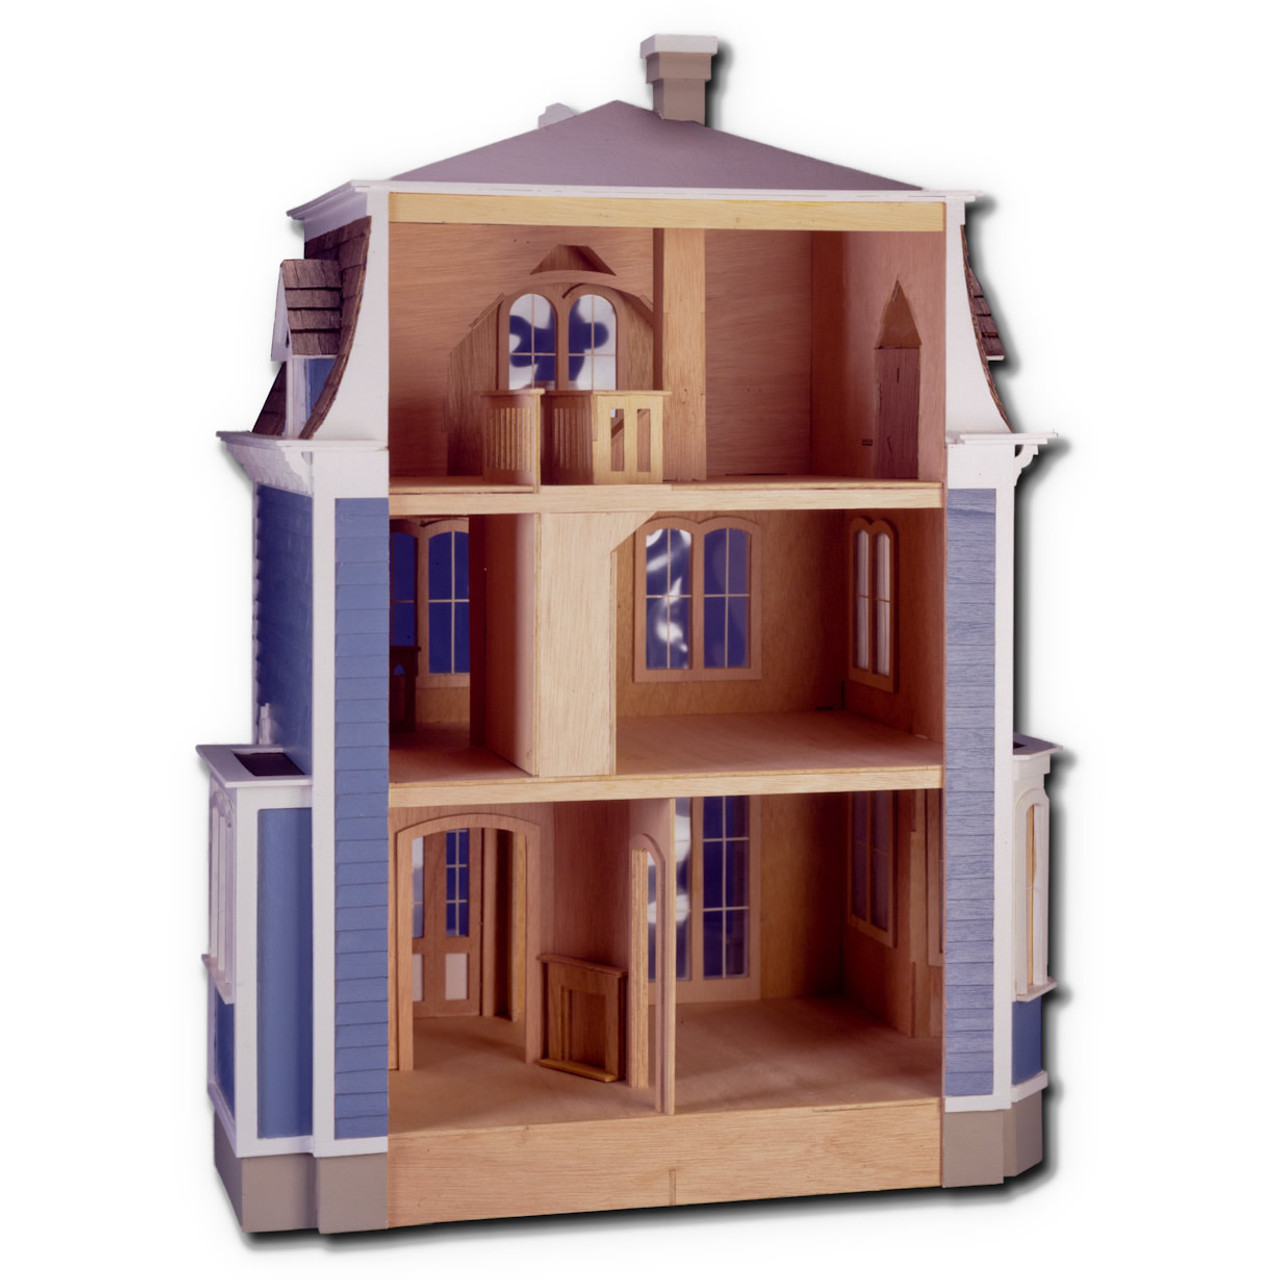 |
| here's what the kit looks like when assembled as per the instructions. You can see that the dormers are a lot smaller than mine and also how the arched opening at the front of the house was squared off and modified. (thanks to Sam for the idea to include a reference photo) |
 |
| These are the renovated dormers in the attic; utilizing and modifying more of the kits lower floor window frames, to accommodate the enlarged alcoves. I wanted to be able to use the alcoves for furniture as well as increase the natural light and views into the rooms. |

 |
| exterior of the left window alcove. Now regarding the bathroom and all my earlier talk about having a fireplace in it; sadly "no can do"😕 |
 |
| I had 3 bathroom fixtures to install and I'd already reduced the available wall space. Therefore, when it came to choosing between having a tub or having a fireplace, The Tub won- hand's down! (Rub a dub dub!) To make a space in the bathroom for the tub to sit, I built an "L"-shaped wall and positioned a split-door at a right angle on the end of it. |
 |
| The placement of the door, decreased the view from the open end of the bathroom to about 4 1/2 inches which is why the bigger front and side window alcoves proved to be a good idea. |
 |
| This is the view looking into the bathroom from the opened end of the villa towards the front. |
 |
| (above: an early Mock Up, of the 3rd floor with the walls pinned and taped into place) Along the way, I've replaced a lot of my original ideas with others. Even so, the basic layout is much the same. On the left side of the 3rd floor, is the Gondolier's Study/Dressing room. An enclosed hall is in the middle with a long window in the wall facing the viewer. The window looks into the narrow end of the bathroom. |
 |
| Once I'd worked out the floor plan, I installed the electrical runs, TESTED EVERYTHING then I glued in the cardboard sub-floor and proceeded with installing a hardwood floor. |
 |
| I had purchased 2 natural wood bamboo placemats from a dollar store and cut them apart and glued the strips to the cardboard base using FABRIC Hi-TAK glue from Wal-mart. |
 |
 |

 |
| The light wood shows you the size and shape of the bathroom which has lots of floor space but little wall space. After the glue had firmly set, I went over the boards with a glue eraser which easily removed all the excess adhesive which had oozed onto the surface. |
 |
| I sanded the floor several times before I wiped it clean with a damp sponge. |
 |
| I stained the wood with a VERY DARK oil based stain, and when it was dry to the touch, I went over the entire floor with a Dry wall patch to fill in between the slightly beveled wood planks. |
 |
| I scooped off the excess compound which in turn, lifted some of the dark stain with it, then I wiped them down again with a damp sponge and a dry paper towel. After the putty had set, I went over the floors a second time with the dark oil based stain. |


 |
| The results were that the floor looked less like a bamboo placemat, and more like a worn and weathered plank wood floor- |
 |
| I painted and aged the bathroom doors, and counter sunk the door thresh-hold into the floorboards to make it flush with the hardwood. For the photos I've pinned it upright to the foamboard wall with blue tac and sewing pins. the photo below shows the tub on other side of the short wall |

As a result, the tub's legs are badly corroded. Nevertheless, I decided that this was A PLUS for the Villa's bathroom. So other than just a little touch-up of gold Pentel poster color, on the legs, I left the majority of the corrosion fully exposed.
I painted the outside of the tub with a golden brown acrylic paint and aged it with a thin black wash of matt acrylic paint and graphite pencil, as you can see in the photo below.
 |
 |
| Storage in the bathroom is minimal as is the opportunity for display, so when I remembered I had this shelf unit from my friend Bettie Smith, the ONLY place it would fit was in front of the tub, and so the only way you can see it, will be from looking through the enlarged window at the front of the Villa. |
 |
| an aerial view of the layout of the attic bathroom The sink that you see below also came out of my Greenleaf Glencroft, and was cobbled together from a pink plastic doll sink found at the thrift store and a cake pillar support. The toilet was part of an unglazed 3 piece ceramic set ( thrift store) which had previously been painted a melon colour. The toilet seat doesn't lift but it was easy enough to repaint to look as if it does. |
 |
| above and below are mock ups without the interior walls so you can see how the fixtures are positioned within the space. The only things glued in are the floor and the wall tiles on the mirror wall everything else is freestanding including the wall panels themselves. Re: the TILES Initially I had planned for more yellow-gold wall tiles. But when they didn't work out, I had to change them to something entirely different. These replacement tiles look rather odd with this wallpaper but until I figure out what to do about it, I can't glue anything into place. The photo below was taken in mid-January and not much has changed since. |
 |
| I had the dollar store green cupboard for AGES and it fit into the alcove as if was custom made. I'll probably fill it with towels and other bathroom necessities. |
 |
| Looking in from outside the alcoved window, towards the little chest in the far corner the bathroom. The photo below is the long view looking straight ahead through the same alcove window, through the bathroom door across the hall landing and into the Gondolier's Study on the opposite side of the Villa. |
 |
| fyi to take the following photographs, I have removed the interior BATHROOM WALLS and the TUB FROM the Dollhouse and onto my work table, rather than try and shoot through the windows |
 |
I began filling the shelves and accessorizing the tub.
To facilitate the view and open up the dark corners,
I made a pair of "iron-look" wall lamps. One for by the sink and the other for over the tub.
|
 |
| I made the orange tree a number of years ago, and Fatima made the floral hydrangea-print pitcher. The gold cherub is an earring, and the potted purple hydrangea is a recent gift, made by the talented Jodi Hippler. I LOVE this grouping although to me, it looks more English than Italian despite the stone seat. Which brings me to my NEXT CHALLENGE. |
 |
| HOW TO MAKE THIS BATHROOM LOOK MORE MEDITERRANEAN? This is proving to be more difficult than I'd thought. I've tried all types of changes and nothing is making me happy. But then Last night I decided to add a mural above the tiles around the tub from a photocopy which I had printed out a few weeks ago for a different project. I sliced the print into 3 sections. The bottom section I glued to the long wall above the tub. The middle section of the print was cut to fit around the shelf unit where majority of the picture would be cut away thereby making the subject itself more obscure. Yet because of the equal values of the colours and tones, it reads like one continuous print even though the corners don't line up at all. |
 |
| The vertical wood trims are temporarily stuck on with blue tac and won't be glued in until ALL the interior walls and the bathroom ceiling are fitted into place. Meanwhile the horizontal trims are still in the process of being amended. |
 |
| The lion rug bath mat is a paper cutout which I shall eventually re-size and re-print onto a suede paper. |
 |


 |
| The Fornasetti wall-plaques are magazine cutouts glued onto punched chipboard rounds; glazed with clear nail varnish. I've blue-tacked them to the wall for the photos, but they'll probably get changed later on, too. |
 |
| All in all, I'm much happier with the mural than I was with the wallpaper, but naturally when you change one thing it affects everything else around it. Sooooo... |
 |
| as of last night, I've made up my mind to change the rest of the wallpaper in the bathroom which I can't show as yet because I am still tentatively feeling my way through each and every stage of this transition and this post is already long enough! And so in summary: what began as full steam ahead in December came to a full stop in January; which is now a slow crawl into February leaving only 8 months until the Show in September! oh the pressure! the pressure! ~ 😳 ~ Rub a dub dub |
 |


