As usual I'm LATE AGAIN! ⏰😩
Sheesh! where has the time gone?
I honestly meant to have Part 2 published early last month but wouldn't you know, I've been totally engrossed in the Johnny Depp and Amber Heard defamation trial on youtube, and between that and actually working on the bedroom of this DOLLHOUSE, I've missed my blog deadline by a mile- 🤥 yup- MY BAD!
Anyway, I'll try and make it up to you in this post, because I'm going to show you what I've finished inside the Dower House living room AND I'm going to show you what and how I'd made ( then remade) the leaded glass windows in the living room using an unconventional method, which happened to work for me.
There's A LOT to cover so grab yourself a hot cup of coffee or tea because this will be a long, Long,LONG post and times a-wastin' -
beginning with -
THE New FRONT DOOR
.jpg) |
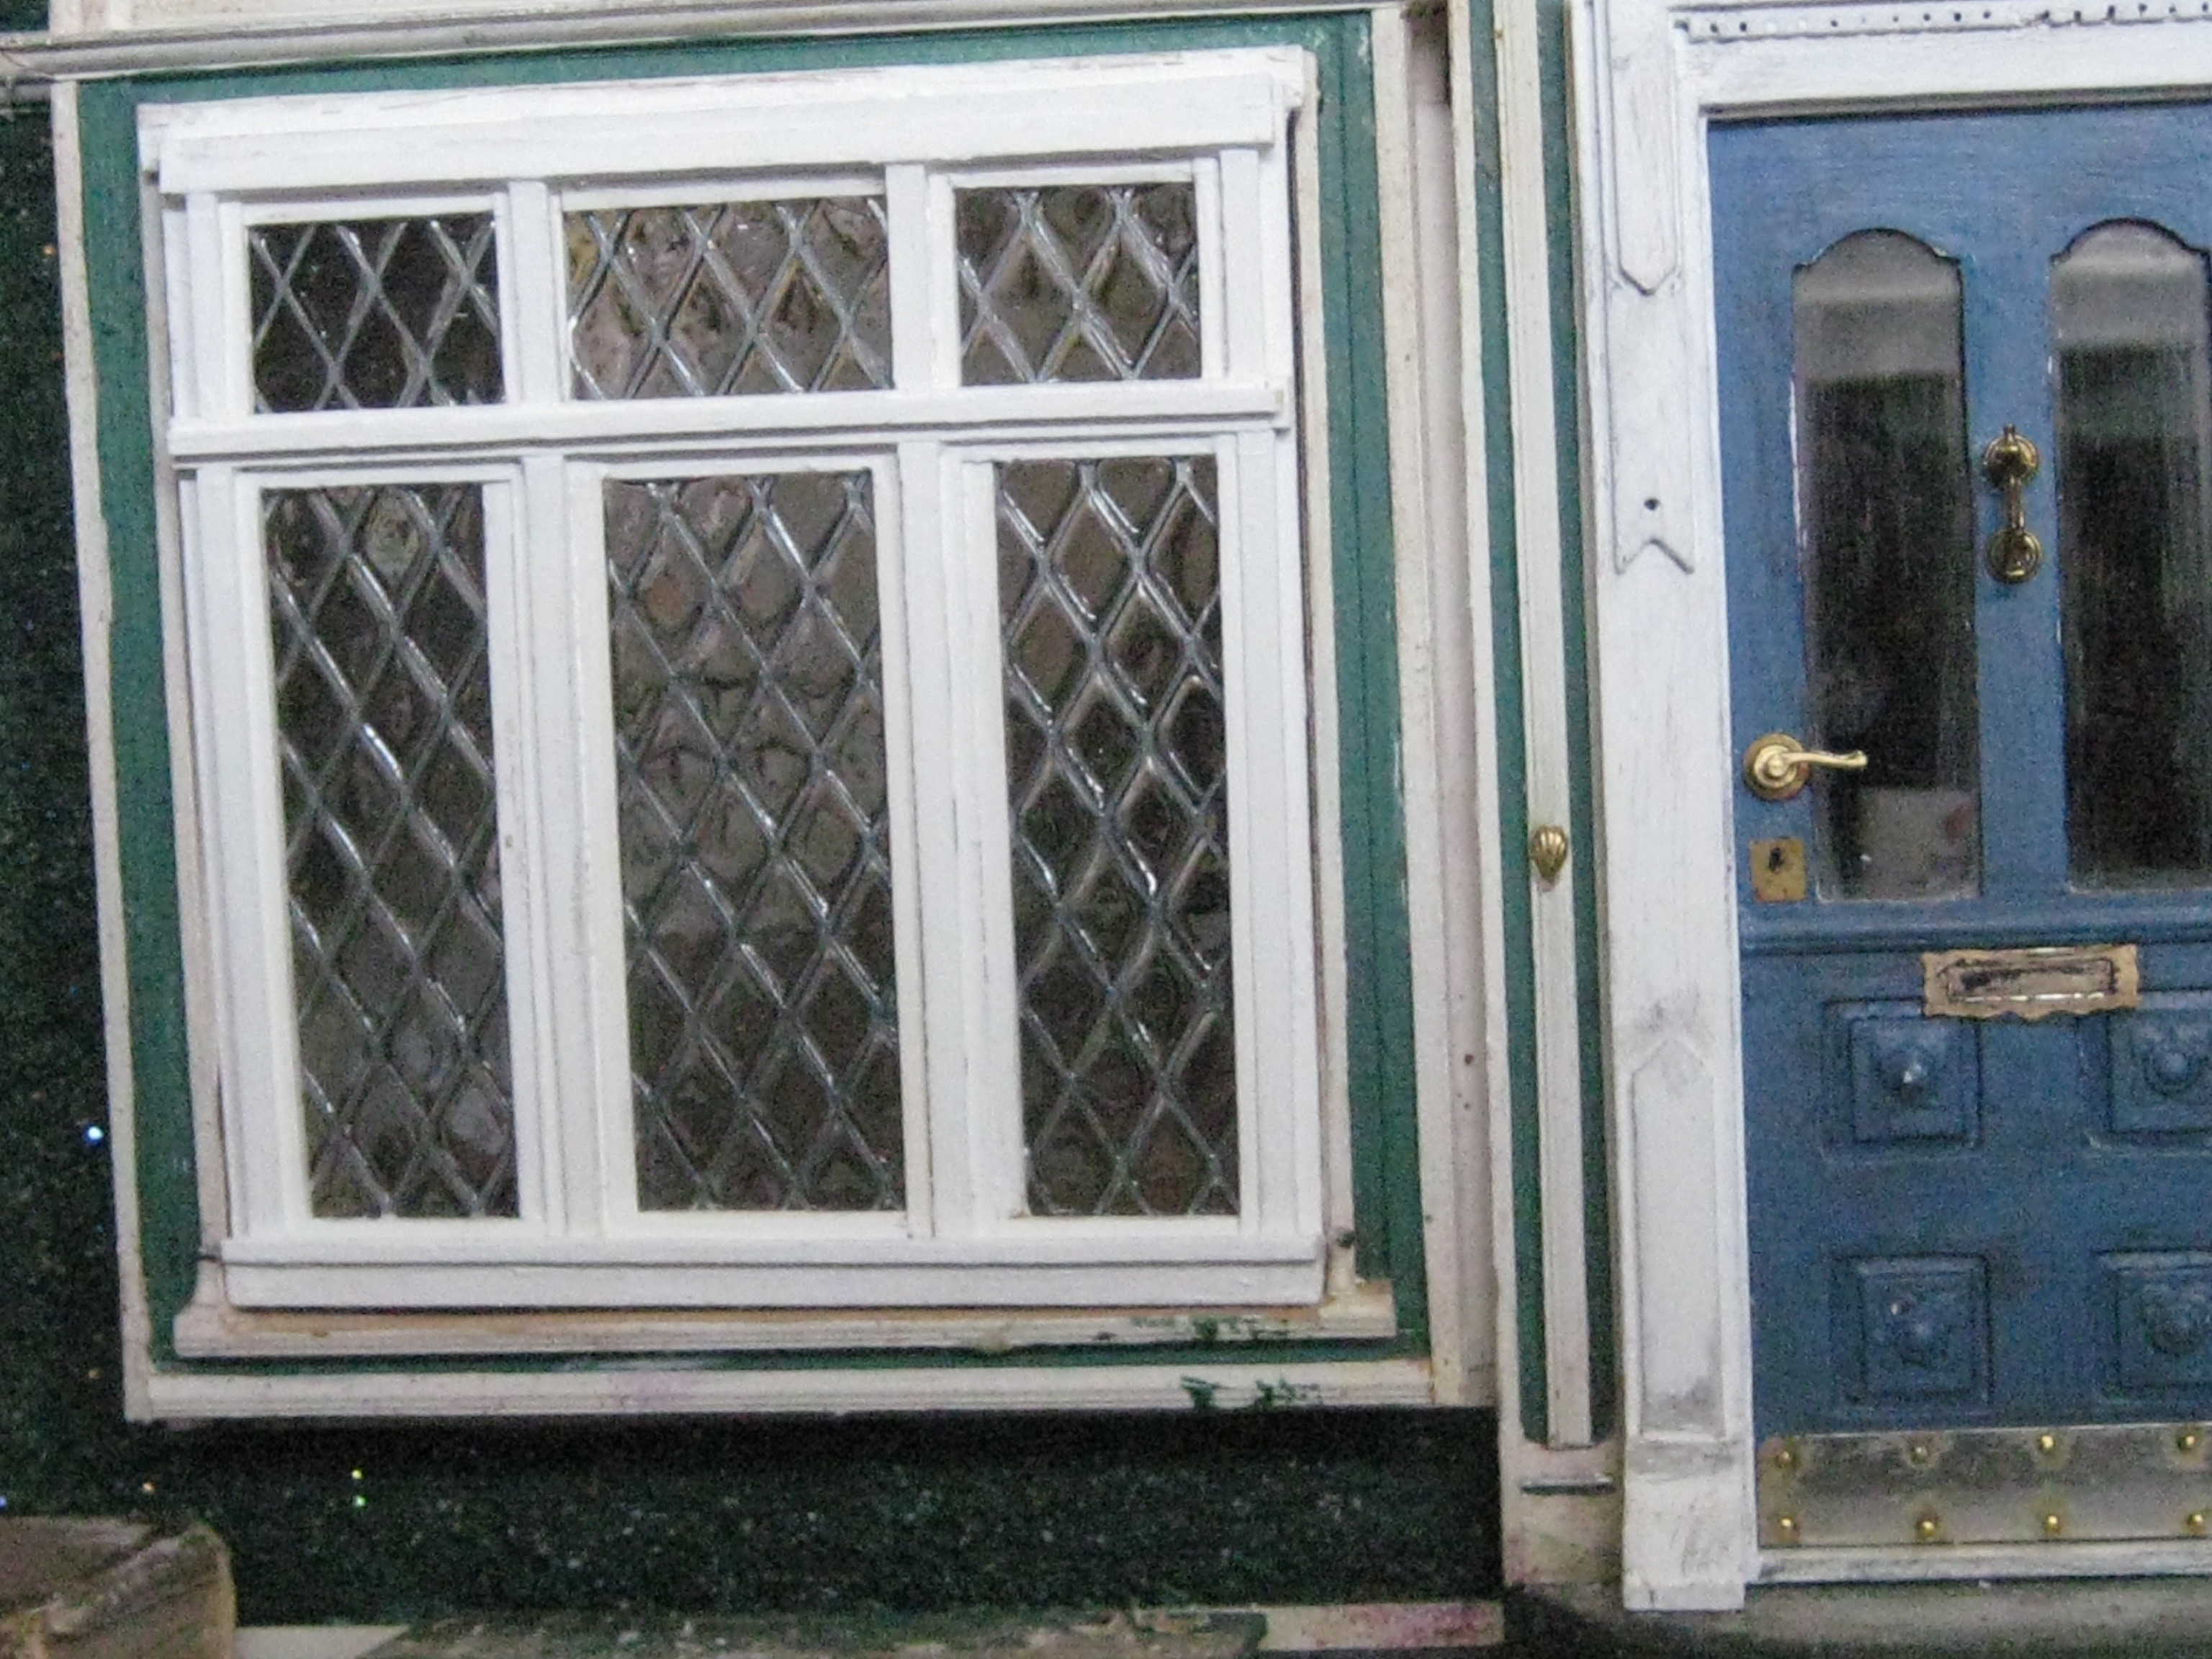
| The door is a "vintage" Miniature House Victorian front door kit. I already had in my stash and believe it came from my dear friend BETTIE SMITH'S miniature collection. I didn't realize how old the door was until I tried to find the image of it via Google and wasn't able to, but here's an photo of the companion window which will illustrate the carved detail above the door: a detail which I was forced to remove. .jpg) I had to lose the cap due to the sloped roof of the Glencroft that angles down over the top right corner of the door: there just wasn't enough room  The new door is rectangular however I still wanted to keep the look of the old gothic archway which is original to the kit. To do this I re-used the old kit door finishing trim and extended the "legs" of it on both sides to match the taller height of the new door. The door itself is flush with the exterior front wall of the dollhouse and is pressed up as tight against the existing exterior wood trims as it can go. Nevertheless, making it work from the inside created a 1/2 inch recess around the front door . In other words, installing the new front door was the equivalent of trying to fit a square peg into a round hole. I had to modify the installation to enable the door to swing open without any impediment caused by the interior door surround resulting in a deep space between the door and the wall. Clear as mud - right? 🧐 .jpg) In short this is what it looks like and I've left it removable for the time being. Who knew that changing out a door could turn into something as complicated as this proved to be? Even so, I'm happy with it because the little recess is unusual and quirky and has a very 'English-y' feel to it! ❤😌 I've painted the door both front and back, several times trying to get it to look fresh without appearing too pristine. In the end I lightly aged it with a graphite pencil then called it a day. Just in case you're wondering why I wouldn't want this door to look 'BANDBOX NEW' is because I want my tiny dwellings to appear as though they've been occupied for a long time and time and the elements have a way of removing the surface sheen from just about everything and people have a way of causing certain amounts of distress on the things we regularly use. Which is why, I didn't want the door to look freshly painted. I Did however, want a letter slot in the front door but I didn't want to have to cut one out of the door so I purchased a set of 2 brass mail slots and glued them to both sides of the door. I ordered a package of mini mail from the U.K complete with U.K stamps and postmarks. If you're in the market for British mini mail, I've included the link below- Ebay I left one letter on the floor under the mail slot: the rest are housed in the Secretary. I felt that The Dowager needed a bit more personal security therefore, a iron slide bolt at the bottom of the door became a requirement. Years ago, I had made one out of card-stock for the front door of Villa Leone, which turned out quite well, however I didn't feel like making another so I bought mine on line. The one you see below is by TOWN SQUARE MINIATURES I really like the look of the black iron bolt against the white painted wood. It stands out (but not too much!) and thus the Dowager is able to rest securely! |
.jpg)
.jpg)
.jpg) |
| NOW LET'S TALK ABOUT THE LEADED GLASS WINDOW ( a semi tutorial) Last Year, when I'd removed the old kit windows from this dollhouse, I made sure to save them so that I could use them as a guide but wouldn't you know it when I needed them- I couldn't find them SO I had to make a window from scratch. 😣 NOT MY FAVOURITE THING TO DO! 😫 I made a window then after I'd made it I didn't like it😱 |
I had enough wood trims for the replacement panels,
but historically
me and wood have a very shaky relationship.
I inevitably waste more wood than I actually use.
With me it's -
measure OFTEN then cut it WRONG anyway.
I painted lots of trims knowing that I would mess it up and of course I did.
As for the acetate,
I had just enough of it
to make the second set
of"glass"panes- whew!
It is difficult to see in the photo below but I cut 3 separate panels of clear heavy plastic and built the frames around them
into one single unit.
.jpg) |
| Once I had the frame(s) secured it was time to move on to the leading. With the first set of windows I used the metal mesh from an air filter it was good but the mesh had depth and so I needed a lot of UV resin to fill it. Hence it made the glass too thick. |
.jpg) | |
| For the leading in this window I used the metal cross-hatched mesh from 2 MOSQUITO ZAPPERS!
The Zappers look like plastic tennis rackets with 3 layers of grills (2 big over1 small) which are sandwiched over each other and connected to wires; which are connected to batteries; which are housed inside the handle. I've seen them in action on t.v. although I've never used one myself. I found these at the thrift store. I've included a link to Walmart's so you can read up about it if you're interested. Bug Zapper |
.jpg)
.jpg)
.jpg)
 |
| The front and back of both rackets have a VERY FLAT crosshatched metal which I thought would work the best. I first tried it up against the window opening to see if the scale of the leading looked right but it was too hard to tell |
 |
| I proceeded to pry apart the plastic frame from the bigger of the 2 zappers because I wasn't able to unscrew it. The smaller racket was easier to disassemble as the screws were more accessible. |
.jpg) |
| This method worked but I had to be careful not to accidentally bend the mesh. This is what it looked like once the grill was removed from the frame. |
 |
| The photo below shows how thin the profile of the mesh is |
.jpg) |
| Below the "leading" in millimetres |
.jpg) |
| and in inches |
.jpg)
.jpg)
NO SOLDERING REQUIRED-
I laid the window frame over the mesh to test it out
.jpg)
.jpg)
Once I was satisfied that it would work,
I cut out 3 separate sections of leading for each panel using tin snips and laid them between the wood strips.
To hold them in place
I used a tiny bit of Fabri-Tac around the edges of the metal to prevent them from shifting as I continued to build up the wood trims around them.

.jpg) |
| and ANOTHER TEST I continued to build up the wood panels AROUND and OVER the leading from the inside of the window, then I repeated the entire process again with a second layer of metal and trims for the outside of the window. I know... Sounds like a weird way to do it but I'm not a great builder, so I do what works for ME. |
.jpg)
.jpg) |
| Once the window panels on the inside were completed, I BRUSHED over the leading and the clear plastic with a very THIN coat of UV RESIN |
 |
| I USED A BRUSH having learned the hard way with the first set of windows that pouring on the resin makes the glass way too thick and uneven. unless of course, that that's the look you want |
 |
| I tested the window once again once the interior glazing was done. |
.jpg) |
| For the exterior side of the window I had to make sure that the grills lined up with the interior leading on all 3 panels then I began building up the wood trims over them too. When the exterior trims were completed I again brushed over the metal with UV Resin- curing each panel one at a time under the UV lamp. I'm still debating on whether I should randomly tint some of the diamond panes with a colour to imitate stained glass 🤔 Knowing me, I'd wreck it and then be mad at myself forever and/or have to make ANOTHER set.... Moving on... |
I installed the new window.
As you can see,
this dollhouse is in desperate need of a repainting
which I shall do LATER.
For me I start with the interior and develop the character of the owner.
Later, (much later) I'll work on the exterior after I've established the history of the house
and its current occupant-
kinda backwards to the norm but that's how I like to do it.
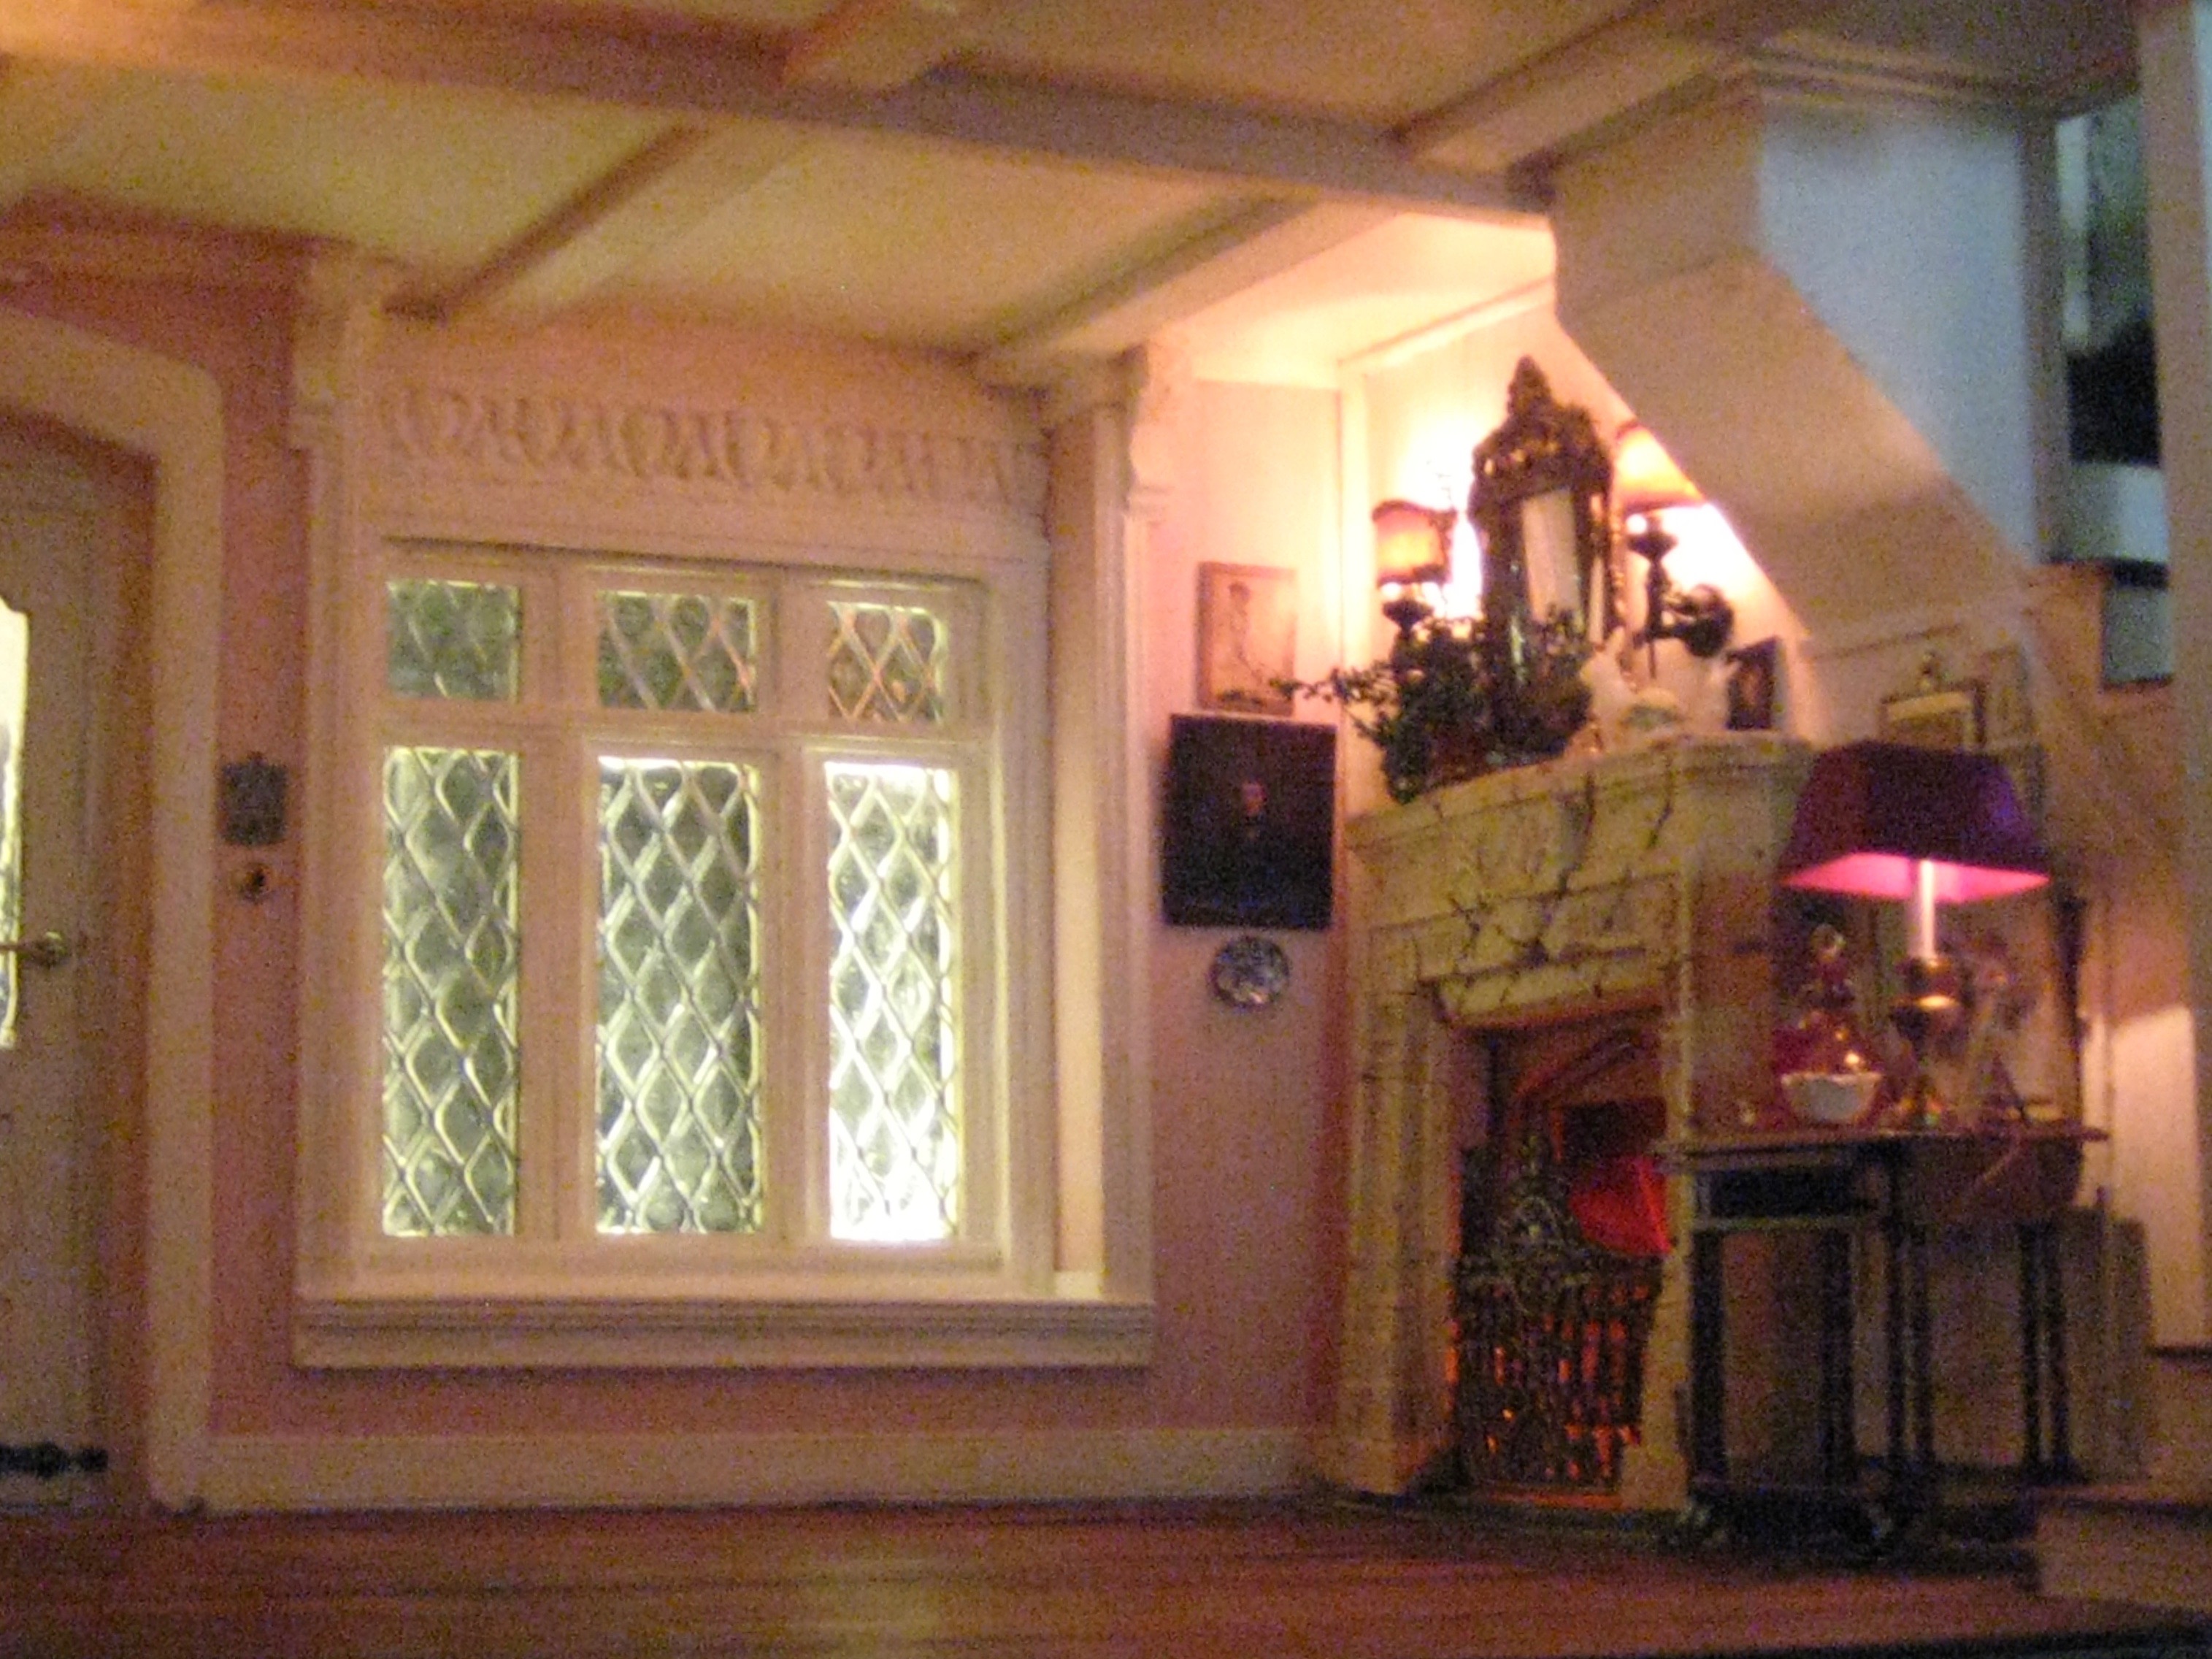
.jpg) |
| The window in situ fyi I made these drapes for Villa Leone but I swapped them out with some fabulous fabric which Jodi MY MINIATURE MADNESS had gifted me with instead. Initially they were place holders but then I decided to make them permanent. They're held in place with Museum wax and the stiffness of the fabric. The next thing on my TO DO LIST was unexpected. |
.jpg) |
| Above the window bump-out was a connecting strip of the pink wallpaper I used in the rest of the room. But now with the larger leading the window looked proportionally small. My solution was to beef up the window surround and make it look more imposing! |
.jpg) |
| I used an air dry clay casting from this silicone mold which I'd purchased on Amazon for some of the detailed stone carvings on VILLA LEONE  I cut a section of the Egg and Dart trim to fit above the window and glued it in place. I LIKED IT! I felt it gave the window more PRESENCE and the needed visual weight so I went with it. I removed the narrow strip of pink wallpaper and filled the void with more wood trims above the egg and dart moulding, and then painted everything white. |
.jpg) |
| THINGS ARE LOOKING UP! 😎 |
.jpg) |
| More wood trims were added around the parameters of the window until I was satisfied that the window could visually hold its own. I may add some black hardware to 2 of the side panels to suggest that the window are operational, but for now I'm calling them done! |
THE FIREPLACE
.jpg) |
| As I think I mentioned in Part One, this fireplace was formerly a tea-light holder which I found at the thrift store for a few dollars: I LOVE the Size of it! It had a thick, heavy duty resin hearth which I sawed off with a hacksaw- easier said than done Let me tell you guys sawing resin by hand is labour intensive! 💪 The metal grate is original to the fireplace. |
.jpg) |
| Before I forget to tell you- the little blue and white dish on the wall |
is by artisan Sue Sherrill
an Ebay purchase
but the pictures on the wall
are magazine cutouts
which I pasted onto heavy card and hung with a wire and/or BlueTac
The majority of artwork in the living room,
as well as in the bedroom are mounted onto card-stock which I've edged
with complimentary wood stain furniture markers.
or a matching felt pen.
THE MANTLE
Once I'd decided that I wanted a green plant on the mantle, I quickly made one using some dried green plant materials from my stash.
But then, as usual,
I changed my mind and decided to replace it with something different.
Since I specifically wanted an overgrown ivy
to crawl and drape around the mirror and mantle,
I decided I needed to make one myself.
.jpg)
I made the ivy using multi-twists of fine copper wire which I shaped and then painted.
Once the stems were dry,
I applied
tiny ivy leaf paper punch outs
securing them to the stems with
white glue and super glue.
When all was set,
I brushed over the stems and the leaves with a thin mix of white wood glue and water.
The stems were planted into a square plastic
spray nozzle which I'd painted and glazed with UV resin.
I filled the vase with brown plasticine
to hold the ivy in place.
.jpg)
.jpg)
fyi
Below is a photo of the previous dried plant material
for comparison
.jpg) | |||
The wall sconces were fortuitous purchased from SP MINIATURES originally intended for Villa Leone however, they didn't work for the Villa so on a whim, I tried them here and THEY WERE PERFECT!
The over-mantle mirror is one I've had for AGES (1970's)! It's a heavy metal casting which use to have a print of a Old Masters painting. I replaced the print with an old compact mirror then painted and aged the metal frame. |
.jpg)
.jpg)
.jpg)
Also on the mantle, are a brass candlestick; a playing card stud earring used as free-standing picture frame; another magazine cutout; a tiny Capodimonte china ornament; and 2 white rabbits from the ebay store of
which I painted with clear UV resin.
The third rabbit from this set, sits on top of the Secretary.
.jpg)
.jpg) |
| On the left side of the fireplace wall is a fimo cornucopia sculpture which FATIMA of BEAUXMINIS gave me more than a decade ago! It looks like Murano Glass and I've filled it with long fireplace matches: wood slivers shaved from a full-sized matchstick. To the right of the match holder is a nesting table, with a display of a cranberry glass drinks set by GLASSCRAFT. The wine bottle contains red printer ink. .jpg) There's also a small wooden camel which I glazed with UV resin and a delicate china bowl by Teresa Welch and a photograph in a brass frame; all of which is illuminated by a brass lamp sporting a burgundy shade purchased from an online miniature show. .jpg) 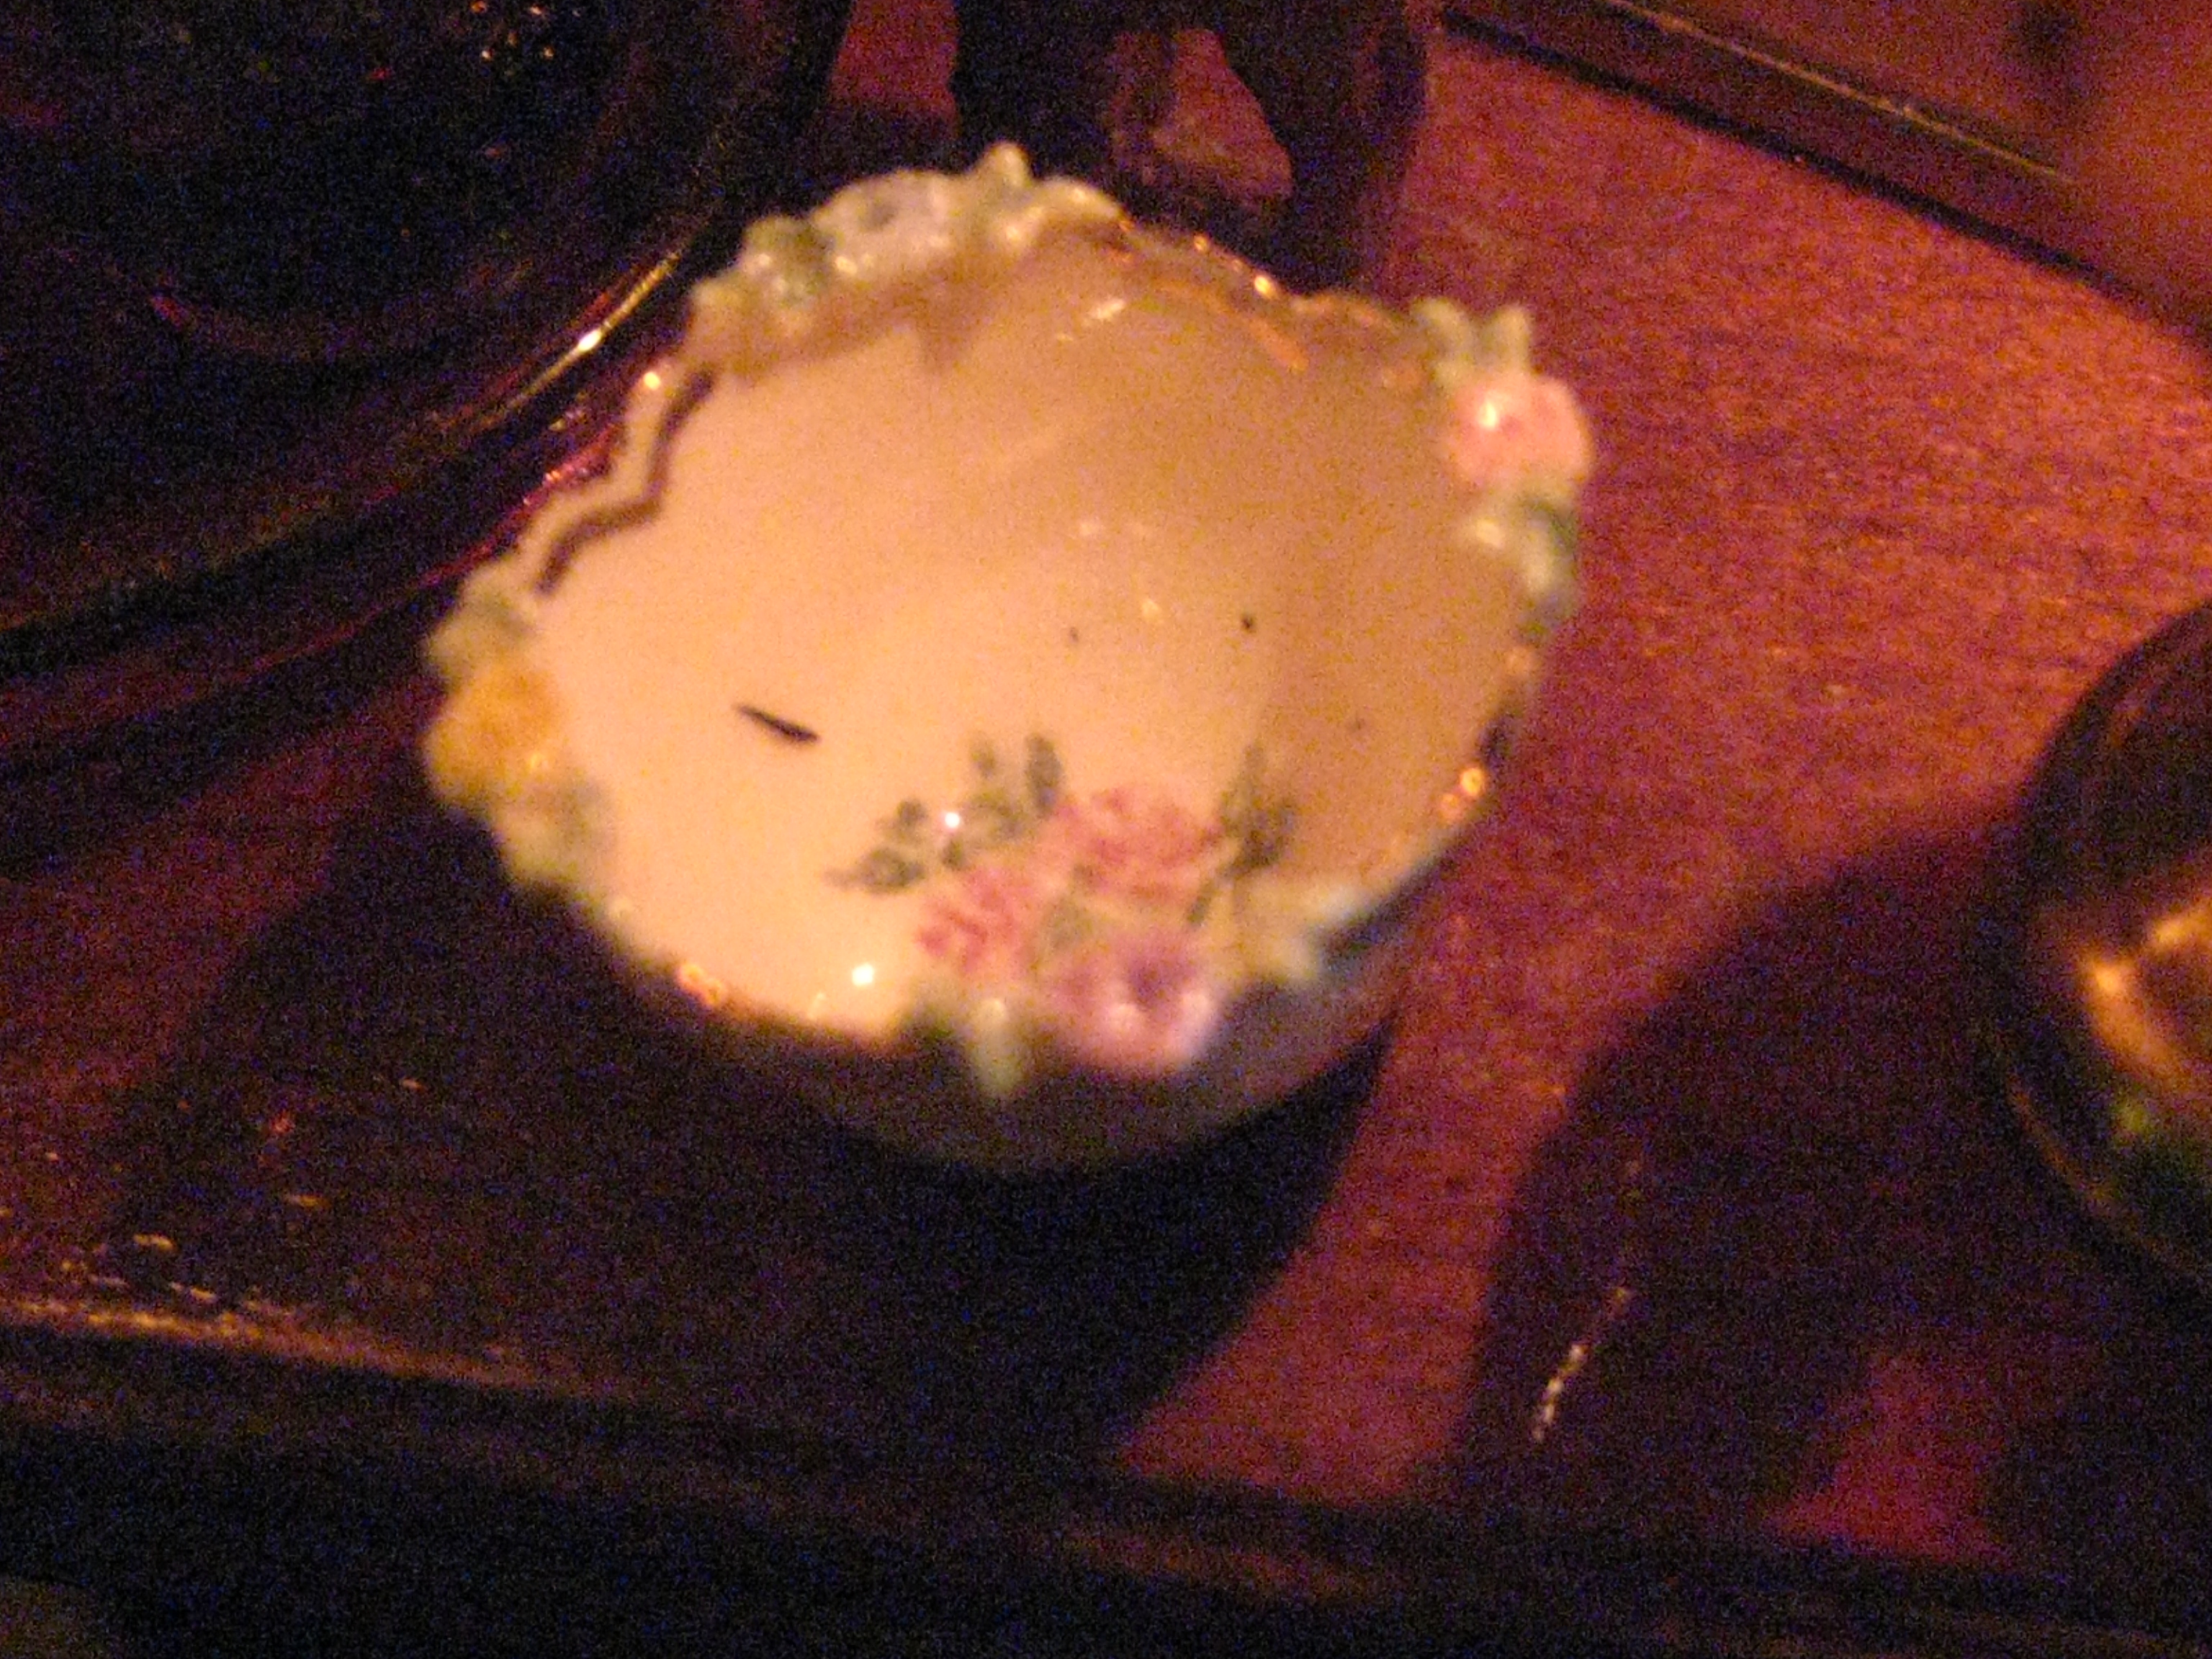 |
.jpg) | |||
| The pink glass display and the pink roses in the painting appear to have been made for each other! .jpg) The TREASURED painting was a gift to me from Cathrine Buron Ninette & co. which she painted specifically for #43 GREEN DOLPHIN STREET however, I think I've found a better home for it here in The Dower House! Thank You again Catherine! 💖
|
.jpg)
.jpg)
.jpg)


.jpg) |
| The oriental carpet was just one of at least 6 identical mini carpets woven into a LONG LENGTH of GORGEOUS Thai silk which I was LOATHE 😣 to cut up although eventually I did. I glued on a backing using FABRI-TAC to keep the rug from fraying. .jpg) The carpet repeats the rich golden yellow of the window curtains. On the floor under the arm chair is "Churchill" the Dowager's new bulldog pup. He's all tuckered out from playing with the Union Jack rubber ball (a bead) lying next to him. Unfortunately his maker who is a VERY TALENTED Russian artisan is currently off line right now, otherwise I'd be able to share her Etsy link but I'm hoping that she'll soon be up and running again because as you can tell, she makes Truly Wonderful miniature animals with lots of expression in their poses. .jpg) |
.jpg)
.jpg) |
In the photo below you'll see the VERY NARROW flight of stairs leading up to THE BEDROOM which I'd just begun working on during the time I was writing this post. I've since finished the hall walls and most of the stairs themselves- the 2 Windows in the stairwell are yet to be installed.  I've eliminated the previous wooden handrail but I at one point I was seriously considering installing a ROPE-GRIP However, now that I've finished the stairwell I'll probably NOT do it since getting my big hand in that narrow space would make the job awkward and difficult. Re: THE FLOOR I used the left-over wood siding from The WILLOWCREST KIT aka VILLA LEONE because I HAVE LOTS OF IT! waste not -want not THE LEFT SIDE OF THE LIVING ROOM |
.jpg)
Initially my plan was to use ALL of the available wall-space in the Living Room
to showcase a number of the Dowager's prized pieces of
miniature blue and white china.
But
as the room began to fill up with other things,
the only wall left for a china display was the left one.
However
the large secretary in the middle of the wall
reduced the space even further to
the area above it
and a tiny bit on either side of it.
.jpg) |
the BLUE AND WHITE CHINA |
.jpg) |
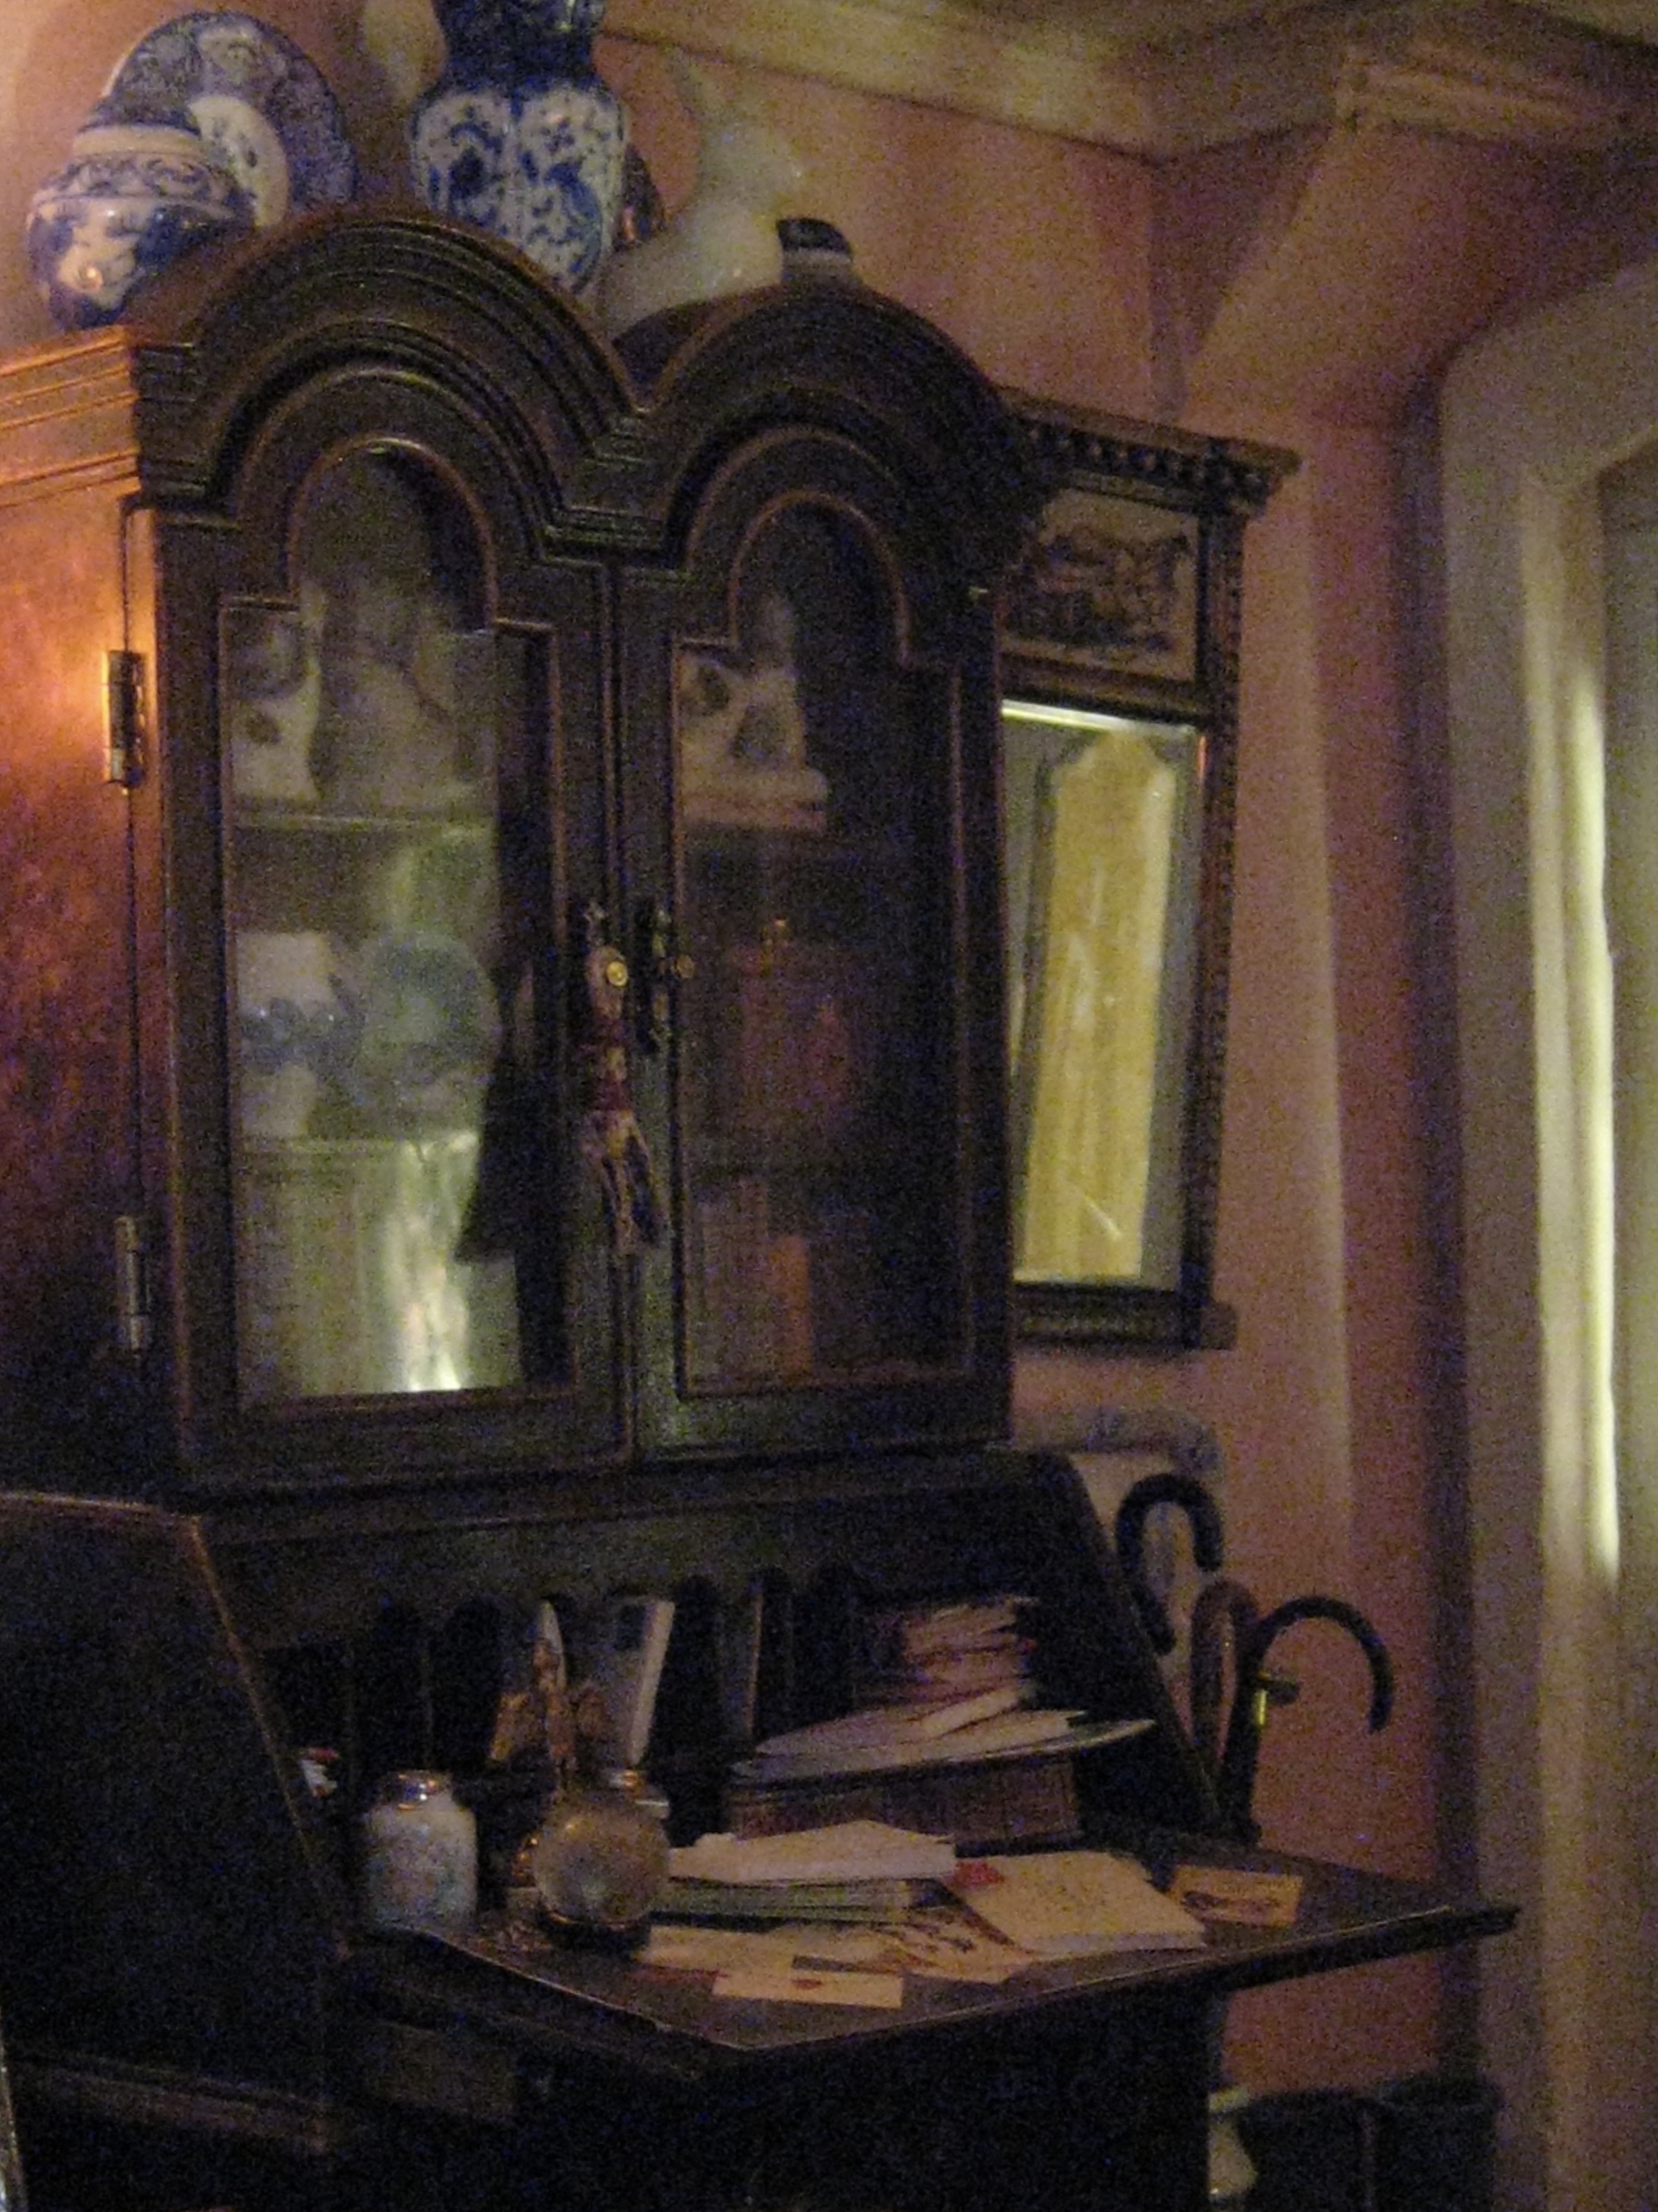
| The top of the desk proved to be the ideal place to feature the taller pieces in my collection |
 | |||||||||||
.jpg) THE AMAZINGLY TALENTED JONQUIL NORRIE of Latchkey and Jonquil sent me a parcel for Christmas which contained (among other small wonders) a tall blue and white vase which she'd hand painted! 💖 I'm perpetually gob-smacked and in awe of her talents! 💖 I placed it Centre Stage on top of the secretary flanked by a couple of plates from TWELVE TIMES MORE TEENY alongside a couple of ginger jars I'd found on Etsy and a large white rabbit from GiuliasMiniatures The Secretary itself, is a vintage resin plastic piece from The Goebel Butterfly Collection which I'd painted a long, long time ago using a faux bois technique to get it to resemble a dark burl.
is "Vintage" JEAN DAY. Back in the day (no pun intended), Jean used to make Wonderful little porcelain dolls and dollhouse dolls and I'm proud to say that I have quite a few of them some of which you can see in my blog post toys,Toys TOYS
 .jpg) The original seat cushion is a burgundy suede, and the entire cushion lifts out of the frame, I recovered it using a section of a man's Italian silk tie depicting a circus elephant of all things! 👀 I've recovered the cushion with great care so that the silk can be removed without leaving any damage on the original leather. I know this for a fact since I've already changed the fabric on this chair 5 TIMES! 😅 Back to the desk...
|


.jpg)
 |
| British mail purchased on Ebay |

 |
| The small scalloped dish above the light fixture was made by U.K. Artisan Nikki Naki Nu and the English mirror to the right of the desk was purchased from SP Miniatures another favourite resource of mine |
 |
A growing collection of canes and umbrellas are placed next to the desk alongside a pair of muddy Hunter Wellies |
.jpg) |
| The canes and the brollies |
.jpg) |
| the Mary Poppins parrot umbrella came from Miniature Crush on Etsy |
.jpg) | |||
| This lovely umbrella was made by Fatima of Beauxminis Sadly, I had to steal it out of #43 Green Dolphins Street whilst I wait for Fatima to make more of them. The Muddy Wellies
fyi I wouldn't normally have such dirty boots inside the house but they'll have to remain in the living room until the exterior gets done. I've already got the boot-scraper for the front stairs!
INTO THE HOME STRETCH Yes! I'm almost done😄 |
.jpg)
.jpg)

So having come full circle
we are back again at the window.
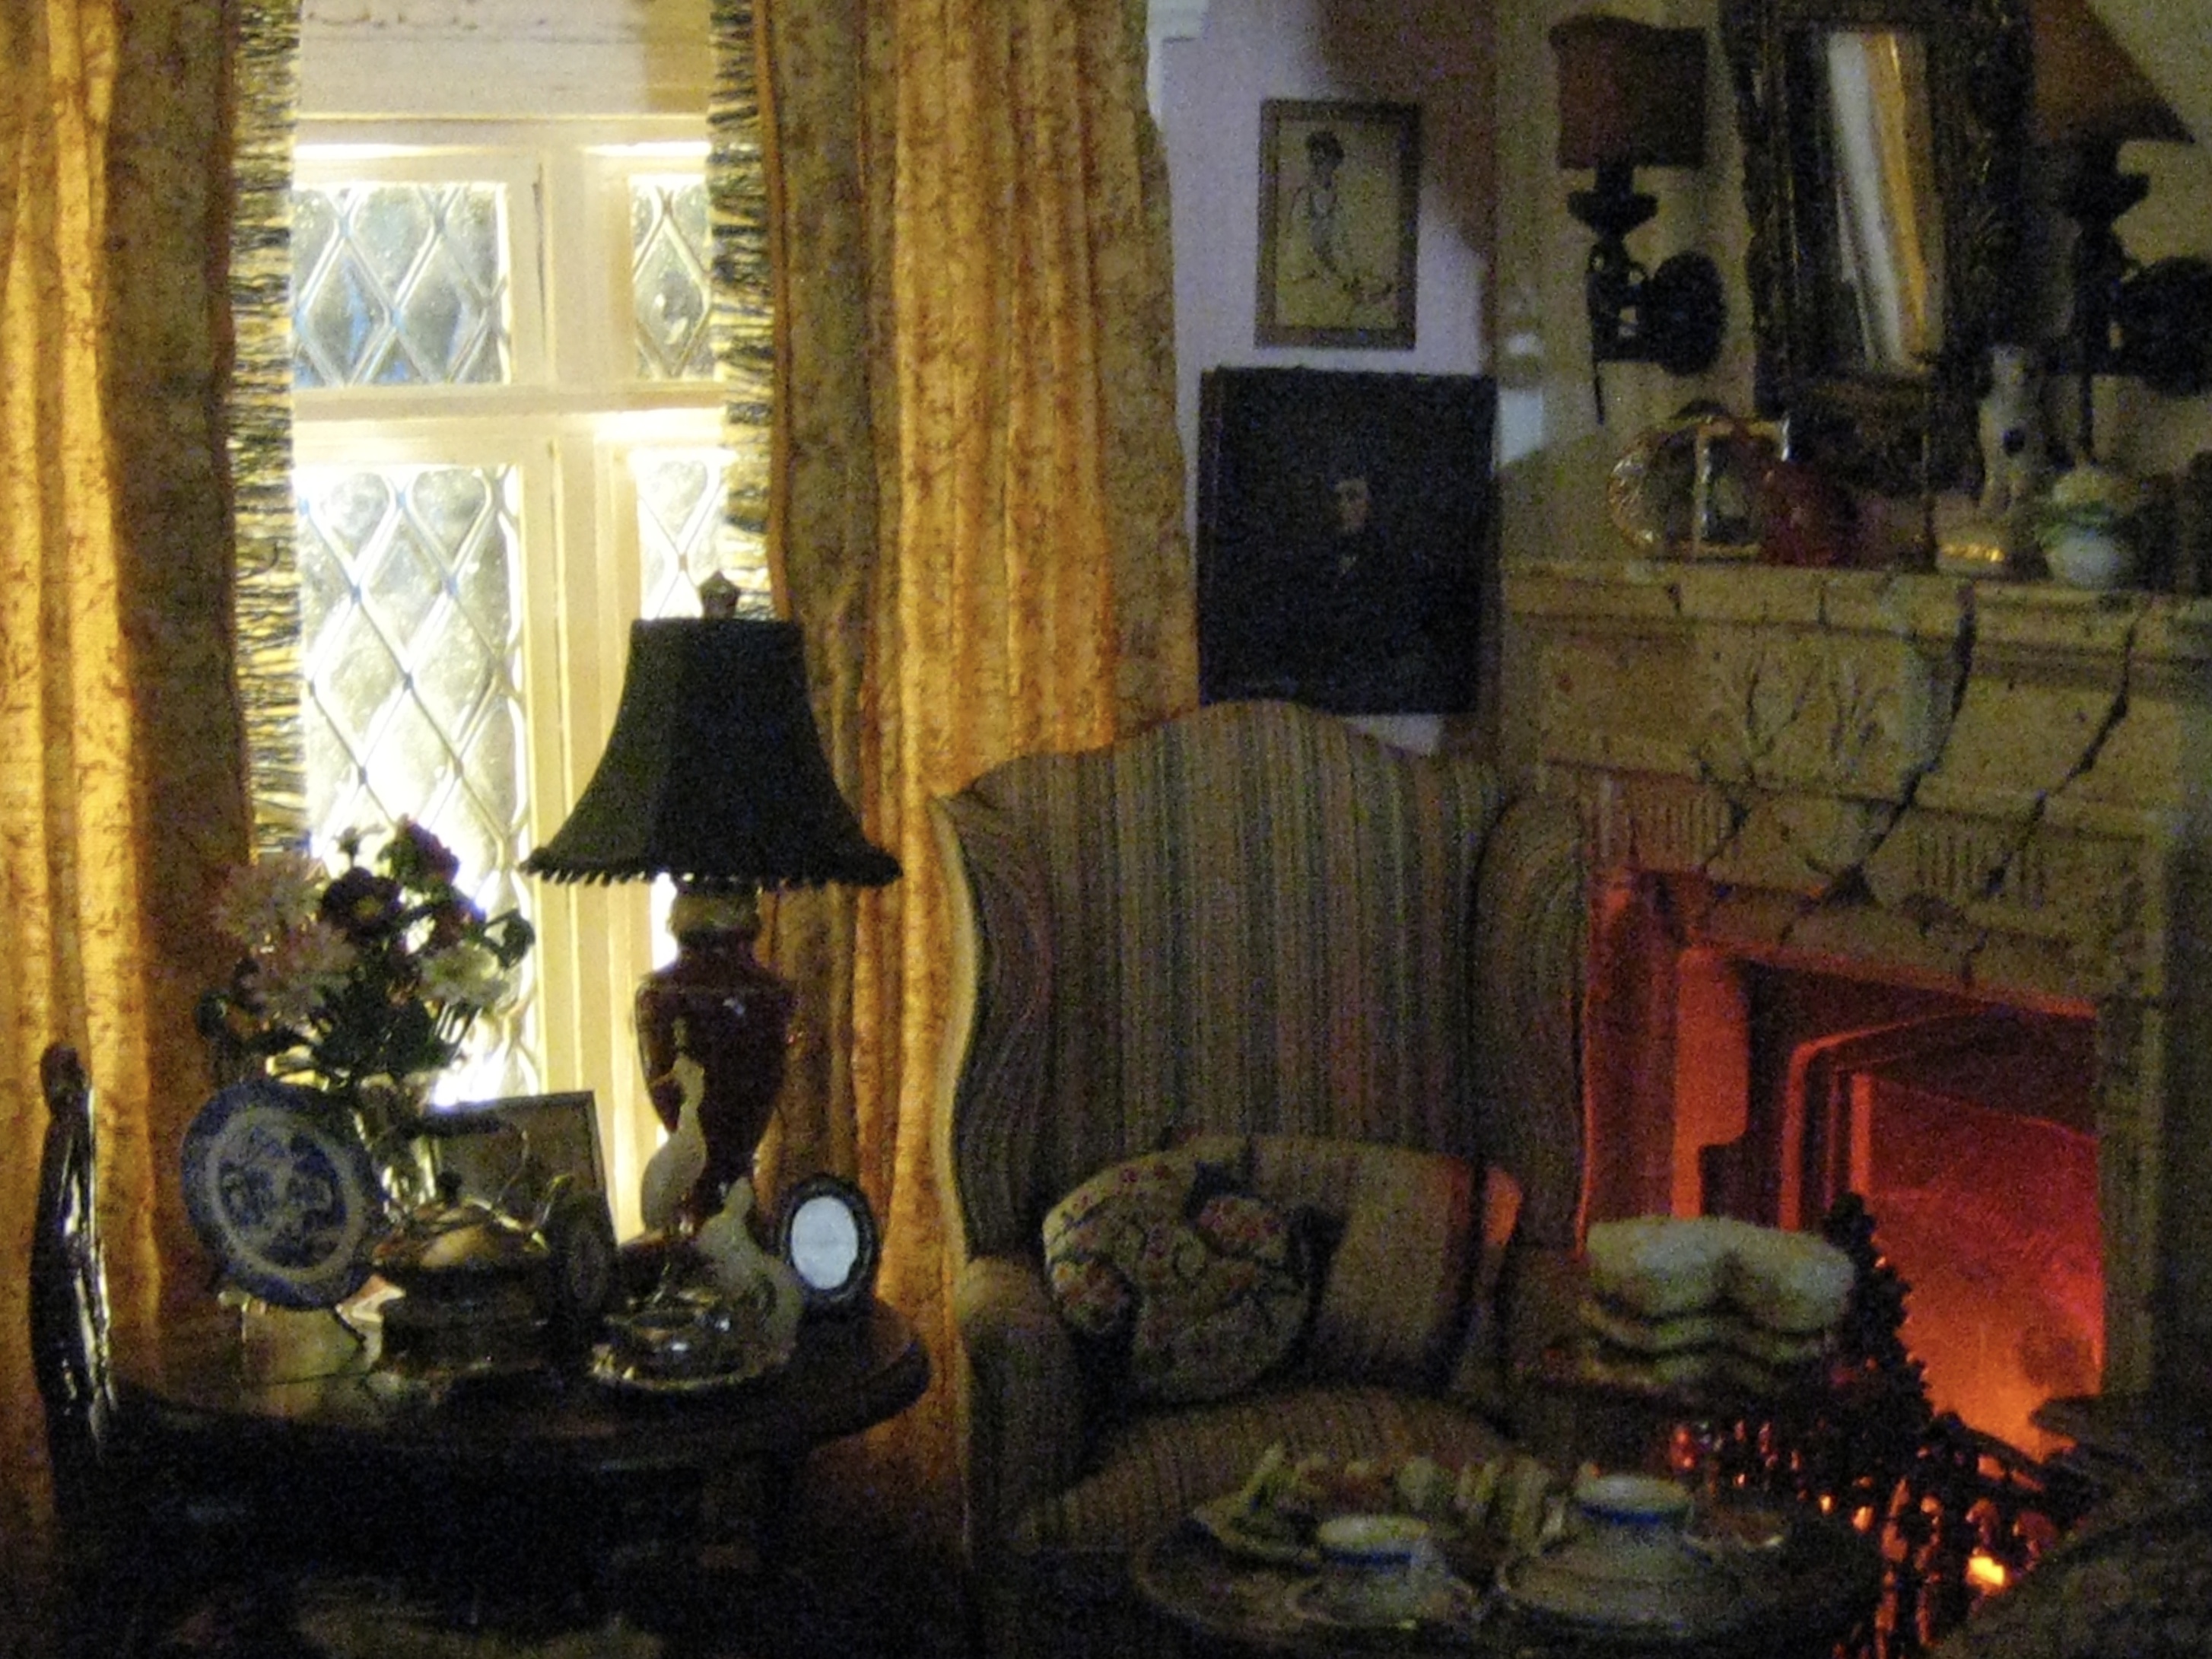
In front of the window I have installed a wide arm chair
from a miniature furniture lot purchase-
It was already upholstered in a multi-stripe of light & dark stripes of pink, gold, beige,
and gradient blues
.jpg) |
| I like the way it picks up the pink in the wallpaper but I also enjoy the contrast of it against the golden yellow drapes and the area rug. On the chair are two cushions One made for me a LONG time ago embroidered by my friend Pam Grant and the other cushion I made using the same fabric and method as those on the sofa.  |
.jpg) |
| On the small gate-leg table, is a "non-working"lamp. Non-working ever since I accidentally broke off the wires! whoopsies! Even so- Since I already had enough illumination in this room and only required the presence of a lamp to dress this table, "non-working" works just fine! 😆 But to make it work for this room, I painted it, glazed it with U V resin then I appliquéd it with gold nail decals. The shade is painted inside and out with silver nail polish and black chalk paint, after which, the bottom of the shade was edged with a fine black picot trim. |
The silhouette on the table is another magazine cut out
mounted onto card-stock.
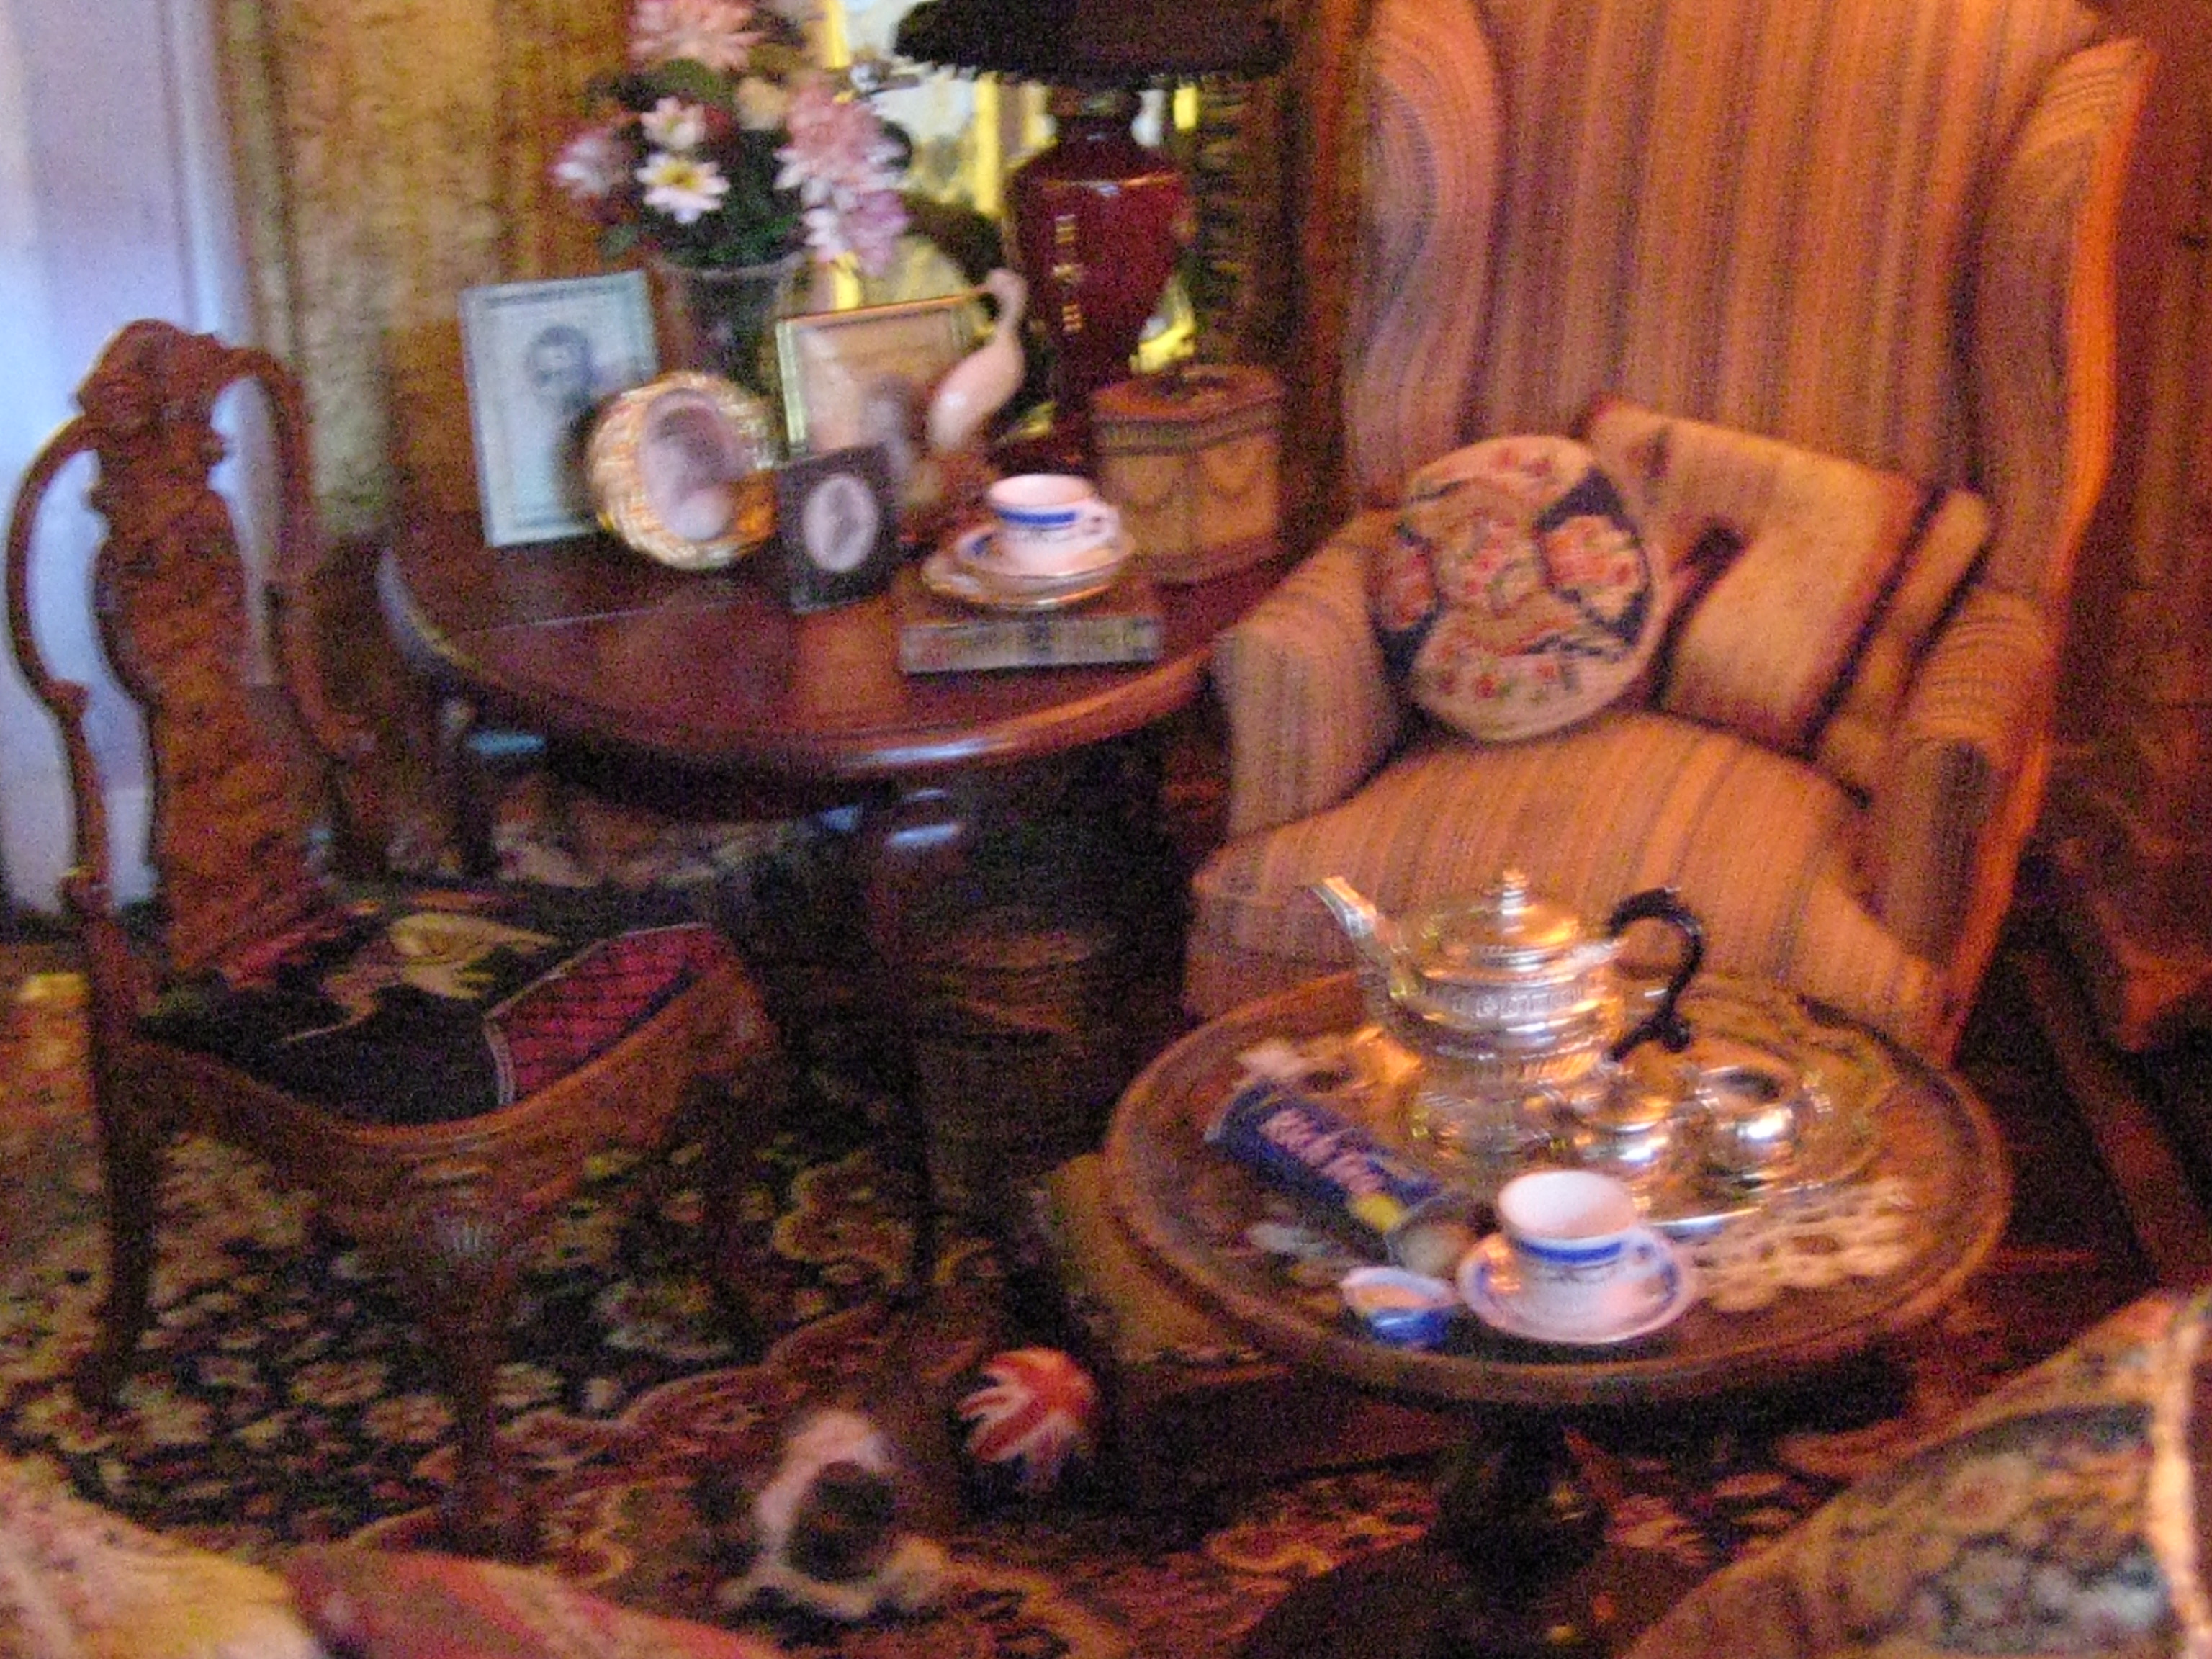
The sterling silver cream and sugar on the silver tray
were all made by Don Henry.
The tray came from
and the silver sugar and cream I acquired from
.jpg) |
| The black and white Staffordshire china dog is the mate to one displayed in the secretary. The painted metal hunting dog was a lucky find inside a bag of thrift store junk. A blue and white Stokesay ware plate sits in front of a bouquet of white daisies, pink dahlias and burgundy peonies. Daisies made by me Peonies I made from a kit by The Miniature Garden Dahlias -Ebay |
.jpg)
.jpg)
The silver teapot is one of my
FAVOURITE THINGS
I can't remember where or when I bought it,
but what I liked about it
was its unique shape.
When it finally arrived in the post,
I was SMITTEN even more! 😍
It's hand-signed but the signature is so faint,
that it can only be deciphered via a jeweller's loop.
The knob on the lid and the carved handle are both made of (ebony?)wood.
There's also what looks like a teeny tiny hallmark
stamped in the metal
which is impossible to make out even with my loop.
Regardless of whether it is sterling silver or not,
the entire teapot with its curved spout and squat body is
Altogether LOVELY
.jpg)
SO there it is-
YOU'VE SEEN ALL THERE IS TO SEE!
SUCH A LONG POST😂
but I hope you've enjoyed the tour
and found it worth the wait!

.jpg)
 |
| the DOWER HOUSE LIVING ROOM is DONE! well actually there are still a few more tweaks which I need to complete so let's say it's 99.9% DONE!  Thank you everybody for you patience AND for sticking it out to- |

THE END
before you go-
here's a teaser of the Dower House bedroom which I'm currently working on....
and I can hardly wait to show it to you-
IT WILL BE READY"to post...
very soon!😜

elizabeth
.jpg)


Hello lady Elizabth,
ReplyDeleteWhat a wonderful post. The door is just amazing. I love the security lock and the finish looks aged but well taken care of. The window “leading is a stroke of genius and looks superb. I will be trying that one.
I am very impressed by your collection…truly a feast for the eyes!
A big hug my friend
Giac
Hello my Dear Dear friend! ❤️ I have missed your presence for some time now, but it is encouraging for me to read your Lovely comment AND to be able to enjoy your virtual company once again! 😀
DeleteThank you Giac, for your praise of the door. It might not be the door I initially envisioned but I think it goes well with its surrounding. The slide bolt has become a favourite feature of mine, since it feels like the door would look naked without it!
But I'm SO GLAD that you like the leading idea- HOORAY!
It's both CHEAP AND EASY and saves a LOT of time and effort since all the hard stuff is already done- no muss with limited fuss- and who could ask for anything more? 😜
BIG HUGS back 😘
elizabeth
I can't get enough. I loved your remark about measuring often cut wrong! Boy can I relate--I did that yesterday trying to fix a previous accurately measure window frame that wasn't. I am always in awe of all the unique and special accessories that you have and I appreciate that you share your sources. I'm ordering from one today, a vintage garden implement that we still use in our garden--a push cultivator. What a find. Thanks Elizabeth this wonderful post that has so much to offer.
ReplyDeleteYou know what Ann? The older I get, the more I've had to come to terms with my own inadequacies and construction limitations. Even so, what continues to frustrate me is that even when I REALLY TRY to get it right, accuracy still eludes me and frankly, I don't know what I'd do if the world ever stopped making drywall patch! 😂
DeleteI'm VERY HAPPY that you are taking advantage of the links I've posted, because I know how much I've appreciated finding new outlets and sources from others too.
And I'm DELIGHTED to know that you've already found something from one of the vendors posted, that will add to your own creative mini scenes - HIP HIP HOORAY!!!! 😄
Meanwhile, I was speaking to my friend Janine earlier today and she pointed out that some of the links were broken so I went through them all again, and I think I've fixed them but if you happen to try one that doesn't connect please let me know.
But hearing that you've enjoyed this post on several levels was encouraging to read and now to respond to, so Thank You VERY MUCH Ann, your comment made me SMILE -anti -construction comrades in arms 💪😘
elizabeth
This beautiful room is very detailed in every detail. I like the window.
ReplyDeleteHello Faby!❤️ Thank you for your Lovely compliments on the details of the living room AND especially for your comment on the window! 😘
DeleteIt's funny to me how the window is a prime example of something better resulting from a previously big mistake.
The bug zappers leading proved to be a GOD Send and is not only ready made, but could very easily be adapted towards other miniature projects as perhaps 1/24th trellis work or fencing in a garden scene like the little greenhouse you made and posted about awhile back! 😃 The future possibilities could be endless!
elizabeth
You are a master of making rooms so they look like the owner has just left the room. I t is really amazing and I love it. Your window is really breathtaking.
ReplyDeleteHello again Jette! ❤️
DeleteI'm SO GLAD that you like the general atmosphere of the Dower House living room- Thank You!!!! 😘
I've been living with this finished living room for almost 2 months and I am STILL really happy with the way it looks as well as the way it feels, so when I read that others are enjoying it as much as, I am, it Doubles the Pleasure! ❤️
And I'm VERY GLAD that you've enjoyed my window tutorial.
This is the FIRST one after a Very Long Time too, so I felt a bit rusty putting the tutorial together, but it wouldn't have happened at all if I hadn't messed up my first attempt so badly- lemonade from lemons, (as the saying goes)
😜
elizabeth
Hello Elizabeth! It it so lovely to see you back and to know you have been (almost) fully immersed in your creativity! I know for many of us that getting to see what you've been working on is way better than any of the drama unfolding over there in Depp/Heardville!
ReplyDeleteThe door came out marvelously! Your solution for the square peg in the round hole was not only brilliant, but it actually helps to give the illusion that the walls in Dower House are as thick as one would expect from an old English estate. And leave it to you to care about the safety and security of the occupant with the smart bolt at the bottom. A girl's got to have some peace until her adorable bulldog has grown enough to scare off any malfeasance! But one day, the mail carrier will surely have to count his fingers once pulled back from the mail slot, lol!
I am always so tickled by your inventive uses for discarded things! And to pull the "lead" out of the bug zapper has got to be the most hilarious double entendre to date. Flying insects everywhere are on their backs, feet flailing in the air with the giggles. You have not only made the most incredible, if not unconventional, leaded glass windows in dollhouse history - you have also saved many tiny souls! I absolutely love the way you come up with the methods you need to create the look you have in mind. The window frame and the moldings surrounding the window looks as "fine old estate" as one could ever hope to achieve! I really think all your accidents are happy ones because you turn them that way.
The drapes and all of the finely curated and created décor pieces in the room are gasp worthy, but I know you by now. Things are apt to change about a hundred times before the end of the project, and each iteration is going to make us swoon all the more. As with all of your amazing rooms, the angels are in the details and I find myself pouring through each photo again and again. That secretary is soooo delightful, and the burl treatment divine! The solution you came up with to make the sofa proper for company again is the kind of thing that gives us all hope for the poor, broken down pieces in our own mini junk drawers!
I could go on and on because the noteworthy elements of this space are innumerable, but you already know I am a fan for life! I am still pinching myself that you are creating and posting again, and your joy seeps through every square inch of this page! I can't tell you how delighted I am to see this story unfold!
What a SWEETHEART you are Jodi! ❤️ You can't imagine how much I've ENJOYED reading your Funny and BEAUTIFUL comment!
DeleteI was actually laughing out loud about inadvertently saving the souls the giggling bugs- I'd never thought about it that way- but I LIKE IT 😂: Missionary to mosquitos ✝️
And I also got a good chuckle after reading how your anticipating some additional changes to the room as time goes by.... and YOU MAY BE RIGHT ABOUT THAT TOO! I certainly wouldn't put it past me. 😜 Kinda scary to be this transparent but also comforting to know its coming from a GOOD PLACE and from a fellow miniaturist whom I not only Greatly Respect but also DEEPLY Admire❣️ From one " fan for life", to another😘
elizabeth
Un trabajo impresionante, me ha enamorado cada detalle, me encantaría vivir en esa sala, parece totalmente real. Con más tiempo me volveré a pasar para disfrutarlo , detalle a detalle más lentamente.
ReplyDeleteThank you VERY MUCH Rosa-Maria! ❤️. It is one thing to admire a room in a photo but it is another to want to say you'd want to live in it and so your Generous Compliment about this living room makes me feel Very Happy! 😘
DeletePlease take all the time you need to slowly review the details in the photos- but don't look too closely at any of my construction work! 😜
elizabeth
What an enjoyable tour, so many things and details to see. I love the cosy atmosphere, it's very inviting, I would love to sit in the armchair next to the fire surrounded by such lovely things. The leaded glass window with the curtains is perfect and the display on the table in front of it makes a gorgeous scene. I also love your Catherine Buron painting it has really found its place in this room. the detail of the Union Jack rubber ball is fun.
ReplyDeleteBeautiful teaser of the bedroom, I'm looking forward to seeing more.
Geneviève
I Totally enjoyed reading your Beautiful comment Genevieve and Thank You Very Much for it! 😊I think that a comfy chair by the fire would be my first choice too, especially since the cat has commandeered the entire sofa! 😂. Even so, I am glad that you approve of the placement of the painting by Catherine, on the wall next to it. I was Sooooo Glad to be able to place it where it could be easily seen and fully appreciated not only by The Dowager but also by ME and all others who stop by for tea and a visit. ❤️
DeleteAnd you are in good company regarding the Union Jack rubber ball as it is one of Janine's favourite details too! 😄
elizabeth
Me encantan tus publicaciones, disfruto cada uno de los detalles que nos enseñas para crear una atmósfera de lo mas cálida y cuidada. La ventana te ha quedado espectacular y en general toda la habitación. Ha sido un placer disfrutar esta publicación que aunque larga, se saborea en profundidad.
ReplyDeleteEstoy impaciente por ver el dormitorio.
hank You Very Much Matxalen❤️ and I apologize that it took so long to reply to your LOVELY comment!
DeleteI've been working on the bedroom of this dollhouse so for the past few days I was in "THE ZONE" which explains my absence from my blog, however I have enjoyed reading your comment and am VERY GLAD that you've enjoyed your visit here! 😊
It Always gives me Great Pleasure when people like what they see and I always Learn from and feel Blessed by such positive encouragement❣️
elizabeth
Dear Elizabeth (take two... the first comment disappeared half way through writing it!! ? !) I am once again Amazed and inspired and awed by the creative process you take us through on your way to achieving the beautiful decor of your Dreams! There is no-one who rivals you for creating a mood, an atmosphere, a "look" in such depth and delicacy! You find such treasures in such ordinary places... hardware stores and junk shops... and turn ordinary things into amazing miniatures! Your leaded glass windows put mine to shame, but I can only argue that mine are much "older" and "worn out" by now! LOL! Your pursuit of excellence has been worth the effort! And the way so many items that once lived somewhere else, have now found their true homes, is a part of the magic you have to weave disparate pieces together into a story, a place we would Love to live in or visit at the least! I just LOVE your creations! It is always such a pleasure to see your work up close and in detail, to marvel at the amazing collection you make! Thank you for sharing your artistry! I can't wait to see more! :):):)
ReplyDeleteHello Betsy! this comment is TAKE 3 for me!
DeleteEver since Blogger's last "upgrade" I have had no end of difficulties with my comment section. Everything takes at least 60 SECONDS to load between each and every reply- very frustrating to say the least! 😣
But now with that out of the way, I want to THANK YOU Betsy, for your Wonderful comment- It means Very Much to me! 😘
Re: the leaded windows- they are a prefab short cut, whereas your windows are each 100% hand-made so it's like apples v oranges each are unique and tailored to their particular situations! ❤️
When I originally built this house, I was still pretty green and my "making" skills mediocre, but guess what! ? They haven't improved and are as pitiful as they ever were, which is why I have welcomed items made by others into it! 😜
I've particularly searched out English artisans to incorporate into The Dower House, so that it will actually have a little bit of England in it but because of the cost of shipping, I'm picking and choosing very carefully, which means that each item has to count! So I Really Appreciated your saying they've found their "true home" Betsy: which is music to my ears! 😄
elizabeth
¡Es todo perfecto! Alucino con las ambientaciones que haces y con todos los elementos que repartes de una manera tan coordinada . Además cada elemento en si mismo es una maravilla.
ReplyDeleteMe ha encantado como las hecho el ventanal. ¡Es fantástico!
Thank You Isabel for your Lovely comment!❤️. It takes me a while to coordinate each of the items inside my rooms and during its construction, this room was arrange at least 3 different ways before I finally settled on this one. It was quite interesting to me that each of the living room groupings took the room in a slightly different direction which then dictated the various items I could use.
DeleteI finally decided on what you currently see, not only because I wanted the table and chairs in front of the window but also because it allowed me to get more furniture and more accessories into the room and MORE was what I was looking for! 😄
Once I had it fully loaded, then I began editing certain things out again, keeping only what I felt was essential to my story and I'm SO GLAD that you approve!😘
elizabeth
Hi Elizabeth! Phew, what a marathon post! I love that you still post on your blog, so firstly thank you for that. I love reading all about how and why you did things. This little living room is so beautiful and warm feeling, and very English countryside. Everywhere there are tiny details that tell the dower’s story and that’s one of the things I like most about your houses - they really tell a story of who lives there. Your little fur babies are also adorable and make this cottage feel like home. It really looks like the home of someone who has spent a lifetime collecting the most beautiful pieces and really ‘lives’ in their home. You have shown so many beautiful minis, it’s hard to pick a favourite, but I have to say I am entranced by the monogram cushion in your bedroom teaser pic! It’s stunning and I can’t wait to hear about it. One other thing, it’s probably of no use to you now, but the door is the same as the Classics Yorktown door. I have some, and the windows, for a future project.
ReplyDeleteGreetings Shannon and thank you for your Beautiful comments! ❤️
DeleteRe: the embroidered cushion in the Bedroom teaser: it was another gift from Jonquil Norrie! I couldn't believe my eyes when I saw it and I Absolutely LOVE IT!!! She is Incredibly TALENTED in so many different mediums and I feel Privileged and Blessed to have been on the receiving end of some of her Awesome/ Specialized work!
Much of last week was spent, working almost non-stop on the bedroom and I'm currently awaiting one more thing to add to it before I can call it "DONE", so it won't be too much longer before you'll see more of Jonquils Delicious handiwork displayed in this house! - how's that for a teaser!? 😊
elizabeth
Yaaay!! Can’t wait!
Deletecomme à chaque post, je suis époustouflée par le travail que tu as accompli Elizabeth. J'aime beaucoup la fenêtre à croisillons.
ReplyDeleteUne fois de plus, j'ai la sensation de pénétrer dans une vraie maison. Les nombreux objets, le feu dans la cheminée (je viens avec un bouquin et je m'installe dans le fauteuil), le joli petit chat ... apportent du vivant. Tu as créé une ambiance chaleureuse !
Bon week-end Elizabeth !
Welcome Joce! I will make sure to save the seat by the fire for you, for whenever you come by for a visit, and by all means- come with your favourite book so we can discuss it! ❤️
DeleteI will shoo the cat off of the sofa, and after our chat we can have a bite to eat and Afternoon tea together- this door is always opened for a friend. 😘
elizabeth
Merci Elizabeth ! Je serai ravie de partager une longue conversation avec toi !
DeleteComme j'adore les chats, je prendrai celui-ci sur mes genoux
Elizabeth,siempre logras cosas maravillosas con tu gran intuición, la ventana emplomada es preciosa, muy auténtica!! la puerta tiene el envejecido perfecto y cada detalle de la decoración es digno de admiración! todo confluye armoniosamente para dar un ambiente cálido y acogedor, enhorabuena!!
ReplyDeleteBesos.
It give me Enormous Pleasure to read your Beautiful comment Pilar and I THANK YOU for also including the recessed door and leaded window in your praises! 😘 😄.
DeleteI find it forever interesting that the very obstacles and/or impediment which will initially anger and confound me, will often (at the end of a build), become the most interesting and notable details in a room. Things I never would have initially thought of on my own, will change the entire direction of a room, all because of a "problem". I only wish I could actually LEARN this lesson of going with the flow, without having to repeatedly re-learn it, as OFTEN as I do! ❤️
elizabeth
I remember from school that Poe's definition of a short story was "you must be able to read it in one setting". Well, it took me two settings... but in the end this is a post and not a short story. ;O)
ReplyDeleteAnd what a post this is... thank you for this well explained and photographed development of the Dower House's living room. I've enjoyed it to the fullest... you are always full of surprises, great ideas and a neverending source of inspiration. And I learnt today that you're the hero of the insects in your area... it's stunning that you've been able to see the potential of this killer racket to be the perfect solution for your window build. Btw it made me smile that I've recently bought the same bunny trio from Guilia... but mine will have to wait patiently for showtime.
As always your photos were the cherry on the cream, especially the last ones showing the whole room with all its atmosphere and the perfect combination of your installed lights and the light coming through the window. And now I'll be waiting to see the bedroom... and if this might take a little longer again... blame it on the cat. As she's already responsible for the sofa she can take some more blame... *tweet*
Hugs
Birgit
After being such a long time away from my blog, I knew I had a lot of ground to recover, so although this post began as a "short story"the more photos that needed to be included, turned it into a the "novella" edition you've read! - so I confess Birgit, to being GUILTY AS CHARGED 😄
DeleteAnd although a felon inside our blogasphere, I AM INDEED a hero in the insect world which is why they call me "SUPER FLY"which may not be the most desirable moniker in either the bug world or our mini one! 🤣
Even so, I am SO GLAD that you have enjoyed the window build photos Birgit! ❤️.
Early in the reconstruction of this dollhouse; long before the wallpaper was hung or the door and window installed, I set about arranging the furniture and accessories to establish the atmosphere and then took countless photos along the way, just so I wouldn't forget what it was supposed to look like later on, since the Best Laid Plans of mice and men, have a habit of sudden changes- don'tcha know! 😜.....
Periodically, I'd keep referring back to those photos when times of surprise, discouragement, and set backs would occur. They helped to keep me focused on the end game- so THANK YOU Birgit for your LOVELY comment on the mood within the pictures and that the end results were worth the effort of a "Two settings read" 😘 ❤️
elizabeth
p.s. Giulias rabbit trio are totally FAB but I think you'll agree that all of her products deserve TWO THUMBS UP! 👍🏾👍🏾
ReplyDeleteHa, ha, measure often and still get it wrong, I can relate to that. The leaded window is a masterpiece, it looks amazing. I think it’s great how we always find a way to achieve what we want to do. The room is beautiful, the fireplace is stunning, the sofa, the food, Jennie is adorable. The fire and the lighting make it a lovely cosy room, one that I could curl up in with a good book. It’s all gorgeous.
Hi Polly! 😃. I'm surprised at how many people find that particular mis-measuring statement, applicable to themselves!😂 It's comforting knowing that I'm NOT alone in my construction inadequacies because misery loves company however I'm going through tubs of dry wall putty at an almost equal pace to the amount of wood I'm wasting- Not Good for my ego or my wallet! 😫
ReplyDeleteNevertheless, I am GRATIFIED that you have enjoyed reading my latest adventures with this Dower House living room and I THANK YOU for your comments and your compliments on the various details and components I've chosen. ❤️
I agree with you too, that whenever I look inside this room the first thing that comes to my mind is a desire to curl up into it with a good book! - but it would have to be the chair because Jennie won't allow me on the sofa- meow 😸
elizabeth
Dear Elisabeth, I am sorry for being so late with a reply. I had started a few times on reading this great post when other matters pried me away. Now I thankfully had time to read the whole thing. And it is a delight to see how the dowerhouse evolves and grows.
ReplyDeleteI like the changes that you make to it. The leaded glass windows are a real treasure. I will store this super idea for when I ever need to make some myself. Bug zappers will be around for a while so plenty of available materials. :-)
I love how you furnish the dowerhouse with the idea of the dowager taking her favorite possesions from the big house and try to fit them in the smaller house. It reminds of an interview I read a while ago with the Dowager Duchess of Devonshire. On the question if she regretted not living in Chatworth anymore, she replied: "Now I enjoy the luxury of having everything so small." This quote comes to mind when reading your adventures with the dower house refurbishment.
Huibrecht
hank you VERY MUCH for your comment Huibrecht,😊 and I'm so glad that you've mentioned the Dowager Duchess of Devonshire because I hadn't heard of her OR known about Chatsworth until Jonquil mentioned her in a comment she'd posted on my Instagram page.
DeleteIt was uncanny that I used a similar tint of pink on my mini living room walls as she did in hers. When I saw that, I knew that, I was heading in the right direction with this cottage, and now that you've revealed this additional information, I'm even MORE Encouraged to "enjoy the luxury of having everything so small", just as The Dowager did! 😎❤️
elizabeth
p.s. Another Thank You for your compliments on my leaded glass window- GREATLY Appreciated! 😘
I love this room! You've done a fabulous job. I especially love how you did your leaded windows. I need to do some in my 1/2 scale cottage and I have a full roll of wire mesh, now to get working on it! Thanks for sharing your work!
ReplyDeleteHello Wanda and Thank You VERY Much for your approval of this living room ❤️and also on the Leaded Glass Windows! 😘
DeleteOn the first try of this technique I used a wire mesh from an air filter which was thin and flexible but the metal was not entirely flat, so if you plan on experimenting with the mesh you have, I'd do a test strip first, because you wouldn't want to waste your precious UV resin as I initially did❣️ 🧐
elizabeth
Gosh I enjoyed reading this so, so much! I love the details, explanations, the story and images. You are inspiring and humble; I think the Dowager would be very pleased that you are telling her story. (I tried to leave this comment on your latest post but it failed....no matter - it applies to all your posts.)
ReplyDeleteThank You so mUch Jill! ❤️. It gives me a lot of pleasure knowing that people are not only enjoy the photos but also the text. I believe that every step of the journey is important for me to document because it's easy to forget not only what I've done but how I did it so having it outlined on my blog, has been a reference resource for me as well.
DeleteI hope that the Dowager will continue to approve the developments of her story, she's becoming quite a complex character study.
As of today, I'm in the process of writing the next installment which should be ready to publish by this weekend if not a little sooner. I'm very excited about it and hope that you ( and the Dowager) will be too! 😊
elizabeth
p.s. kudos to you for NOT giving up on the comment section. It's an ongoing "hit or miss" frustration for me but I really appreciate your sticking with it! 😘