I am currently hard at work on the Bedroom of 'the Arthur' dollhouse and if you are thinking "What about the Kitchen?", well I am working on that IN MY MIND, right now. I am seriously avoiding having to work on that staircase in the kitchen which has to be done first, before anything else in that room is started. For Whatever Reason, work on the stairs is scaring the pants off me! I decided to refocus on something Not so intimidating; a distraction until I can work up the nerve to do the stairs. So I decided to work on not only the second floor bedroom, but also the bathroom too. I have been pleasantly surprised that they are both now, very 'Close to Completion', and will be ready to show very soon. As a little teaser, I am going to show only part of the bedroom because it is the one with the new Victorian Fireplace that I made. After searching the net for a number of different images, I decided to use a composite of a couple, and made up my own design as I went along. The picture below is the main source of my INSPIRATION. I needed something very narrow and quite tall for the space. So starting from the photo below, here is what I did......
 |
| Fireplace Inspiration |
 |
| This is one of the mini hole punches that you can get at the dollar store and other craft outlets |
 |
| I am going to use the blister packaging |
 |
| I wanted to make a shallow hood for the opening of the firebox and the shape of the casing was the right width. If you chose to do this step, cut your mat board to fit the hood. I had cut the board first, and then had to re-cut the front of the fireplace to the size of the hood insert. |
 |
| I sketched a line of where I wanted to cut and used a pair of scissors to cut on the line |
 |
| This is the shape that I wanted and it fit inside the body of the fireplace |
I didn't show the photo, but THIS ENTIRE SECTION OF ACETATE WAS GLUED UP INTO THE CURVED TOP OF THE FIREPLACE OPENING. It is a very Shallow Hood that is very discreet and with a Low Profile. It can just be seen in some of the photos further below.
 |
| I also am using some old zip ties that had a good amount of length and some texture on one side of it |
 |
I built the fireplace from mat board and balsa wood. I used some scrap wood trim on the top of the box on three sides and now I am testing out the zip ties before I glue them on too.
Right after I applied the zip ties, I installed the plastic hood inside the rounded top. ( I forgot to take a photo of it and I apologize) I used the Fast Grab Tacky glue to secure everything except for the zip ties, for that I used the Quick Grip! |
 |
| I was at my favorite thrift store and they were selling these mismatched paris of earrings which I bought after a little negotiation, for a better deal. I wanted them for the inside of the fireplace. |
 |
In this photo you can see how I wanted to use the gold embossed earring and also the zip tie as part of the fender. Everything then began to gel and I went BALLISTIC and added embellishments of every
kind. I used Wood, Plastic, Metal, Acrylic, Beads, Findings, Mesh, Headpins, Spacers, Toothpicks, Filigree, Ball chain, Flat chain, and Mat board. Anything that had carving or texture was what I was looking for. I used several photos as reference and made the fireplace as gaudy and ornate as I possibly could. |
 |
This is what it ended up as
It is very busy looking, isn't it? |
 |
Side View
You can just see the rounded hood in profile |
 |
| I did a test fit in the bedroom |
 |
FITS!
Then, acting on Sans advise, I spray painted this piece with a flat white enamel and left to dry. It received 2 more coats of flat white and this is what it looked like when it was all dry. |
 |
| What a difference! |
 |
| Next was to paint the interior of the firebox with a black acrylic paint called "Wrought Iron" |
 |
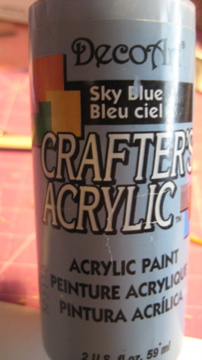
| Following that, I painted the outside of the fireplace in "Sky Blue" |
 |
| The "Sky Blue" was toned down with a wash of a thin transparent black and a thin transparent brown to age it and make the look more old painted metal. |
 |
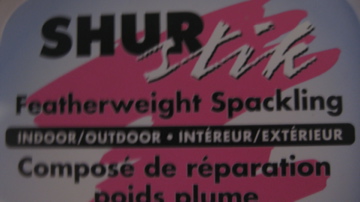
While the paint was drying, went to work on the hearth. I used the Spackle that you see below, to butter the surface of the mat board and applied a not too thick layer of it on the surface with a pallet knife. IMMEDIATELY, I over-laid an thin coat of the Sand Gel Texture Medium that is very grainy. I scooped it out with the pallet knife and buttered it right over top of the Spackle and then left it to dry. It just 'floats' over the Spackle when it is applied, but it dries really hard! Right after I had applied the products, I realized that I hadn't sealed the card first so it would warp. To counter-act that , I lightly wet the backside of the mat board with water. Apparently, this 'confuses' the card so that it stretches in Both directions and therefore stays flat!?
anyway,
it worked |
 |
| I LOVE THIS STUFF! |
 |
I painted it with the Black acrylic paint after it was dry
I think that this looks just like a stone slab! |
 |
| Then I used a tiny bit of the Sky Blue to soften the black and tie the hearth in with the fireplace |
 |
| The finished hearth |
 |
The finished fireplace!
I had to see if I still liked it in the bedroom..... |
 |
| YES I DO! |
 |
| I hope You do, too! |
elizabeth


.jpg)


Oh my! It's georgeous!
ReplyDeleteHello Merja! Thank you so much! I am Very Pleased with the way this has turned out! Far better than I had expected or imagined. There is Lots of 'Happy Dancing' going on here in the Studio!( smiles)
DeleteEnjoy your weekend!
elizabeth
How could you not love it?!!! Wonderfully imaginative! It's perfect. :D
ReplyDeleteHello Brae! Thank you very much for your comment and your compliment! I feel a whole lot of Relief that this project is over as it gets me one step closer to completing the bedroom. But making this Victorian fireplace was so much fun, primarily because the Victorians were never shy about ornamentation and so I had the opportunity to be as Wild as I Wanted to be. I am so glad that you like it too!
DeleteHave a great weekend!
elizabeth
No, I don't like it....I LOVE IT! It looks absolutely amazing. Elizabeth, you are so clever!
ReplyDeleteIsabelle
Hello, and thank you very much Isabelle! This was one of the Most Rewarding projects that I have done, Isabelle. I actually had to make myself STOP adding stuff on top so that I didn't lose the details underneath. If you are ever needing to up-grade any of your small properties, in the future, let Sam know that making fireplaces is very rewarding and is Always a Plus with prospective buyers!
DeleteSee you soon
elizabeth
p.s. I hope that your exams went well for your Real Estate license.
Thanks Elizabeth! You are always so encouraging!
DeleteIsabelle
Excellent! I love it too. It's so good when we manage to create something that seemed so difficult at first. Congratulations!
ReplyDeleteHello Patrick! Thank you, I am glad that you like it, too. Maybe you can tell, but I am feeling Very Well-Pleased with the results!? (smiles) This has been an Adventure for me and Yes!, it thrills me that I dove in and did it, and now it is done. Thank you for your comment and your "congratulations', Patrick!
Deleteenjoy your weekend
elizabeth
Wow this is gorgeous. I love love your fireplace. You are amazing.
ReplyDeleteHugs Maria
Hello Maria! I am delighted that you like this fireplace and I am STILL floating on Cloud Nine, about it. I think what gives me the Most Pleasure is that I was able to customize this fireplace to the size that I needed, without having to buy something and then hope it would fit. Thank you for your compliment, Maria and have yourself a wonderful weekend!
Deleteelizabeth
Wow!
ReplyDeleteThat is creativity! You were amazing to explore the possibilities of all the material you have available. The fireplace is awesome!
Thank You, Eliana! Crafting and creating is what I like to do best and this fireplace was a spin-off of the Bull's Eye Mirror tutorial that I just did. With the Mirror, I applied the extra bits with glue to the surface of the plastic frame; with the fireplace, I did the same only it was glued to Mat board and balsa wood. It is the Paint that makes it all cohesive in the end. Thank you God,
Deletefor Paint!
and thank you Eliana, for your comment and your compliment
elizabeth
Hello Elisabeth, this is gorgeous work. I would never have expected the plain foam/balsa construction to become so stunningly beautiful and realistic by the way you embellished and painted it. Thank you for showing your working process to us, it is such an inspiration. Hugs, Liduina
ReplyDeleteHello Liduina! I THANK YOU and I welcome your comment! I have to return it right back to you, as you have done the Same Technique with your Vintage Iron Beds! They are wonderful and your painted bed was what got me thinking about using a color on the fireplace rather than my original thought of to just paint it all black. Your beds therefore, also served as INSPIRATION. So I Thank You, Liduina, for the compliment and also your creative and imaginative and beautifully executed iron beds made from the bits and pieces from the mini junk drawer, that totally inspired me to try and make a fireplace!
DeleteBig Hugs back!
elizabeth
Thank you, very much, for posting such a detailed explanation of your fireplace. I need to build a tall, narrow fireplace, too. I don't think my room can take such ornate decoration, but the techniques and ideas you've shown...plus your inspiration photo, which is exactly what I needed to see...will be a big help to me. I've only discovered your blog recently, and will soon take the time to read all your older posts.
ReplyDeleteHello Sharon! Thank you for your comment and the lovely compliment that came with it! I hope that you noticed the Bull's Eye Mirror that I hung over it? I was thinking about your comment about wanting to make one for over your fireplace, when I hung the mirror up. Now you can see what it looks like when the 2 are together. I made the fireplace deliberately OVER THE TOP, I decided to take photos of the step by step, to show that all those unrelated pieces can be made to work together and that Paint can solidify them into a single unit, just like with the mirror. I hadn't made a fireplace for 13 years and Never one so gaudy or ornamented. It was a fun project that you can modify any way that you like. I DO hope that you will try it. It is NOT hard AT ALL!
DeleteHave fun this weekend
elizabeth
Привет Элизабет!
ReplyDeleteВаш проект, как всегда вызывает потрясение! Из разных деталек, из ужасной серьги вы сделали невероятно красивый камин. Камин смотрится как натуральный. Вы как фокусник! Бросаете в шляпу мелкие монеты, огрызок яблока, поломанные часы. А из шляпы возникает белый голубь!!! Мне очень нравится наблюдать превращение от одной фотографии к следующей! Вы вдыхаете жизнь в безжизненные предметы. К сожалению повторить это невозможно! Это особый неповторимый талант!
Татьяна
HAHAHAHAHHA! You are sooooo funny, Tatiana! Yes indeed, those WERE Terrible earrings and maybe that is why they ended up in the thrift store. Who who want to pay retail for them in the first place? It is beyond me, but I am so grateful that they they were there waiting until I came along! And indeed, everything except the kitchen sink, went tumbling into 'The Hat! hahha You do the same with your minis and I can say that probably we all know how to turn the proverbial "sow's ear" into silk purses, in one way or another. It IS rather unfortunate that this is a One of a Kind, but then there are always new rooms to do and there are ALWAYS, other Ugly Earrings to rescue! heehee
DeleteThank you for your comment and your compliment Tatiana, I thoroughly enjoyed them Both!
elizabeth
Dear Elizabeth,
ReplyDeleteWow....that's a fireplace !! Thanks for sharing! I think you inspire a lot of people. The way you work is for everybody. The explanation of how to do is very clear!
Hugs Dorien
Thank you for those VERY KIND and MUCH APPRECIATED WORDS! I sometimes feel very Inadequate at this, and at other times, so Empowered! This is one of the Empowered moments!
DeleteI Want to Inspire people, because People Inspire Me! God has been good and blessed me and I wish to share this blessing with others. I remember when I first began this hobby back in the early 70's. I knew NOTHING and there was NO ONE to bounce ideas off of and NOWHERE to turn except to the occasional book or magazine that was chanced upon. Trial and Error was the order of the day.
Then Nutshell News magazine was discovered, and a whole new world was before me; so much to see but so much out of reach! Some of what I show, is what I have learned to do over the course of many years of experimentation, and other stuff is what I am learning to do Now, as a result of seeing what others, such as yourself, are showing on your Wonderful blogs! We all help each other.
When I present a tutorial, and if it is Not clear, then what is the point!? I hate missing instructions or a critical step that is left out, don't you? I try to present them as detailed as possible without losing the train of thought. However, I tend to Ramble On, so if I miss anything that is not included for you, Let me know and I shall be happy to....
Talk your Ears OFF!
Have a great weekend Dorien!
elizabeth
Dear Elizabeth,
DeleteI've been so busy all the time that I didn't open my eyes for a dollhouse.
A few years ago my life turned and I needed something to do.
I'm so glad I discovered the world of dollhouses and the people who share the same interest.
It's an amazing world!
Have a nice week
Dorien
Yes, Dorien, it Is an Amazing world!
Deletewooooooo, espectacular, todo un lujo.
ReplyDeleteGracias por mostrarnos el paso a paso, tienes una imaginación asombrosa. Felicidades:-)
Hola Rosa Maria! So nice hear from you and what a lovely compliment! Thank you so very much! I have shown the step by step so that you will be able to see just how easy it is to do! Also, once you get going on it, you don't wish to Stop! I kept looking for More stuff to try out and even when it was all done, I added another little bit to it. It is fun, and as Tatiana mentioned in her comment, completely ONE OF A KIND!
ReplyDeletehave a terrific weekend!
elizabeth
О, да! Камин великолепен! Очень красиво выглядят фигурные детали, прекрасная фактура! Я восхищаюсь этой красотой!!!
ReplyDeleteHello Ludmila! Thank you for enjoying this fireplace tutorial! You are right, is is definitely loaded with Lots and Lots of curly bits and pieces. I was like a kid in the candy store! I would have like to have put on Even MORE but one Has to stop somewhere! heehee With the amount of broken jewelry and beads and chains,.... I could probably make 20 more and Still have stuff left over! So It is a Relief to me to have been able to use a small portion of what I have been collecting for so long. I am glad that you have enjoyed this and hope that you will also enjoy your weekend. Here on the west coast of Canada, it is B.C. Day, so Monday is holiday! Even More time for me to play! Hooray!
ReplyDeleteelizabeth
You're a genius!
ReplyDeleteHello Sognatrice! Not a genius just crafty! Also, if you want to know the truth; cheap! I have an idea in my mind of what I want, but then I don't want to have to pay for it, and then wait for it to come. I have built fireplaces before just never anything so ornate. This took just an evening to build and after the spray painting, it was full steam ahead. So all told it took only 2 days from start to finish. And the cost, other than the ugly earrings which were $3.00 instead of the original $5! ( can you believe it?????) was nominal because I had everything else already waiting
DeleteFast, Fun, Cheap and Easy. What more could a girl ask!?
Thank you for your compliment, Sognatrice, and enjoy your weekend!
elizabeth
I sure do love it. Another fabulous result plucked from your minds eye made from all sorts of random items. Fabulous.
ReplyDeleteHello Sharee! I am delighted that you like this fireplace tutorial! "All Sorts of Random Items" is what we All use, including You! The way that you transformed those pizza box spacers and turned them into actual table legs with ATTITUDE was Wonderful! THAT is thinking outside the box! I think that this piece is made more special because now you can see just how it was done and not just the finished work. It it like a magic act. As Tatiana mentions, what goes into the hat is unrelated stuff and out comes something else and yet if we knew the trick then the wonder of it becomes understandable. I hope that what impresses you the most, is that this is Entirely Doable by anyone who wants to try it.
DeleteHave a great weekend Sharee, and thank you for your Comment and for the Compliment!
elizabeth
It's absolutely gorgeous! I breathed a sigh of relief when you painted it. At first I wasn't sure you were going to paint it--whew! Your fireplace looks incredible, perfect--great work. I LOVE IT! xo Jennifer
ReplyDeleteHeeheehee! I am so glad that you like this tutorial Jennifer and thank you for Loving it! I love it too and I was Holding My Breath too. After that last bit of junk jewelry was applied I had to go on faith that it was going to look Better than what I was looking at that moment. But no sooner did I begin the first coat of white spray paint then I knew it was 'okay' and that it WAS going as I had hoped. That paint changed EVERYTHING! Sometimes you just have to look past the obvious to the possibilities. I am now a Very Happy Crafter!
ReplyDeleteThank you Jen for your visit, and by the way, have you chosen a name yet for your new Shopkeeper? I'm going to stop by agian to see all of your current list of choices, see you then!
elizabeth
Congratulations on your finished piece. It's wonderful. I've been to scared to make my own. So have been looking to purchase ones. Thanks for the idea, I might try and be brave and have a go.
ReplyDeleteHi Indy-Poppy! I know the feeling of being "scared" to try something out. That is just how I am feel whenever I contemplate working on the stairs! The thing about this is, that unlike a staircase, which must be a certain height for the risers and the depth of the step, these fireplaces can be Anything you want! That is what gave me the courage to give it a go after so many years. Looking for an inspiration picture produced several, all really different which showed just how versatile they could be. The thing is if you give it a try, you may really enjoy it and save your dollars for some more Reutter's porcelain to add to your collection, as a reward to yourself. If you don't like it,... well then go ahead and shop, but ""nothing ventured nothing gained".
DeleteThank you for taking the time to comment , Indy-Poppy. I thank you for your compliment and hope that I will soon see a home- made fireplace, from You too!
Enjoy your weekend
elizabeth
Way cool Elizabeth! I can't believe your end results from a bunch of odds and ends.
ReplyDeleteHello, my dear Susan! ISN'T IT GRAND!? I keep taking quick peeks at it, as I sit here at the computer. It has totally surprised me at how well it has turned out and how nice it looks in the bedroom. I am so happy to have Finally put to good use a bit of what has been accumulating over the past year in my "Junk Metals" box. I decided to sort through it after I completed this project and found even more good stuff buried like pirate treasures at the bottom. If I had another room to make one for, I might give it another go sooner than later, but I still have a lot of stuff that needs to be done in both the bedroom and the bathroom and so I shall have to stay focused to stay on task. But this was a Great bit of Fun and I am soooo happy with the way it has finished up and I am Delighted Susan, that you like it too!
DeleteThank you for saying so and by the way, I went on line and had a look at the Rayburn stove that you had mentioned. I only looked at the modern "vintage style" so far and I really like them. I like the way the burner lid is rectangular instead of round like the Aga, which would be a whole lot easier to translate into miniature. I am going to go back to the site for some further investigation, and view some of the other styles. It makes me really want to have a Real Life modern iron stove. I already use cast iron pans and casseroles and I find the heat is the most constant and everything seems to cook better when I use them. I can dream pipe dreams of a real life one OR just make my dreams come true by building one in MINI! ( smiles) and Minis are waaaay cheaper!
Have a great weekend, Susan
elizabeth
I'll bet you spend a lot of time loving that fireplace Elizabeth, I'm always in love the my most recent triumphs ;)
DeleteYessss, it's the square hob cover that I like with the Rayburn, to my mind a more vintage look and also a much larger cooking area than just a couple of round hobs. And, there are good images of the Rayburn logo to put on your oven door :))
Hi Again Susan! I just returned from pinning a photo of your tea cosy to one of my Pinterest boards! Now I am able to admire your works too, Susan! hehheheh
DeleteI have not hit that Rayburn site again as yet, but I certainly shall!
e
The transformation is incredible. It's a real work of art!
ReplyDeletehugs♥,
Caroline
Hello Caroline! I am so happy that you like this Fireplace. I am currently Smitten with it for right now. I will have to move on from it soon enough, but currently am very satisfied with it. Today I am like a cat in the catnip, rolling and rolling in it! Whooopie! Thank you so much for your compliment and your comment; it always makes my day!
ReplyDeleteHave a Great weekend, Caroline!
elizabeth
Elizabeth, this is a work of art. I'm telling you that when you decide to create, nothing stands in your way. What imagination you have! This is such a beautiful piece. It must have given you such a lift when you were finished with it. So many beautiful little details make it so complementary of the Victorian era. No kidding, this is one piece that I will never forget! What a gem you are!
ReplyDeleteHello Lucille! What a wonderful compliment and You are always such an encouragements! Fist off, I would like to Thank You Lucille! You told me a good while back about Aleen's Fast Grab Tacky glue. I saw you mention it again recently on another blog and this time I was determined to get some and try it out. Well..... as you have probably guessed..... I LOVE IT!!!!! It is a great glue and I used it the most when constructing this fireplace, so Hat's Off to You, Lucille. I did sneak in some Quick Grip for just a couple of the plastic bits like the fender and the attachment of the zip strip to the top of the structure but all the rest of the item were with the Fast Grab Tacky. A new favorite! I am so glad that you like this piece Lucille and I can't tell you how much fun it was to construct. Nothing was too difficult or fought back. It went smooth as silk and That in and of itself was a pleasant surprise. I have everything in the mini bedroom freestanding right now. Nothing is glue down and that includes the roof, but everything is in place and ready to go. I have to get the lights threaded through the walls before the final assembly can take place but I needed the fireplace in position before anything else was to be done. Anyway, I shall show you some more progress hopefully by next week, God willing, and meanwhile Thank you for your visit here, Lucille. It is always a great pleasure
ReplyDeleteEnjoy your weekend!
elizabeth
impressionnée, je suis , et même plus que cela. Elizabeth votre cheminée est fabuleuse ! Avec un peu de ceci, un soupçon de cela, un morceau de ... Quelle imagination, et quel regard vous possédez pour arriver à ce magnifique résultat.
ReplyDeleteBonne journée ! rosethé
Bonjour Rosethe'! Thank you! I am so happy that you like this Fireplace project! It was so easy to do, with just a 'dash of this and dash of that' and Voila! .... A fireplace that is made to order and for mere fraction of the price of one at retail!
ReplyDeleteIt is not necessary to even have a lot of junk metal, you just need anything with some interesting textures on it and that can be plastics from model cars or railroads or acrylic , or plastic leaves from the dollar store, toothpicks, stir-sticks etc....
anything at all that can be glued to the surface of the firebox, is usable. As I sit here writing this, I am looking up and Finally, I have found all the little gold cupids that I had searched for earlier and wanted to use for the Bull's eye mirror. They are Pinned to a bulletin board where I would be able to "find them when I needed them" it seems, Rosethe' it Does Not pay to be too organized. Two days later and NOW I see them!
Have a Great weekend
elizabeth
Wow this is wonderful. I love how clever you are and thank you for sharing how it was done.
ReplyDeleteHello Mummyboo! Thank you very much for your comment and the delightful compliment! Susan, ( of microcrochetmad ) once called me "the Queen of Trash" Now I may not be the 'Queen', but I am a little princess; the' Princess of Possibilities' that is. I am not good with wood. That is a fact. But I do know how to get Effects and make them look Effective. Therein lies my strength. And because I can do it, then so could you, Mummyboo (smiles)
DeleteEnjoy!
elizabeth
Your fireplace is wonderful. Thanks for sharing.
ReplyDeleteBye, Faby
Hello Fabiola! I thank you so much for the compliment Faby and trust that you are making the most of your holiday! I wish you lots of fun and relaxation!
DeleteEnjoy!
elizabeth
Hi Elisabeth, your fireplace is stunning work, thank you for sharing the tutorial, it is clear to me. And this also is clear to me: you ARE a very creative woman and not a genius ;) (I always say the same, because it IS!!).
ReplyDeleteYour remark of: make it yourself what you can (like the fireplace) and you can save your money for something you can't make, that fact also is my mainspring to make my own miniatures :D! I love the process of inventing and making miniatures (I guess we think the same about that), that why we are so happy if it succeed what we intended to create. Thanks, dear Elisabeth, for all the comments you left us :D!
I often can't reply on comments, because I can't find the time for it in my busy life and especially because of the translation issues, I am sorry. But know that every comment of you on my blog and other bloggers are very loved by me!
Big hugs, Ilona
Dear Ilona! I shall treasure this comment, Thank You! I am Always enthralled by your skills and your magic touch with the different areas that you explore and conquer. Everything from flowers to fimo toys, china, dolls, clothing, shoes, furniture, etc..... There is Nothing that you haven't done that isn't Superbly crafted and I know that I haven't seen it all. I think that when I see work such as yours, I want to try harder to be better at what I Can do and that is my constant aim within this hobby. Crafting is such a Pleasure and if something turns out right, the Pleasure is Intensified and I want to share it with Everybody. I am often amazed that I have been able to make something, such as this cheap and easy fireplace and how simple it was and yet it doesn't look 'cheap' to me. I am happy that others are liking it as much as I do; it makes me very happy.
DeleteI always appriciate your comments Ilona and they are always cherished by me, So Keep Them Coming! hahah And I am glad that you enjoy my comments on your blog, because I always intend to keep on making them!
elizabeth
Yes!Yes!Yes! Your fireplace looks like a million bucks, Elizabeth. No one is going to believe it cost only $3++ even in mini dollars :).
ReplyDeleteIt is funny how you showed the hole puncher 1st because there's nothing hole punchy about your fireplace :). Isn't it weird how everything has a new meaning for us miniaturists, like the back of a zip tie or plastic casing or "Versace" earring. Tatiana's metaphor of a magic hat is perfect :). And voila , MAGIC! Pure , sweet, miracle, magic :).
My dear, you should pour yourself a congratulatory glass of favourite drink, sit back , read all the accolades here with a Cheshire Cat grin and keep patting yourself on the back for a beautiful, beautiful job.
Ok, I am going to ask a really silly question because it may be clear to all, but I have been scratching my head wondering where the plastic casing went. Was it where the Versace earring was glued on?
Hello my dear Sans! Yes, the plastic casing was installed into the the curve of the top of the opening and after reading your comment, I went back and capitalized the sentence because it was probably unclear to others as well, so thank you for drawing that to my attention. I didn't notice that I was missing a picture until I was previewing the posting and then I amended the text but , I should actually should search for a photo and insert it if I have one because it IS an issue for me too.
ReplyDeleteYou know I never thought that these earring may well be 'VERSACE' ! That would really up-grade this fireplace, wouldn't it! haha I have YOU TO THANK, Sans for the advise about spray-painting and I shall faithfully follow your advise heretofore. Once that white spray paint went on, it was YES! NOW THAT'S WHAT I'M TALKIN ABOUT! I was delighted and send you a thousand and one kisses, Sans! I have since sat back with several cups of tea and just gazed until my eyes glazed over and as Susan said, I have spent a lot of time Lovin this Fireplace! Now time to move on and love something else too! I am getting very close to getting the bedroom completed but just as with you Abandoned House, there is Always just one more thing to do before I think it is ready. But it IS getting there. I love hearing from you Sans and your comments have always either made me laugh or deeply ponder. I am encouraged by your incredible wisdom and your generous personality and honesty and I am very glad that we have found each other through the blogs.
Enjoy your week ahead!
elizabeth
Dear Ms. E,
ReplyDeleteI sat here and tried to craft a new word for how amazing this is but unfortunately I have used up all my "blow my mind words" on the last few post you have made.
I will now use some type of Synesthesia and try to explain how amazing your stuff is with a ..smell color or like the sound of a number 1
*tinkling orange 5*.... alright I may have to work on this more...
Hugs! Amazing.
Hello Jane Smith! You know Jane, I am not to good with shorthand and I am still trying to decipher 'google talk' codes and symbols, so PLEASE don't make it any Harder for me! hahah
DeleteI take it that you like it though, so I am very pleased about that! I know that you have been collecting findings too Jane, so here is yet another way to put them to good use. I Thank you for your Unique and Always Funny comment My Lady, and A ' Tinkling Orange 5', right back to you! hehehe
elizabeth
I love it! I love it! It looks just like something you'd see on Downton Abby. thank you so much for sharing how you did it :) it reminds me of Doctorwho's the lady in the fireplace. I hope you get over your fear of the staircase I'm sure you'll come up with something wonderful and here's some inspiration http://www.youtube.com/watch?v=-Htztc-d514
ReplyDeleteHugs
Marisa :)
Hello Marisa! I now getting hooked on Miss Marple, thanks to you! hahhahI I love the view of from the house of the sea that was featured in the above episode. It was so beautiful! Thank you for liking this fireplace Marisa, and you are probably right in saying that it is" Downton Abby-ish".
ReplyDeleteI am now finding myself slowing down ( again ) after such a furiously intense amount of work, this past week. I think it is time to get out in the garden and hack back some of what has been growing Wild in my absence! Today is another, Glorious Day! Thank you for your comment and the link!
Who is Dr. Who?
elizabeth
Oh My Dear Elizabeth!!!! You have outdone yourself!!! I LOVE LOVE LOVE this fireplace! And the Room it is in... I can already Feel the warm aura!!!! I am SO Impressed with the range of items you used to create the fireplace from scratch!!! WOW, WOW, OMG Amazing Awesome WOW!!! And the color and patina of the old fireplace is just Gorgeous!!! I want to move in Now!!! LOL!!! I LOVE your work!!!
ReplyDeleteHello Betsy!!! I was hoping that I would hear from you! Thank you for your Most Welcomed comment and your observation on the tiny bit of the bedroom! I recall that you have used this technique on YOUR marvelous bedroom ceiling in your Fantastic, smaller than small, Tree House, and so this must be as familiar to you, Betsy, as it is to Liduina, with her faux iron beds. Your Ceiling was made to look ornately carved and then gilded and you added bits and pieces to the base and built it up until you were satisfied. I have done the same, only on a fireplace! I chose the color to compliment the walls and I hope to have them ready to show soon. Right now everything is held together with masking tape and is waiting... and waiting ... and waiting, ... for me to GET ON WITH IT! hahah The wall color in the bedroom is really pretty ( if I do say so myself , smiles ) and there is a story to tell about it too. But I shall have to wait on that and keep you a in suspense for just a little while longer. Meanwhile, Betsy dear, I am so happy that you have enjoyed your visit here and I always enjoy reading what you have to say! Usually right afterwards, I am all fired up to do some more! It seems that we both belong to the world famous MUTUAL ADMIRATION SOCIETY! I hear that it's membership is very Enthusiastic!
ReplyDeleteelizabeth
Incredible work. You have a wonderful 'eye' for spotting the potential in 'junk' - I would love a tenth of your talent. Even with that magical gift you still have to work to make the creation so... many congratulations and well 'dones' on a beautiful piece of work. It is quite amusing and exciting to scroll through the post and looking at the pictures of the fireplace in its early stages and thinking - nah! don't think so. Especially when I hit the OTT glitzy photo and then sheer transformation into a perfectly sized Victorian fireplace - how incredibly clever you are with paint.
ReplyDeleteHello Em! Thank you so much for the compliment! I have to admit, I Do have an 'eye for junk"! I LOVE it so! I can never seem to get Enough and therefore I must have a way to justify buying it so often. haha I think that Paint is such a blessing and with the fireplace, I too, was somewhat dubious whilst the fireplace was in its raw state. Then Paint came to the rescue and I was delighted to see how a 'boo', turned into a BOOYA! I am glad that you think so now,too!
Deleteelizabeth
Hello Elizabeth,
ReplyDeleteInspired! This was a real tour de force and the finished fireplace is exquisite! I just love all the detail you added on an it looks incredible painted. This is really very high end work my dear Elizabeth...why you sometimes doubt your skills and talent is a mystery to me, right up there with the caramilk secret! Incredible work Elizabeth, you are such an exciting artist to follow.
Big hug,
Giac
Hello Giac! I am so happy that you like this fireplace project, my friend! It was a whole lot of fun to do and I would love to do another again, before I forget how! Ha! Thank you for the comment about being an artist; I use to paint a long time ago but that was since replaced by this hobby but I have not thought about that 'title' until you mentioned it here. It is a good feeling to think of this project on the Arthur in that way! I appreciate it Very Much!
DeleteBig Hugs Back!
elizabeth
Oh, I love it! You have a great eye for findings. Yes, it did look a little bit "busy" before paint, with the different colors and styles, but somehow also very beautiful. But after you finished the painting, it's absolutely perfect for that room!
ReplyDeleteThank you very much Evelyne! I am so happy that you like it! I published the photos so that other people could see that there is always " Potential in the ugly" I was just as pleased as everyone else at the way this finished up and so it was an adventure for me as well. I suppose that is one of the great pleasures in working in this hobby. That even though one may be behind the wheel, the final project can be directing you down a different road and then you find yourself NOT where you thought you were headed but somewhere else that is even BETTER!
Deleteelizabeth
Un trabajo fabuloso, me encanta es una maravilla, gran resultado.
ReplyDeleteUn abrazo.
Yolanda
Hola Yolanda! Thank you for your comment and I am so happy that you have enjoyed the results of finished Fireplace Project! It was so much fun to do and as you can see, you are able to use whatever is at hand to make something similar. All you need is some JUNK!
ReplyDeleteelizabeth
Wow Elizabeth,
ReplyDeleteYour fireplace came out beautifully. I actually liked it just about
any way you did it, it was gorgeous white too. But it looks more
King Arthurish looking with the finished product. Wow, that was a lot
of painting to get that neat outcome. That take lots of patience.
Can't wait to see the rest............
Hope you are having fun playing!! lol
Blessings, nellie
Hi Nellie! Your comment made me smile because I remember when I started spraying it white I loved it! I was amazed at how the paint unified it all, plus it looked so 'pure'. Then when I painted it the sky blue I liked the effect of the serenity and the clam and the beauty of how the blue transformed it. I was a tiny bit sad that I had to age it and make it dirty looking but there was no other option. In order for it to blend in with the surroundings it had to be minimized and look as old and well-loved as everything else. It was a Sacrifice of the Purity one thing to benefit the Outcome and the Unity of the Whole. Thank you for your wonderful compliment Nellie! I am so glad that you have paid me this visit.
Deleteelizabeth
I think this is just SO clever! It's just perfect for the bedroom. I'm going to have to increase my stash of bits, definitely. What can be created with a bit of imagination and small bits of stuff is inspirational - I love it!
ReplyDeleteHi Irene! Thank you! I am delighted that you have enjoyed this post and I have to say it was a lot of fun for me to do as well. It was a way of re- teaching myself a skill that I had not used for such a long time and yet having the nerve to use so many different elements was something that I had never done before!
ReplyDeleteIt was a good way to use up some of the 'odds and sods' that had been waiting for something useful to do. and They had been waiting for a very long time!
elizabeth
I most certainly do! a wonderful Victorian fireplace - no-one would ever guess what it is made from. Fantastic!
ReplyDeleteHi Sandra! I am so glad that you like this fireplace; Thank you! It has now become a Favorite project of mine ! It is the first time that I have tried anything so 'over the top' elaborate! What fun!... No rules! ... Just Play!
ReplyDeleteelizabeth
what's a good idea, thank you
ReplyDeleteHello Claude! I am glad that you think so and I have to say that this project was a total indulgence for me! I had so much fun experimenting and playing with the components. Nothing was off limits as far as ornamentation. What freedom to use anything and everything. I encourage you to try it too, and see!
ReplyDeleteelizabeth
This comment has been removed by a blog administrator.
ReplyDeleteOh Daphne!!! Please forgive me as I accidentally deleted your warm and lovely comment by not paying attention to what I was doing!
DeleteWhaaaaaa!!!! :(
But I shall THANK YOU anyway and say that I am so glad that you liked it so much. :D I had a lot of satisfaction putting it together and it is now the focal point of the bedroom. I never get tired of looking at it whether the fire is blazing or the embers cold.
Once again Thank you for your enthusiastic comment, I REALLY DID APPRECIATE IT :))
elizabeth
Hi Elizabeth,
ReplyDeleteI wanted to thank you for posting this wonderful tutorial! I read through it and embarked on my own mini adventure and made the perfect fireplace for my dollhouse. So much fun! If you would like to take a peek here is the link.
http://naturessoulminiatures.blogspot.com/
One thing I have always loved about this hobby is the generosity of people who share their experience and knowledge. It makes it so much fun for so many. :)
~Auralea
Hi Auralea! Thank You for your Most Welcomed comment and your lovely compliment! :)) It really pleases me when people are able to use my tutorial information towards making miniatures for themselves. I use lots of other peoples tutorials to help me with what I do, and so it is just Paying It Forward. Your tutorial and how You Made Your Fireplace was most informative, well presented and Your Fireplace looks Great!!!! ( the gathering up of possible things to use for the relief decoration took me a while too)
DeleteYou are soooo right about the generosity within this hobby Auralea; and that is what makes this hobby More Fun for me too! :D
elizabeth
Un resultado fantástico.
ReplyDeleteFeliz Navidad
Un abrazo
Maite
Thank You So Much, Maite! I am Delighted that you like the end results! :D
ReplyDeleteI wish you a Very Merry Christmas, and a Happy New Year too! :D
elizabeth
Hello Elizabeth. I wanted to tell you that I have been following your blog and admiring your work since I first got on Pinterest. That is where I found you. Your little parlour on Green Dolphin St. Is my all time favorite room of the thousands of mini rooms I have viewed so far. I love this little fire place as I love everything else in the room. There's that chair! That gorgeous chair in front of the dresser and painting. Probably my favorite vignette. I'm in the process of building a stone cottage after Rose Hill and there are three fireplaces. One is massive and stone, one is concrete and the one upstairs in the bedroom is...I just don't know. I was thinking a fireplace the size and shape of yours would do nicely. I was wondering if you would so kindly share just the dimensions? I would be very grateful if you would. I'm looking forward to your future projects. Your blog is one of the most interesting and fun to read of any I've seen. Looking forward to hearing from you. Thanks for sharing your projects with the rest of us in mini world.
ReplyDeleteHi Susan! Let me begin by saying that this is probably one of the NICEST compliments that I have ever received so THANK YOU Very Much! :D I happen to love this house and it gives me Great Satisfaction to know that it has struck a note within you too. :))
ReplyDeleteAs far as the measurements for both of the fireplaces they are as follows:
For the BEDROOM fireplace -
4 1/2 inches high
3/4 inches deep
2 1/2 inches wide (with the mantle being wider at 3 1/8 inches)
the LIVING ROOM ( Bespac) fireplace -
4 inches high
1 1/2 inches deep
3 1/2 inches wide ( with the mantle being the widest at 4 inches)
hope this information will help you out. I have been collecting images
( see: elizabeth slinn Fire- places on pinterest ) where you may find more ideas and inspiration to help create something extra special for your miniature bedroom.
Have Fun!!! :D
elizabeth
I just so happen to follow all of your boards on Pinterest and I have for awhile. I believe you are also following one or so of mine. lol It's a "small" world. I just have to say my favorite board is the mini stoves. Just love mini stoves. I've found the one I want for my cottage and just have to save up some cash. I've gotten ahead of you and figured out my fireplace dimensions by guessing from your photos. My dimensions turned out to be exactly the same as yours except mine is one and a half inches deep. How's that for great minds thinking alike? I'm wondering now if I should shave mine down a bit? I've had to build two massive fireplaces already for my cottage and not used to thinking smaller yet. My room is bigger than the Green Dolphin St. parlour so I have some wiggle room. I thought I needed all that depth but I see now it is too deep. I think one inch will do it. I was forgetting about the mantel. I don't want a humongous mantel sticking out into the room. I have a wild passion for bees so I'm going to put a bee on mine instead of the typical lion's head. I think Roses and Bees are a good combination. :) It was kind and generous of you to answer me so quickly. I am a huge fan and you are my inspiration. I would like to sip a cup of tea in the parlour on Green Dolphin St. I feel like I've been there many times already. Just have to mention also that I thought your solution for the little bed was just genius. Using that ball chain brilliant! No other word for it. The coverlet looks like chenille and the whole room is as cozy as it gets. Thanks again. Wonderful to chat with you. <3
ReplyDeleteYIPEEE!!!! I am soooo Happy that you have found the stove that you are looking for with regard to your cottage AND that you've worked out the dimensions for your bedroom fireplace! As no two spaces are ever exactly the same, I believe that the size and shape of a fireplace should be determined according to the wall it is placed against as well as what will be above it, on either side of it and what will be directly in front of it, which also factors in and includes the hearth. The fireplace in #43 had to be tall and narrow, not only because of the lack of wall space, but also because I knew that a bigger firebox meant a bigger hearth, which meant that proportionately, more floor space would be required. I felt that I had to have a "visually reasonable" distance between the hearth and the area rug and the chest of drawers which were the closest items to it. It is STILL really tight squeeze, however it appears to be
ReplyDelete"visually legal" with the rug and the chest of drawers seemingly out of harms way. :D I am glad to hear that you have more "wiggle room in your cottage" than I have, as every inch is as precious as gold in a small house, but don't you just LOVE compact and cozy cottages? :)) I looked for photos of your project on your Google plus without success but found your Pinterest boards and discovered your cottage there. I haven't had enough to time to go through everything as yet, but I am looking forward to exploring all of your boards tonight. From what I have gathered, you and I share a passion for crafting. :D What is the name of your cottage? Is it called the Rose and Bee? Speaking of bees, my friend Janine has a passion for bees too, and has used the motif in the Napoleonic bedroom of her French doll's house. ( see Minworks blog) and has 3 active bee skeps in her Real Life garden. Whenever I'm there to visit, I get the chance to see them hard at work and busy amongst her flower and vegetable beds, they are Fascinating to observe.
Thank you for your warm compliments Susan, and I look forward to learning more about your doll's house project as I am now an official FOLLOWER of the greater majority of your boards.
And please feel free to inquire about anything which you may need further clarification on. One of the reasons that I blog is so that I am able to remember what I did, long after I've done it, but sometimes I prefer to write it in my 'Recipe Book" so if you don't see it Here, I may have the answer There! :D
elizabeth
I got your notification from google but I don't know how to use that. I clicked "Follow" I hope that's right? I'm kind of a computer ditz. I don't know what happens now.
ReplyDeleteI fell in love with "Rose Hill" cottage from the movie "The Holiday" many, many years ago. Two women having man problems decide to get away from it all and they exchange houses for a holiday. One is an English cottage and one is a modern house in L.A. The house in L.A. doesn't do a thing for me but I have always wanted to live in that stone cottage. I've never realized that dream so I decided to build a mini and play let's pretend. The outside is quite close to the real thing but I'm taking liberties with the inside and pretending I bought Ivy's cottage and did some renos. There will be a small front garden with yellow, white and pink roses and the inside is carrying on the rose theme with the papers and colours. I'm almost finished the first floor with only a few little trims to do and I'm laying the hardwood for the second floor right now. I built everything from scratch because my first and last experience with a kit was not a good one. I was building the Greenleaf Lily and got 3/4 through and decided it was not for me so I sold it as it was. The lady who bought it was more than happy to finish it off.It was a terrific learning experience for me because it presented so many problems with pieces falling apart or not fitting and how to solve it all. It was frustrating in the extreme and I was just not happy doing it.The only other doll house was one I made for my sister about 40 years ago when she was 6.
I have done just about every craft. I'm teaching myself to be a fair water colour painter and I love doing mixed media. I designed and sold jewellery for about 12 years and got really tired of it. All those supplies are coming in very handy for my new and revived mini passion. I have only a few miniatures so I am keen to make and buy some to fill Rose Hill. I noticed on your board with the tables and chairs that you have pinned the exact set I want for my cottage. I clicked love. I won't be able to afford $30. per chair so I will attempt to make my own.
Anyway Elizabeth, I have blathered on enough for now. I have some errands to run so better get them done. I'm curious about that notification and what happens though. Does it mean I will see when you post something? Just so great to chat away with you. I could talk about minis all day long I think. Sus xo
I forgot to mention in all of the above that the reason I thought I could build a stone cottage in the first place is because you did. :)
ReplyDelete:D !!!
DeleteGreat project. I am looking for fireplace ideas and this project is very inspirational! Great work - Troy
ReplyDeleteHi Troy! Thank you for the compliment! I remember enjoying the making of this fireplace, so I am certain that you will too! :D
ReplyDeleteelizabeth