Saturday 27 June 2015

What's in A Name? .... #The HBS Denise Kit


 I was born in the U.S.A. 

My mother was born in Canada. 
Back then... Canada was still called a Dominion and tightly linked into the British Commonwealth.  Perhaps that explains why my mom was (and still is), Fascinated by the British Monarchy and chose to name me after Queen Elizabeth II while she was still a princess.  As a young girl, my mother wrote a poem to commemorate the Princess Elizabeth on the eve of her marriage to Prince Philip which she then mailed to Buckingham Palace, and when she received a "Thank You" letter from the princess via the royal secretary, she was over the moon!
Her poem and the Thank You letter, were published in the local newspaper along with my mother's photo. She was so proud of both events that she named me "Elizabeth" after 
her Royal Highness.
Thanks mom!
:D
I think that Names are important too.

I am not sure why this kit is named "Denise"but I knew that I was going to have to give it a new name
BEFORE 

I began working on it.
Finding a suitable name whether it is for a child, a business, a book, a blog, a perfume, a pet, an event, etc., can be quite a challenge.
The name I was looking for needed to have a reference to the sea, as the photo of the cottage on the box looked to me like half of the hull of a ship.  It was to be American so that I could finally use my Americana painted furniture which I have been saving.
The name also had to be one that I would not get tired of repeating, so nothing too long like  
#43 Green Dolphin Street!
I tried out several names as I  cleaned my house in preparation for our next Miniteers Meeting
Last Tuesday Janine, Linda, and Fatima a.k.a. "The Miniteers" came over for a light lunch  and we had a great time eating, gabbing and exchanging gifts.  The sun was shining and our spirits where high. Time sped by far too quickly and was so much of fun. Towards the end of our visit they asked me about my next project, and did I have an idea yet of what I wanted to do?
It had taken me 4 days to come up with a working title, and I thought I would try it out on the group to see what they thought.  
Here is the name I presented. 
LAND'S END
"I was thinking that it is a cottage on the eastern seaboard of the U.S.A."
  then Linda said that it is the name of a place in Cornwall England!
Land's End (CornishPenn an Wlas or Pedn an Wlas)[1] is a headland and holiday complex in western Cornwall, England. It is the most westerly point of mainland Cornwall and England, is within the Penwith peninsula and is about eight miles (13 km) west-south-west of Penzance at the starting and finishing point of the A30 road.[2]
Perfect!
a British connection

Mother will be pleased!
:D 

And so
THE VERY NEXT DAY 
I opened up the HBS KIT for the first time. 


"Houston, we have a problem"
 It appears that I will need power tools to make any major structural alterations to the kit. 

*sigh*
I don't do power tools-
I can barely work with a craft knife!
Okay,... 
 that mean that I must try and work
 INSIDE THE BOX 

 I loosely assembled the kit to see what 
"Land's End" will eventually look like
I used cardstock to map out the interior walls and found some french doors in my stash and started moving them around until I found a floorplan that could work.
 To get a sense of the space and how best to organize it, I dressed the space right from the start.  I decided to make the narrow end the end a window wall using the kit's sliding doors.
Janine's Real Life home, aptly named "Becalmed Cottage" has a wall of windows that looks straight out onto the water of Boundary Bay... What a Lucky Duck!

This will be my cottage by the water.

The living room and the dining room are open to each other. There will be a step up into the kitchenette.
*Yes, another tiny kitchen*

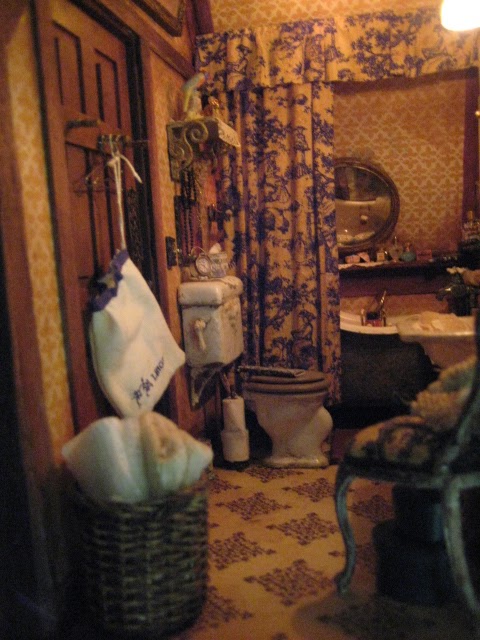
The view is into the kitchen, however the back wall with the window is where I hope to install the bathroom.   

The glass doors which looks out towards the water
calls for a wrap around deck filled with potted plants.
That will be fun! 
One of the kit windows will go in the kitchen where the owner will have a view and lots of light. 

Since the dining area will be right in front of the deck doors, I needed enough room around the furniture to still allow easy access to the deck and into the living room. I auditioned different table shapes, benches and/or chairs but settled on the round bistro table with bentwood chairs that I purchased 2 years ago from Victoria Miniland. 
Once I got started choosing furniture the fun began. 
  Furniture and accessories that have been in storage for over a decade, were set up to work out a traffic pattern as well as coax out personality and a direction for my cottage.
 guess what?
I HAVE LOTS OF STUFF!
 I didn't realize the entire volume of it until I actually got going. 
I have been collecting not only painted furniture but also lots of toys.
 I want to use as much of my Americana /
Nautical collection as I can, as well as include a wee bit of British as a nod to the crown .
 I loaded up the space with everything that I thought would work but later as the rooms takes shape, I will edit out the excess.    
F.Y.I.  the blue hydrangeas in the fireplace, were a recent gift from Fatima
and there is Lidi's basket right beside it! whoohoo!
The sailing ship on the dining table was freed from a 'ship in a bottle' display that I found waiting for me at the thrift store. I think that the flag on the sail is Australian.  I will have to verify that later with either Linda or Janine.

This toile sofa which will be include, was a lovely surprise gift from Janine during the 2015 Seattle Show we attended last March.   It makes itself right at home here.
A lady named Robin made me the country rabbit back in the 1990's. 
Last month, I had received from Linda, an adorable yellow rain slicker and a matching Sou'wester hat. 
They too will be destined for the interior of
Land's End


In the bedroom, I hope to be able to FINALLY
use my Uncle Sam doll ( artist unknown) which I purchased over a decade ago.

The American Flag (which is soon to become a miniature pillow) was clipped from a Ralph Lauren T-shirt which I bought several months ago at the thrift store.
oh.... I have so many plans!  

the wardrobe came from my "At Home By the Sea" Glencroft  but It will serve here as the closet.

After playing with the furnishing for hours, I switched out the  modern sliding doors for the French doors.
They look more Traditional and I am rather partial to Traditional

However the final decision on that will have to wait.

 I think I have figured out enough to actually get started. 

Here's is an overview of my future plans for the
HBS Denise Kit
And Yes.... it's a Mess!

From this point, working backwards, I will take Everything out and permanently assemble the cottage.
Then I will have to prime it and install the interior walls as well as work out the lighting.  

I know that I have a whole lot of catching up to do, but I shall be bringing you progress reports all along the way

LAND'S END 
officially begins now
and
God Save the Queen!


elizabeth

Wednesday 10 June 2015

House and Garden: the end

"Strangers and pilgrims on the earth... seek a country. And truly, if they had been mindful of that country from whence they came out, they might have had opportunity to have returned. But now they desire a better country, that is an heavenly: wherefore God is not ashamed to be called their God for he hath prepared for them a city" 
 Letter to the Hebrews quoted from the Bible, and the opening paragraph from the novel 
                                            GREEN DOLPHIN STREET 
Part 1: MARIANNE.... 


The story of this doll's house has been a long, round-about  journey.  It started by my trying to capture the kinship that I have always felt toward Marinane Patourel, the main character of the book Green Dolphin Street.  
In the story she ages from a practical, headstrong, manipulating, determined, very intelligent young girl to a proud, bossy, self-motivated, single-minded, manipulating but frustrated old woman who(among other things) fights against the  prescribed life of a Victorian woman living in a man's world; and wins!
It came with a price.
However there were times in her life when she made a conscious effort to take her hand off of the rudder to "Let Go and Let God".  Her road to redemption was a difficult battle and she loses much along the way only to find that what she had been scratching and clawing for was there waiting to come to her could she but lay aside her constant planning and scheming, to receive it. Her obstinacy and strength of character is what I love most about her, as well as her resourcefulness in knowing her own worth.  
Originally,I had the idea that I could harness some of her story into this Arthur dollhouse kit and interpret the love I have for this woman's journey, into miniature.
But somewhere along the way, the house took on a life of its own. And although I may have begun this project with Marianne in mind, the house decided that it had its own story to tell. 

Beginning with the post "Poor Arthur" this project has had almost as many obstacles and set-backs as Marianne encountered. You can still read about them if you haven't done so already, but I want to conclude this tale so I shall try now to be as brief as possible.

   After working and re-working the interior of the cottage at #43, I needed to finish the garden in time for its entry into the West Coast Miniature Show which was held this past Sunday, June 8th.   
Now that the show is over and today with the beautiful weather, I took the cottage outside to take pictures of the mini garden in the sunshine of my REAL Life Garden.  Some of the photos are not as sharp as I wanted but you can still see everything there is to see.   I hope that you will enjoy my efforts and my quick review of the finished house and garden of 
#43 Green Dolphin Street. 

The Garden


I am going to begin the tour with
"THE THIRD SIDE"
(the left wall of the cottage)
because that is the one side I have never posted about.  This is because of some problems that I encountered as I was building it which caused me to stop work and then pick it back up again several weeks later.  By then I had a better understanding of what I needed to do and so here goes... 


The first thing that I did was to build out the chimney. The shape was cut from doubled pink foam board insulation.  I secured it to the side of the house after I had sealed off the electrical connections with masking tape and glue.  Then using torn pieces of egg carton and heavy pressed paper, I layered the stone shapes onto the chimney building up the texture until I was satisfied and then carrying it over onto the walls on either side.  The finished stone was then coated with wood glue to seal it.  When it was dry the entire surface was coated with drywall putty and smoothed out with a dry (not wet) sponge, and painted and aged over and over and over....  
When that was done, the development of the garden of the 3rd side could begin.  
I made a drain and a water tap which sits in the corner of the chimney.  Above the drain I needed to add a light so I modified an cheap lantern that I had, so that it wouldn't be so dark.  I affixed a piece of plastic "iron" railing to the stone and used it to hang garden tools.  There is very little room back here however I did want it to look like it was used  regularly, so I placed a short  row of juniper trees at the end of this stretch, along with some flower pots of spilled soil, a garden hose, a potted shrub, a garden fork, a hosta and a 
wheel barrow. 
Here are the pots and the hose
and the tap over the drain which holds "standing water" a few "inches" below the grate. 
The climbing plant was made of 4 fake Christmas gift embellishments ( found at the dollar store), which I twisted together and glued and pressed onto the surface of the chimney.  
I wanted something without flowers because there was so much going on at the front of the house that any more color would be too much!  I have to say that I am very happy with the look of it! I even made two spider webs that are strung within the foliage. 


The climbing plant winds it way right up to the bathroom window.  I added a guard rail for the protection of the items resting on the window sill.
The metal arbor (which was a cut-down metal basket, 
(courtesy of my friend Dave, (a.k.a. "Super Dave!") which was then spray-painted black), is covered with a clematis vine and perched amid its blossoms is a pretty little yellow bird which was a gift from my dear friend
Bettie Smith. 
On the garden path under the arbor, grows self-seeding campanula
Gazing down the left side, is the view from the front of the garden looking towards the back. and featuring a birdbath from Bettie Smith
The front left corner of the garden
The reworked climbing rose entwined with purple clematis, towers over the parlor window.

One of the most difficult things to make for this cottage was a believable looking lawn.  After removing the paving stones which I had already installed (see Studio E: "Night Gardening"),
 I replaced them with grass which I felt was more "English" looking.  The lawn was made with a number of different techniques using railroad model materials and flocking that I kept adding to and subtracting from until I got this.
 There is not a lot of lawn; but there is enough! 
 

 This is the long view of the front garden which growing against the old cement supporting wall.  There is a mix of campanula, silver grasses, hosta, chives, lilies, iris, and Fatima's fabulous, fat and fragrant white peonies are at the far end of the row!
Foxgloves were made from preserved heather
Under the parlor window grow, white daisies, euphorbia 
(the Miniature Garden kit),
 foxglove and Japanese Berberis, chives, heather, with a holly tree to the far right.
Daisies are from both real dried flowers and from paper and 
if you look closely you will see a tiny bee on one of them!
Another overview of the left side of the garden in dappled shade
and below, in the sun! 
 Outside the garden wall, you will see a large patch of Russian sage, a few allium,  a large New Zealand Flax, a clematis cascading through the old metal rail and over the warm stone and some orange day lilies just under the birdbath. The bird bath is shaded by a small tree which protects a tiny wren splashing about in a puddle of water. 
As I was taking photos of this section of the front garden, I tiny hover fly zipped up and out of the flowers of my Real Campanulas, blooming close by, and seriously checked out my Faux Clematis, spilling over the mini garden wall. 
For me- There could be no greater compliment than THAT!
Russian sage
New Zealand Flax and day lilies
And my mini Iris flowers which are nearly done, were preserved from Real life Fading Spanish Bluebells.  I think that they represent dying iris stems quite well, don't you? 


THE RIGHT SIDE OF THE FRONT GARDEN

The right side of the garden was amended too!
I decided to install a stone seat for my bee skep to rest upon right under the kitchen window and I moved the red rose from its original position which had been next to the front door, over to the corner of my new stone wall.  My daughter Sam later said to me,
" I guess that means that the lady will never get to open her kitchen window will she? Because in will come the bees!" 
I suppose that would be true.  But I like the skep better where it is now than where it use to be located.  So There... Sam, the kitchen will always be stuffy!   
I made the white viburnum to drape over the stone seat and creep up under the red rose. I moved the tall evergreen cedar that use to be positioned by the front gate, next to the front door.  Blue delphinium are sandwiched between the cedar and the stone seat and the last of the Bugleweed is still going strong at it's feet. 
Along the front retaining wall grows dill, Allium, bee balm, yarrow, peonies, Love- in- a- mist, and annual geraniums.
The bee balm with a Monarch butterfly
I wish that I could remember the name of this palm- like plant but I don't.  It grow in my Real Life Garden and it is HUGE!  
Fortunately it is still of a manageable size for this mini garden.
Allium and Yarrow in the foreground and at the front door is  an iron urn of Purple Heart to the left of the cedar
 An aerial view which shows my Seattle Show garden trug filled with cut peonies, garden shears, and a seed packet.  An old folding metal garden chair, hosts a vintage sprayer,  a garden fork and a seedling plant in a small pot
This view shows a purple flowering grass, a miniature rose,  New Zealand Flax, and marigolds.  
It was with a nod to the book Green Dolphin Street that I decided to add the New Zealand Flax which pays tribute to the adventure of  Marianne and her husband William as early pioneers of that untamed land. 
A view of the red geraniums, Love-in-a-mist, pink Peonies and a iron urn situated in the center of it all, filled with  more Purple Heart 
The RIGHT WAll OF THE GARDEN

 I made a low stone side wall for the garden so that I could contain it.
Of course, then the neighborhood Cat, must use it for prowling about on!  I certainly hope that he is not looking for 
Mr. Rabbit!!!?
This is the first side of the house that I began the stonework on well over a year ago, but wouldn't you know I ended having to redo it, so that the FIRST SIDE became the LAST SIDE!  The reason was because having left such a long gap between completing each wall, they all looked different from each other.  So the front of the house and the First side were given a make-over at the same time that I was doing the 3rd side of the cottage.   When the right side was ready again, I built out a  small stone wall using styrofoam and masking tape covered with egg carton stone and lots of sand and wall putty.  Then I  made a "tin" planter box which I filled with flowers to dress the small side window, I fashioned a juniper hedge for additional wall cover, plus another climbing plant to scale the wall, as well as the weeds to dress the base of the house.  Lastly I installed the gas meter and added the rabbit.
The right side of the house with the red rose to the left of the window box
the gas meter and a cautious Mr. Rabbit
I made a climbing plant to creep up the wall and around the upstairs hall window so that it would draw the eye and  frame the Beautiful rose painting by Catherine 
( Ninette and co. blog). 
 She had painted this Beautiful little masterpiece especially for
 #43 Green Dolphin Street!  
Thank You once again Catherine! :D
See how the vine frames the window and Catherine's Rose painting! 


Up on The Roof
A number of people at the West Coast Miniature Show asked me about how I made the roof shingles.  I referred them back to my blog post "IN OVER MY HEAD & my mis-adventures with drainage" but it was gratifying that what I had thought were my "poor man's tiles" were so greatly appreciated! Anyway, the chimney stack was made after the rest of the chimney had been installed so that I could line it up properly to make it look like it was all a single unit.  It too, is doubled pink insulation board wrapped with masking tape and coated with wood glue and more paper stone.  I coated the surface with wall putty and more glue and more paint.  I aged it and made the top to support two ceramic smoke stacks which were salvaged from old knob and tube wiring from a home renovation done in the late1980's.  I made the billows of  smoke with cotton stained with black gel paint and hair spray to stiffen it and placed seagulls on the chimney and flying over head.  My friend Dave said that I should have lots of bird droppings on the slate tiles because this house is suppose to be close to the sea.  I obliged but I kinda went overboard.  Then my daughter told me that there was TOO MUCH POOP on the roof!!!! 
hmmm?
So then I had to try and paint most of the poop out again.
You can get a better look at some of what is left of the bird droppings in the photos below  


And Just for fun I added a Weather Vane, because I have had it for YEARS AND YEARS and I was tired of repetedly moving and losing it. 
So that concludes the entire exterior tour of the cottage 
BUT 
there is still more to come.... because 
although I was NOT going to bore you with yet another trip inside the house, I've decided that this would be 
the LAST FAREWELL.  
I have made a few adjustment inside which you might as well
see before I put this house away. 

The PARLOR


Janine's (Minworks blog) orange roses, still grace the tea table
and Catherine's (Ninette and co. blog) gift of the lovely glazed lidded jar is displayed under the light of table lamp on the writing desk and everything still looks much the same except for the adjustment to the length of the bookshelf.
  I removed the lower drawers from the shelf which shaved off a good half inch.
It just looked too long above Fatima's vintage radio and I didn't need the drawers anymore. Now the shelf is visually balanced with both the radio and the sewing chest.


IN THE KITCHEN
I received LOTS of positive feedback at the West Coast Miniature Show about this cottage kitchen.  In the kitchen I have changed the curtains to two cotton panels with a ruffled valance which is consistent with the parlor and the bed and bathroom fabric treatments.  It still astounds me just how much stuff I managed to incorporate into this tiny interior. 
Personally, I can't say enough about Faima's Beauminis onions and garlic ropes and Linda Park's ( Linda's Mini World blog) gift of the sexy black nylons that look Perfect hanging over the kitchen clothes line ! 
Thank You Ladies! :D


And Jane Smith's (Minifanticus blog)  basket of wild mushrooms came my way through a mini trade, and now sit by the old gas stove. Under the sink is a bucket with Linda Park's  yellow rubber washing up gloves inside.

"The SUICIDE STAIRS"

so christened by Marisa (Steinworks blog)
and the nickname has stuck!
hahahha! Thanks Marisa!!!! :D 


                       THE BEDCHAMBER
In the bedroom the central overhead light stopped working!?
 BUT WHY?!!!!
I was not very "happy about that" and it was only a week before The Show! 
SO, Rather than tearing everything apart, I ordered an LED picture light for the bed enclosure,  from
VICTORIA MINILAND
Super fast service and they pre-tested the lamp before they sent it to me, which I Really Appreciated! 

It installs with a thin magnet glued to the wall.   Then you flick the switch and
 Voila!!! Let there be Light! :D


The BATHROOM

Jonquil's wonderful hand-embroidered Laundry bags hangs from the bathroom door
 and below is the laundry bag with a surprise gift from a dear lady named Dena who came up from Seattle for The Vancouver Show.  She and I have been corresponding for the last 2 years about our love for Jesus, our families and of course, about miniatures. 
It was such a pleasure to meet her in person and she blessed me with a number of tiny treasures among which was the perfect little shower cap which I immediately installed on the bathroom door during the show.  The shower cap is actually sewn with elastic thread and stretches open! 
Here though, is what I found the most interesting.  On Saturday, the day before the show, I was driving to pick up the last of the things I needed for the show, i.e. more receipts books, a float etc. and as I was driving it flashed into my head that I should have a shower cap for the bathroom door. 
However, I later forgot all about it as I was so far behind and I was far too busy, just trying to get everything else finished before Sunday morning dawned.
Then I meet Dena at the show and she gives me this lovely little treasure, out of the blue! 
God works in mysterious ways!

Thank You Very Much Dena! 
:D


During an earlier get-together at Janine's house last month, I was presented with another little gift from Linda Park, this special little china bird!  
(I have a thing for china birds and I bought one while at the West Coast show) 
This one looks content perched on the vanity shelf over the bathroom toilet.
It is so nice to have friends both near and far that helped to contribute to the completion of this english cottage.

Janine's lace bra still hangs over the edge of the vintage sink, sharing the space with 2 tiny bottles of Chanel # 5, the eau de parfum and the eau de toilette, which I made a number of years ago.


This wonderful little pot of African Violets came from
Bren's Miniature Pottery
and the soap box was a gift from Norma of

 Make Mine Mini blog 
via Linda Park 
Again a Big Hug to you all!
There were so many Wonderful contributions from different people from all over the world, during the 2 1/2 years of construction and destruction.  Most of which will always remain unseen because it was through the constant ENCOURAGEMENT and the ENTHUSIASM that has come to me via your comments and observations about the progression of this house.  I can't THANK ALL OF YOU ENOUGH for your feedback!   
I like to think of this as a home that all of you are 
WELCOMED INTO 
at any time. 
And I would like to take this opportunity to acknowledge the Fabulous works of some miniaturist that also became a part of this cottage.  I haven't included the photos of their work here but they can be easily discovered in past Green Dolphin Street posts.

Magda of 17-17 blog  sent me a Metronome which I won from her Giveaway which now sits on the sideboard in the parlor.
Jennifer of Plushpussycat sent me a heart-shaped cookie cutter (among many other yummy things) which also were part of her blog Giveaway that I won, and it is in the kitchen in a bowl sitting on the scale. 
Incredible Needlepoint cushions  in the parlor are from my 
dear friend Pamela Grant, 
with whom I got another opportunity to chat with during the show!
Thank You Pam for these Valued Treasures!
And Janine's husband Bruce who still gives me pointers and critiques my photos, which always means so much to me.
In conclusion:
This house and garden was a roller coaster ride of ups and downs 
But
  I wouldn't trade a minute of it!
 And I've learned a lot of new techniques along the way, which is always a good thing, and I am "happy about that!" :D
 I hope that you have enjoyed this Grand Finale posting of...
#43 Green Dolphin Street
***
"Now there's absolute truth between the three of us, William. And as perfect love as there can be on this earth. And forgiveness. For you have forgiven me, haven't you William? 
"Forgiven you?"  bellowed William.
Again she peeped up at him and saw his tawny eyes blazing with love ... for her.
She had got him at last. The triumph of it! Oh the triumph of it! Now at last they were going to experience together the fairyland of mutual love that she had always longed for. Oh, the triumph of it!"
***
I leave behind this story that inspired my doll's house, and like Marianne I am also looking forward to experiencing a new and different fairyland.
 "And I shall never be proud again, William," she whispered brokenly yet proudly in his arms. "Never, never again."
There was a derisive squawk from the birdcage hanging in the window. 
"Oh my!" ejaculated Old Nick in mocking tones. And then, very doubtfully indeed, 

"Oh my?"

the end

elizabeth


DO OVERS! a Glencroft Living room redecoration

    Back in April of 2022, I made up a storyline for my Glencroft renovations, which went something like this...   "After due considera...