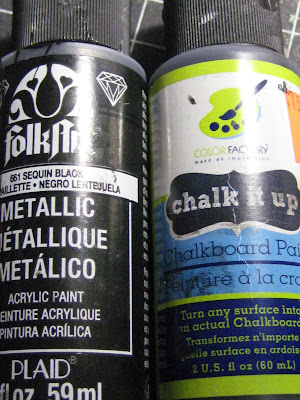
strip em off....
But once again, I am getting way ahead of my story. so Let me begin it this way *** When working on the left side of Villa Leone's kitchen my original muse was a MINWORKS blogpost from several years ago. |
http://minworks.blogspot.ca/search?updated-max=2012-01- 09T10:48:00-08:00&max-results=7
Janine and her hubby Bruce,
had produced a Fab Hall Lantern for her Award winning French House, by gluing together 2 night lights from the dollar store to form a single hanging fixture. |
Remembering what they had done, had me cruising the aisles of different dollar stores,
looking more closely at what night lights had to offer.
Last year I stumbled across this one which I thought might one day make a pretty good stove hood.
It's shape of it reminded me of a hat.
Funny thing is that what I both Liked and Disliked about the shade, was it's unique hat-like shape, however I didn't want it to continue looking like a hat once it was installed in the kitchen.
But another reason that I thought the shade might work as a hood, was that the plastic was easy to drill through, and since it was already hollow, adding lights and hiding the wires inside it would be pretty easy.
I was eager to try it out with my FANTASTIC- NEW-TOTALLY GORGEOUS 8 gas burners, double oven, MOLLY SUE MINIATURES
ITALIAN STOVE. http://www.mollysueminiatures.com/
I cut some wood trim to bulk up the base, then tried it out with the doll "cooking" at the stove.
UGG!
What I had was a plastic hat with a wooden brim. Clearly additional work was required.
To make it look more interesting, I cut up a plastic picture frame to add some carving.
It was very heavy- looking carving and Naturally, I thought I could "lighten it up" with Even MORE HEAVY CARVING
 |
| I kept on adding things: a lion head, a plastic circle, rhinestones, and metal bits and more wood trim. hmmm? "maybe it will look better, once it's painted" |
 |
| Base coat on |
 |
| then 2 finish coats of black acrylic paint. |
 |
| Hmmmm? And although wouldn't admit it out loud, I thought it looked like a halloween witch hat, however, I persisted in the belief that I could fix it up by adding still more to it. |
The general idea was to make it appear in harmony with the brass trims on the Italian stove.
However, no matter what I did
it still wasn't doing it for me.
This was THE Moment
my career as
A Stripper began.
 |
Off came the top!
I tested the lights before gluing the hood to the wall
 |
| The buttons make the lights HUGE! |
 |
| SCORE! I remembered I had some brass strips and some brass doweling. I cut the brass trims to fit the hood then glued them both in place. |
The hood was positioned above them.
 |
| I couldn't get a crisp a bend at the corners with the brass, but it still looked better than I'd expected. I was stoked about both the brass and the tiles. |
I felt like slinking off stage.
In my frustration, I was going give up on the kitchen and go to work on the second floor of the villa instead, since nothing I did; helped, and I could no longer pretend to like- THE HAT!
However, working on the second floor of the villa meant working on the second floor staircase- Arrgggh!!!-
nooooo, I'm not ready for that yet either!
So, I put on my thinking cap to try and come up with an viable solution; because having glued the hood to the wall, I had no other choice but to leave the hat on.
Then a light switched on!... I had an idea
What if- I lowered the ceiling height to hide the hat?
i.e. like a burlesque FAN DANCER, it's still behind there, but you just can't see it
I tried out a section of wood across the top of the hood to see if it would work and what it would look like.
 |
| "YES-I think that I could live with this" |
 |
| Sudden Exposure- (you can see it's undies!) then I made second hat to cover the first hat |
and permanently affixed the lantern to the ceiling.
 |
I chose to use ribbon because it was flexible and would easily conform to the contours of the hood AND because I had lots of it, therefore, IF I made a mistake,
which I usually do;
I could try again.
This gold lame ribbon has a fuzzy texture like velcro
 |
| I applied the first of 2 layers |
 |
| I used my finger to smear a layer of drywall putty over the surface of the gold ribbon which I had painted black. |
 |
 |
| I smoothed drywall putty over the ribbon and let it dry. |
 |
| I cleaned off the overage and waited until the putty had set. When it was dry to the touch, I painted it again with black acrylic paints. |
 |
| then highlighted it with more gold nail polish. |
 |
| FINALLY!!!! |
The crowd was going wild!!!
 | ||
Ta Dah!
|
 |
 |
| Here's a view of both sides of Leone's kitchen |
 |
| Cannelloni! |
 |
| Sauteed mushrooms in butter |
| Irina Miniatures |
 |
| I LOVE cooking on my new Italian stove |
| and Oh, by the way- would you like to stay for dinner? YES?! Well then, "take off your coat" but... |


.jpg)

