just in case you were wondering where I've been all this time, and what's been happening with Villa Leone I shall answer you in 3words: LOTS and LOTS!
I've actually been working steadily on the villa since the beginning of summer, the exception being the entire month of September which was for preparation as a vendor in the 2017
WEST COAST MINIATURE SHOW & SALE
which was held Sunday October 1st and which was an
All Around Success!
A HUGE SHOUT OUT and CONGRATULATIONS to my dear friend FATIMA whose dollhouse "VITORIA" was voted
♥♡♥♡♥♡♥♡♥ BEST IN SHOW! ♥♡♥♡♥♡♥♡♥
Fatima had been working on her GARFIELD Christmas House for over 11 years, and in the course of building it, she made some UNIQUE Alterations to the kit, which has set it apart from other Greenleaf Garfield builds not to mention that it was Packed from the top to the bottom, inside and out with the all the anticipation, excitement, comforts and joy of
A Night Before Christmas
So BRAVO to my very Dear and Innovative friend, Fats :D
And also at this year's Show, there were a variety of Marvelous and Very Creative Displays by many members of M.C.B.C, as well as hosting plenty of Vendors, some old and some new; so there was a good mix with not only lots to see but also lots to buy- which means, that a good time was had and shared by all! :D
✰ ♥✰♥ ✰♥✰ ♡ ✰♥✰ ♥✰♥✰
And now about theVilla:
My first purchase at The West Coast Miniature Show was a white cat from the personal collection of an M.C.B.C. miniaturist named John.
John was a first time vendor at The Show as well as a new member of the Miniature Club of B.C.
This white cat of his which I "adopted", is painted metal and it is heavy. I couldn't resist its lazy sprawl which I knew would work well, draped over the edge of the console table in the entry hall of Villa Leone.
 |
 |
| I have shown you this entry hall many times already, and although I promised a few posts ago, that there would be "no more stairs and/or the entry"- well, I lied. There will be a just a few more photos a little further along in this blog. THE VILLA |
 |
| In the pictures above and below I'm showing the first and second floors of Villa Leone as it was last June. My long range plans are to turn the upper right side of the 2nd floor, into a library/ music room. The left side of the second floor will be a powder room with a sink and toilet. A second flight of stairs will lead up to the 3rd floor bedroom, and 3 piece en-suite. On the main floor right, will be the kitchen leading out to a patio and an enclosed garden, such as they have in Venice. My greatest concern regarding the house, is the distribution of electric light as well as trying to find a believable balance between the OLD and the New. I want the house to have an "ancient history" yet I also wish it to look inhabited; with all the the mod cons of today, whilst still giving a respectful nod to the villa's past. When I took the photos shown above, nothing was glued in, since I kept changing my mind all the time. I had to work up my nerve to actually commit to gluing things in. I began with the tile floor in the main entry, after that, I glued the staircase into position. Of course there were gaps to be filled in between the staircase and the outer wall, which meant squeezing more putty into tight spaces, then more sanding and more painting so it would match the rest. FYI Matching the different paint finishes, proved to be the biggest challenge in getting them to look 'right'. |
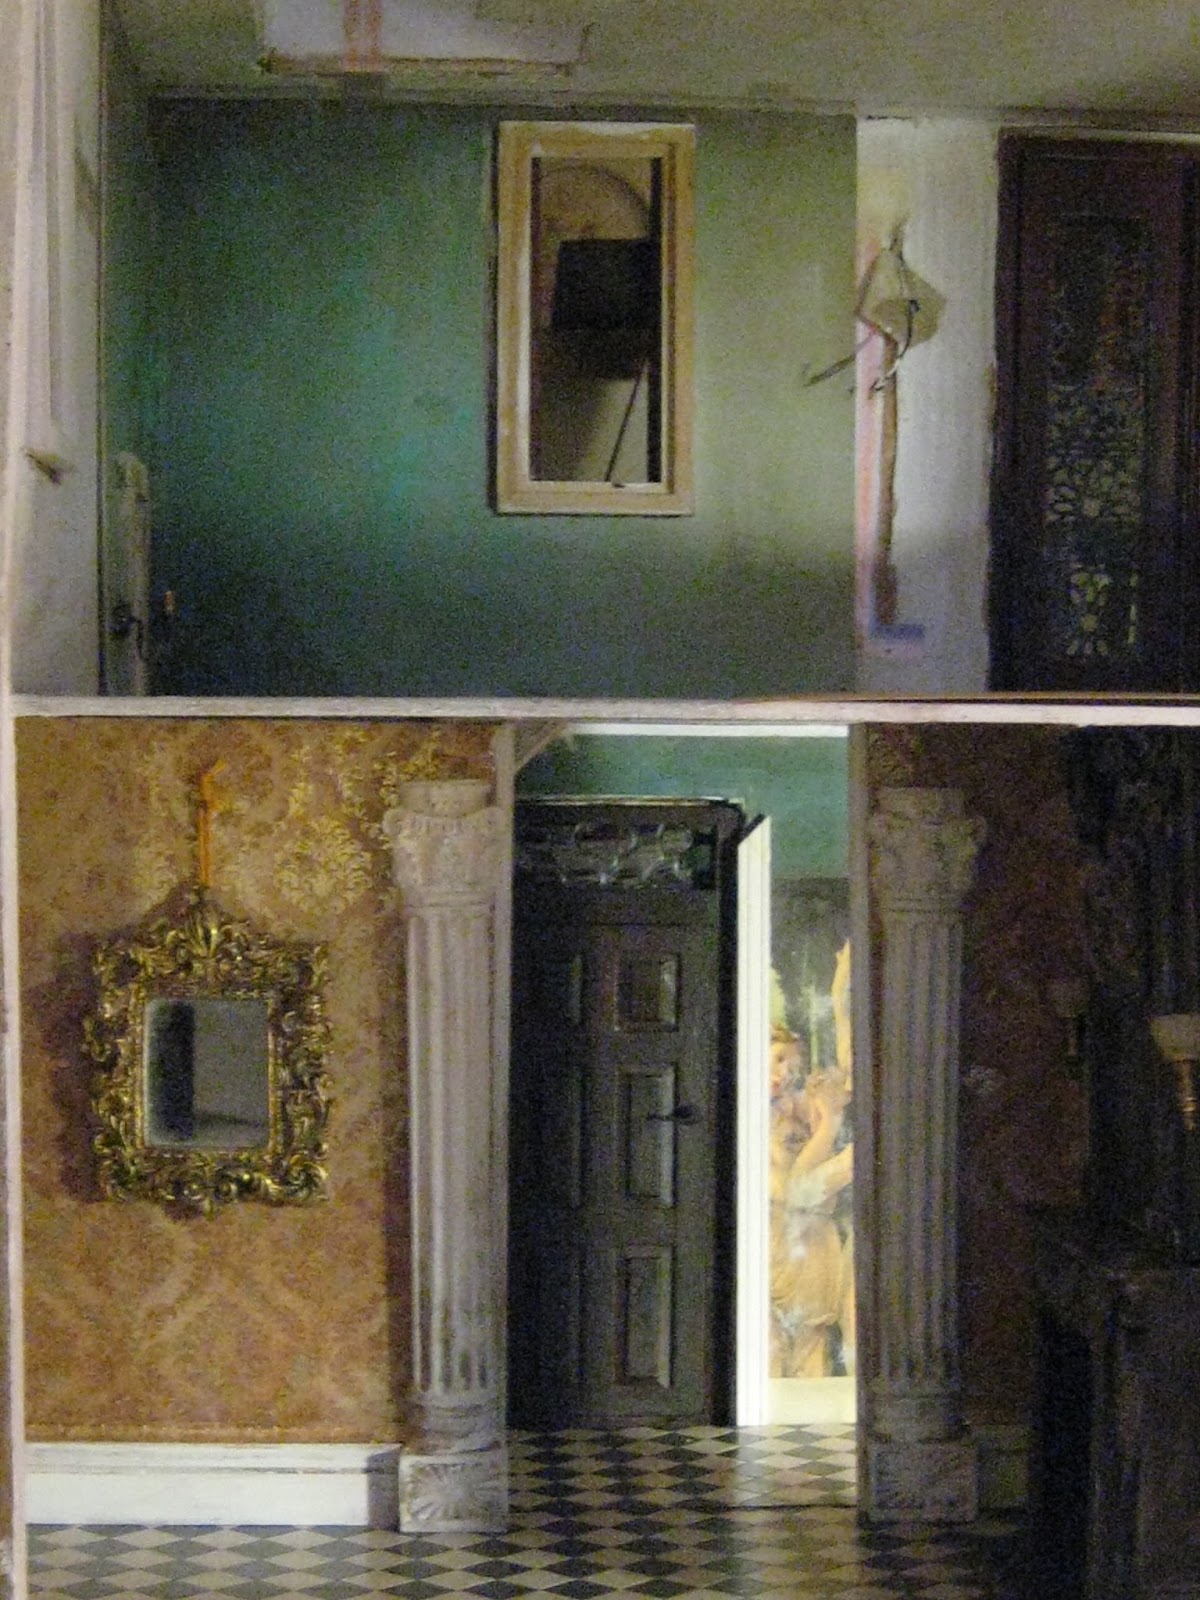 | ||||
 a handrail. For the handrail, I remembered a length of steel scrap metal which I'd found during a morning walk with my dog. I LOVED its faded blue painted patina but let me tell you, it took all my strength to cut and then to bend and shape the steel around the corner and down the length of the staircase. Nevertheless, I eventually I got it done, it's not done perfectly, but it's done. an Oct.18th p.s. In reviewing the photos once again, I can see a couple of significant errors with the handrail which are now bugging me, nevertheless I am going to leave the handrail alone because attempting to correct it at this stage will spell nothing but a series of Bigger Problems for something which will become less and less visible as the rest of the walls go up. and hopefully by then I will have forgotten all about my mistakes. perhaps? maybe? well maybe not, but it IS what it is, anyway!   Hanging Pictures Earlier this year, I had received a package of gold frames sent from Jean-Claude: Maison Francaise 1/12 http://maison1-12.blogspot.ca/ for a giveaway which I had won on his blog. I decided to use a couple of the frames in the upper hall, to display some of the 'ancestors' of Villa Leone. I also installed a HUGE framed religious painting, which I hung over the staircase window.
|


 |
Chair Kits


elizabeth
 |
| I ordered these chair kits from Melissasminiwerld https://www.etsy.com/ca/listing/243706759/dollshouse-miniature-cardboard-kit-one?ref=shop_home_active_30 |
  |
| They were very easy to assemble, although I opted to eliminate the arms and modify them a little. |
 |
| I plugged the holes with putty |
 |
| I added some gold paper strips to the front edge of the seat, to seal the seam between the seat base and the frame for the seat cushion. I also glued on 3-D nail decals to sections of the chair frame. |

 |
| The gold paper was the right width for wrapping around the front base of the chairs to hide the seam. |
 | ||
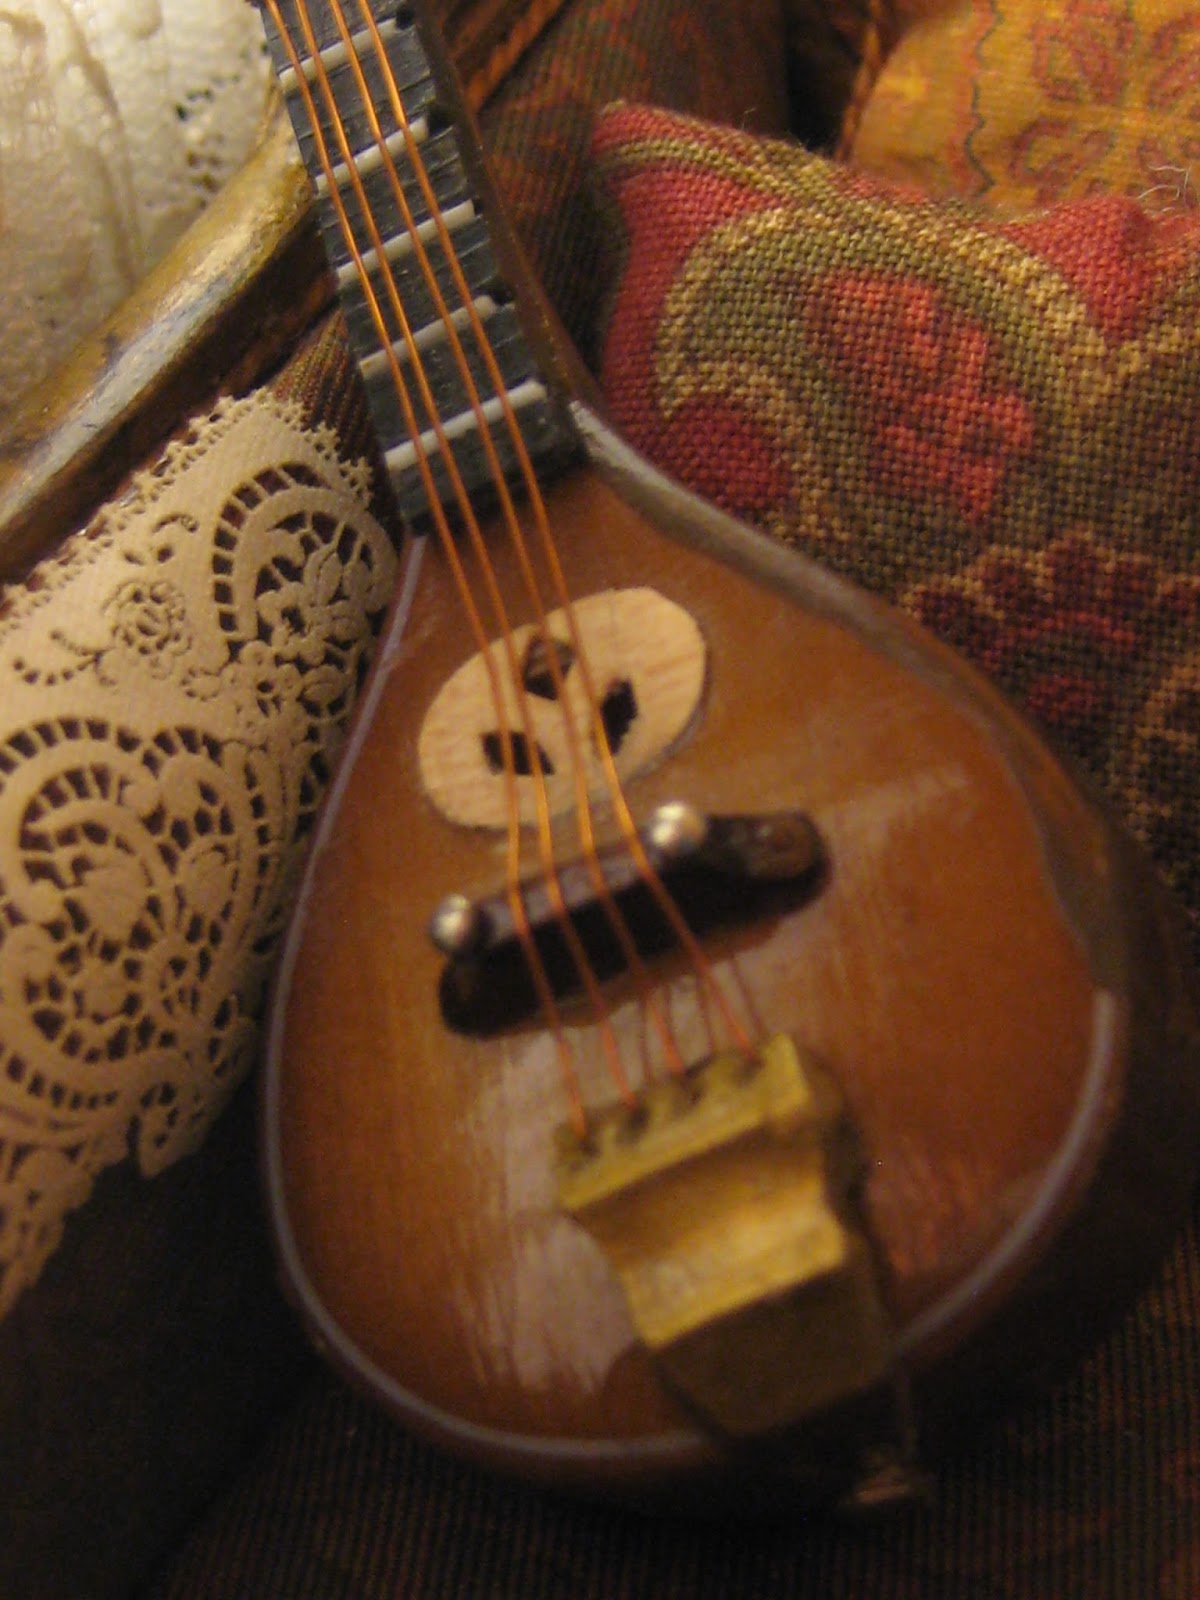
The chairs were then painted with my liquid stone mix, which helped to bulk them up a bit. Then I sanded and stained them with layers of colors to tie the wood in with the frame of the sofa.  I upholstered the chairs and the sofa with silk from a men's tie which I'd bought at a thrift store. The subtle pattern in the silk is of entwining flowers and leaves. The colors are shades of mouse brown, dull gold, burnt orange with a touch of green. I'm usually not a matchy-matchy person, but with the chairs and sofa all finished the same, it made the room appear more unified.   I made new cushions for the sofa from a print of an orange toned persian rug. The doily (pictured below on the back of the sofa) is from Jean Day Miniatures http://daydreamminis.com/jean_day.htm The lute began life as a flat-backed fridge magnet and was a gift from Fatima. I formed a rounded "lute-ish" back for it right over top of the magnet, using fimo and then I cooked it in place with a heat gun. I used a wood furniture Touch Up felt pen over both the fimo and the sides of the lute to blend the two together, then gave it a spray of acrylic sealer to set it. I also installed the fretwork insert from a section of a sandalwood fan
|
 |
| The round table is a HoM kit, which I had assembled years ago and had already painted gold and royal blue. I had also decoupaged a royal blue zodiac print onto the surface of the tabletop, which I no longer liked. The only way I could remove it, was to sand it off with a coarse grit sandpaper. As I began sanding, and as the layers of paper were being removed, the top of the table began to look rather interesting, so I opted to leave some of the original print in place. To remove the fuzziness from the remaining paper, I rubbed and buffed white wax onto the surface of the table top. Then I used brown shoe polish to age and tone down the whiteness of the waxed paper which I buffed to a soft sheen. |


 |
| I went over the brown shoe polish with a light application of gold wax applied very sparingly. |

 |
| And this is the end result It may not look like much in the photo but I find the effect interesting and unusual. It reminds me of shards of ancient pottery or a section of a crumbling wall mural. New on the table top are 2 Fabulous pots of orange striped tulips by a Canadian artisan Lin Morrison Miniatures lin_morrison@hotmail.com ( no website yet) which I also purchased at the West Coast Show Lin sell well-priced mini flower kits, an makes her own mini pottery too. AND just recently she has started making Orchid plants which I Absolutely LOVE! |
 |
The LIGHTS I think that I made the light fixtures for both the main entry and the Morning Room sometime during the month of JULY. They were constructed from ethnic earrings from the thrift store, beads and plastic novelty baby shower rattles from the dollar store. |
 |
 |
 |
 |
| The main entry flush mounted light fixture is in place on the painted and peeling plaster ceiling. After the fixture was in place, I suddenly decided to frost the "glass", so I went over it with Revlon Matte Top Coat. The hanging fixture for the Morning Room was made much the same way as the first one, using a portion of heavy costume jewelry earring parts, and clear glass bugle beads. |

  | |||
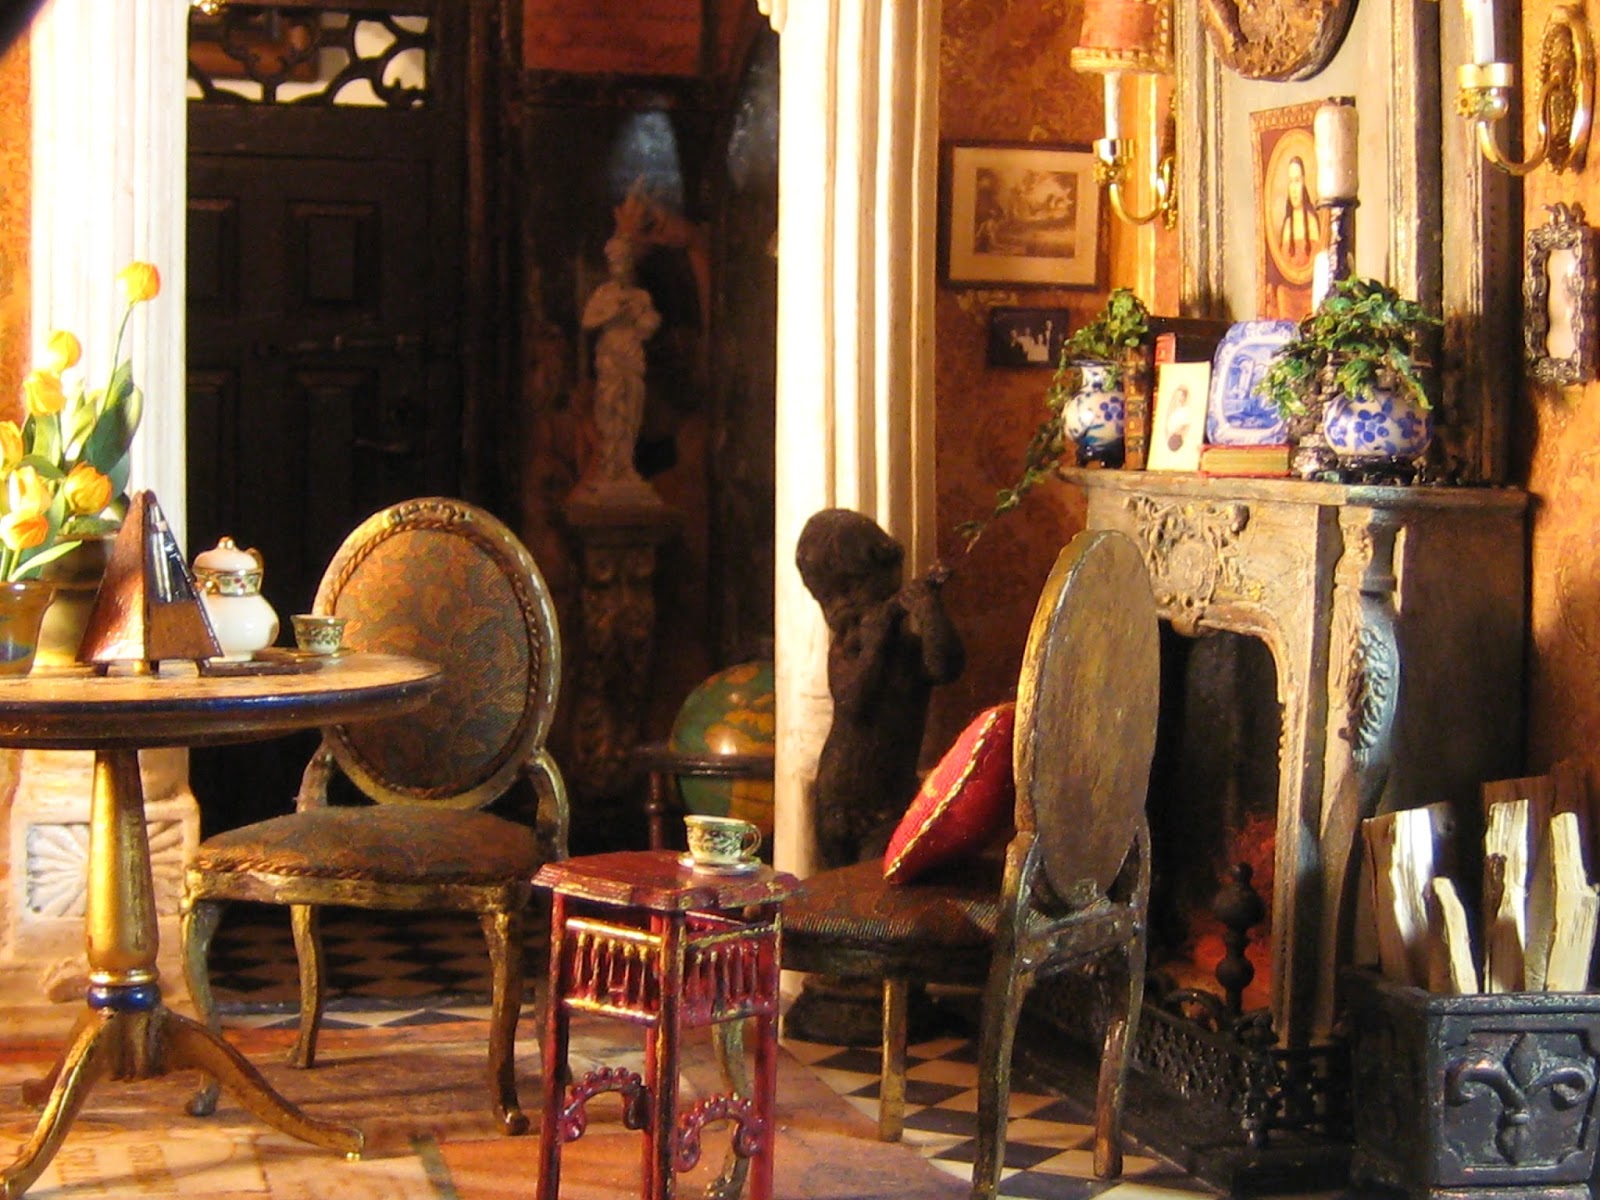
And although I like this fixture, I won't call it finished yet since I can see that I need to make more crystal drops for it. Meanwhile, it does cast a lovely golden glow over the entire room. The new candle sconces, which I purchased on- line from Victoria MiniLand http://stores.ebay.ca/Victoria-miniLAND were finally installed and then the fireplace wall could be permanently glued in! HIP HIP Hooray!!! I made the half- shades for the wall lights modeled after some which I saw in a book of Italian Interiors Dressing the fireplace mantle After much changing and re-arranging, this is the way the mantle looks today. 
 |

 |
| The sweet little Blue and white platter depicting an Italian country side came from A Lavender Dilly https://www.etsy.com/ca/shop/ALavenderDilly  The Rose patterned plate shown below, is another lovely piece by Carrie Lavender. ♡ I set a table for a summer afternoon tea featuring a decadent chocolate layer cake topped with strawberries and 2 Amazingly flaky croissants both by Valentina of Pink Cute Sugar! https://www.etsy.com/ca/shop/PinkCuteSugar  |
 |
 |
| ♥♥♥ Love Love Love! |
 |
So I spent most of the month of August working on the Villa. In September I was getting ready for The West Coast Miniature Show. There was so much to do and to prepare for, that the month sped by and before I knew it, it was October and Show Time. The following Sunday after The Show was over, it was our Canadian Thanksgiving which involved a week of cleaning, shopping, preparing, cooking, entertaining, eating and then more cleaning. I was very busy, not to mention TIRED But now I am back and working again on the Villa, and after fooling around with it some more and making corrections and adjustments
this is what is left to do in the :
Morning Room
1)the interior window frames , 2)hang the lace curtains
3) installing the valance over the curtains
4) add the window "glass"
5) installing the iron grills to the exterior windows
6) add more crystal drops to the chandelierIn the front entry I need to : 7) install the missing wood trim on the stairs in the main entry, 8) paint it, and 9) make new shades for the hall lamps. I thought about waiting until all of the above items were crossed off my list before I wrote another post, however with half of the month of October already gone, and people asking me for an Up-date on Villa Leone, I figured that if I waited any longer, this post would stretch to Infinity and Beyond and as you can see it is already V E R Y- L O N G but no worries I'm nearly done. The rooms continues to evolve, even as I write this. I have recently added Linda Park's
Red and Gold embroidered "V L" cushion to one of the side chairs, along with a dainty china tea set by
Jean E Yingling
it's always those little extras which I love to add
and which seem to change everything I will conclude this post by saying that I would NEVER have thought that any of these rooms I would look as they currently do. Each space has become a pleasant surprise to me as the Leone family begin to make more of their presence felt and their wants and wishes known. hopefully during the process it looks a bit "Italian" to you but more important to me is that none of it looks too new! |


 |


 |

 |


 |
| And now that the sun is setting on The Morning Room it's time to say goodbye. I hope you have enjoyed this catch up post and although I know that it was A LOT to take in all at one time, I did warn you right from the start. ;D My next post should be all about The Kitchen until then I wish you all... |


 |
| buona notte |
elizabeth
.jpg)

