 |
I'd been working steadily on Villa Leone for nearly 3 weeks straight before I grew weary, and ran out of gas. I needed to do something different before I jumped into the next phase of that build; which brings me to the beginning of this story:✈ My friend Bettie is downsizing her miniature collection and has given me some of her miniatures to play with. Among the items she has placed at my disposal, were a number of Chrysnbon dressmaker forms which had seen better days. They had already been spray painted with a white enamel paint which had reacted badly with the plastic forms and had bubbled and melted them certain places. Some of the plastic cages on the lower halves were broken in places as well. In short- they were all in pretty rough shape. I was looking at them not knowing exactly what to do with them, when I decided that it might be fun to mess around a with them, and see if I could perhaps give them A NEW LEASE ON LIFE. "Nothing ventured Nothing Gained" I'd think of the time, as a bit of a vacation break from work on the villa ✈ ☀ The photo below is to show you what the dress forms actually look like in the raw although the metal cage on this one, is also somewhat mangled. The 5 which I used had bubbled where the plastic had melted, both in the front at the bust, and on the back and on the bum. Unfortunately I didn't bother taking the before photo of the them although I should have, but I'm sure that you get the idea. ☹ |
 |
| The dress form still on the sprue, comes with a stand The first thing I did was to try and smooth the most damaged and lumpy places by paring them down with a craft knife, then I sanded any remaining sharp edges. Following that, I painted both sides of the metal cage along with the carved 'wood' top, with black acrylic metal paint. |
 |
| When it had dried I glued the two halves of the dress forms together and secured them with large spring loaded clamps until the glue had completely set. I had to use the clamps because there was so much paint along the edges of the form that I wouldn't get a tight fit otherwise.
The bodies of the dress forms were then painted using a brush with my LIQUID STONE mix.
( gesso, water based acrylic sealer, drywall patch, water) I used this mix primarily to fill in and to try and correct some of the most corroded areas on the dress forms. The mix was painted onto the forms in an even coat. |
 |
| My Liquid Stone Mix the wet stuff is on the bottom of the container |
 |
| After that had cured, I painted the torsos with Natural Tan acrylic paint. When it was dry, I sanded the forms again using a fine grit sanding sponge which really ground the tan paint into the underlying plaster. Some spots were sanded through and exposed the black plastic underneath |
 |
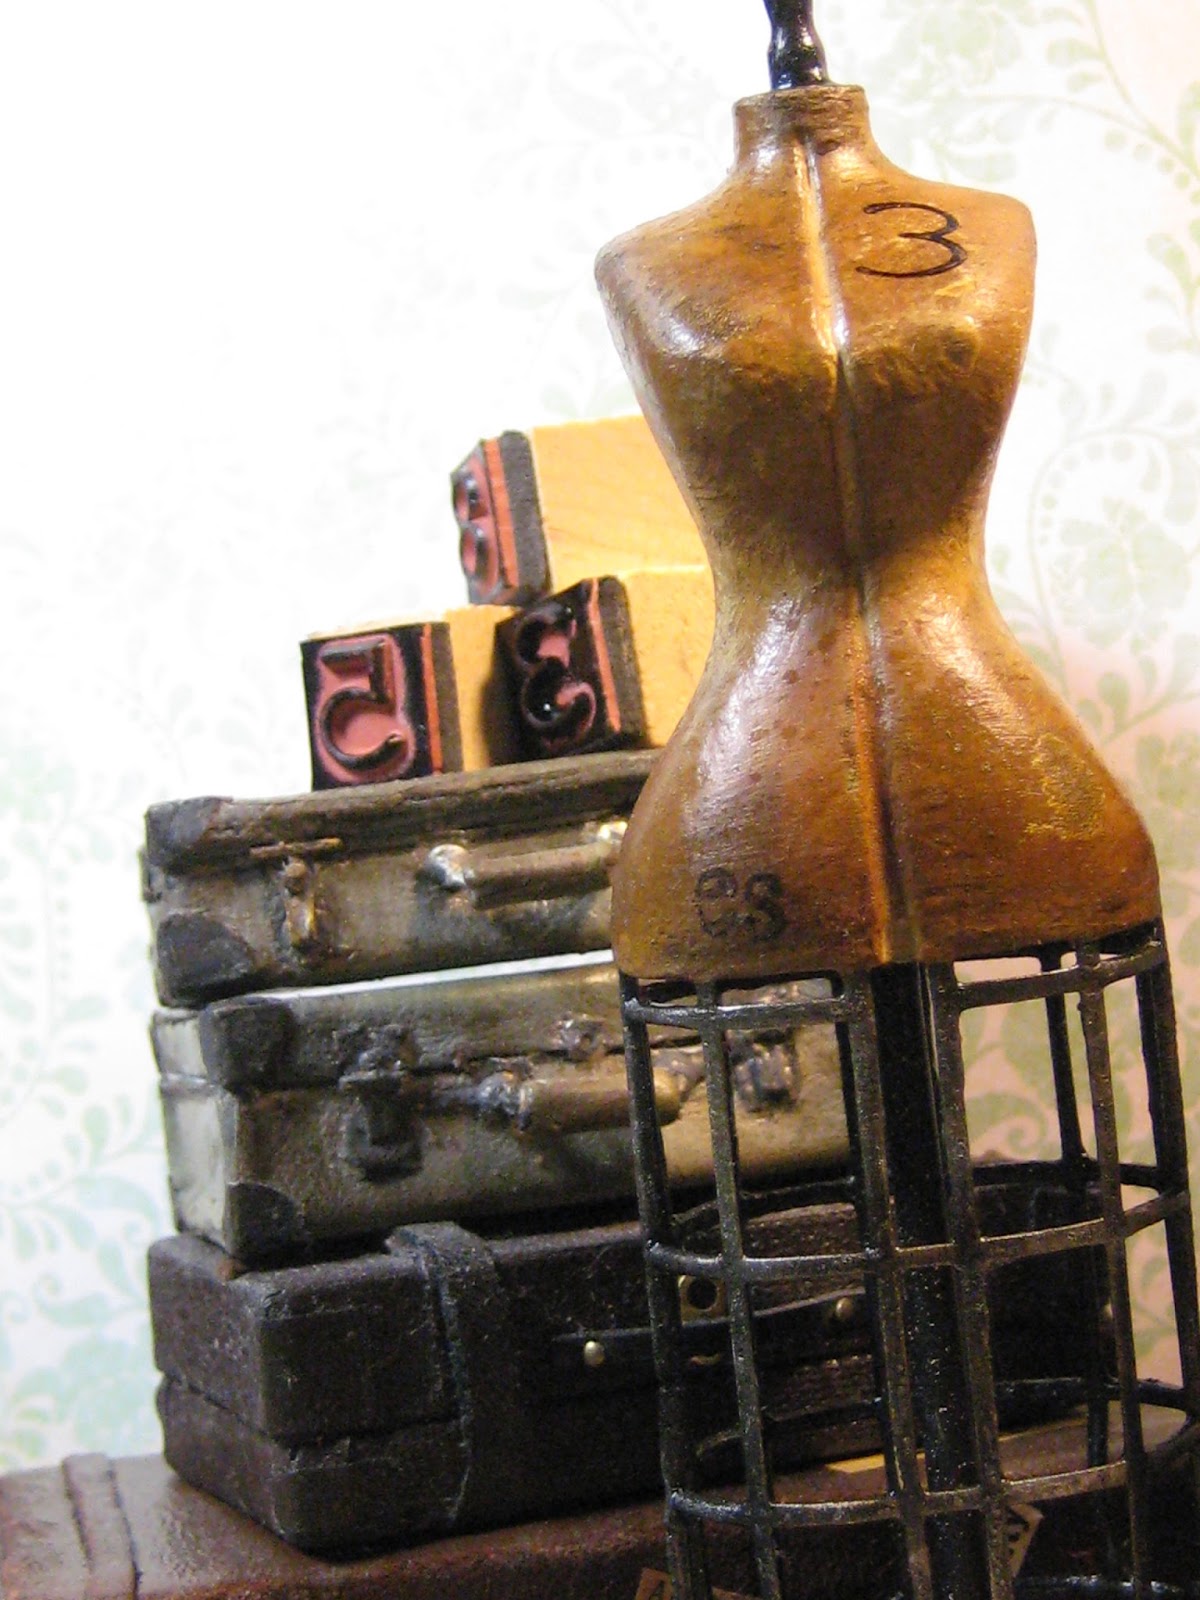
| The torso was then stained with some browns & a black ink using a make up sponge. The silver ink was applied sparingly to the black metal cage. When the inks had dried then I sprayed them lightly with "STIFFEN STUFF" {sidebar} I bought this spray with the idea of using it for fabrics but it didn't work for me, so I have been using it for setting the color on paper, and to set chalks as well as ink and it is Wonderful! It's a lot cheaper to purchase than the SceneARama scenic spray glue which I was buying before. |
 |
| Anyway, when the Stiffen Stuff was sprayed onto the inks, it did just as I'd expected- the wet colors ran. I used a makeup sponge to lightly DAB at the wettest puddles as they quickly dried down, trying not to disturb certain areas which I wanted to remain as is. The blend of colors gave a real leathery look to the painted surface. I repeated this process onto the metal cages, then sprayed and lightly stippled them with a brown Iron Oxide acrylic paint, to add a little rust. To tone down some of the shine, I went over the body rather randomly with Revlon Clear Matt Nail Varnish. |


 |
 |
Lookin' Good Ladies! |
 |
| hey! I think I'm done |
NOPE- NOT YET!
 |
| After re-examining an inspiration photo of some VINTAGE FRENCH MANNEQUINS, I decided to add one LAST detail and make the metal attachments at the shoulders. I chose some suitable press studs from my stash and flattened them a bit with a pair of pliers; stuck them onto some masking tape and painted them with the black acrylic metal paint. |
 |
| When they were dry I glued them onto the dress forms using Jeweler's glue. |

 |
| I touched up any missing paint and sealed them with CLEAR MATT NAIL VARNISH okay NOW THEY ARE DONE! ✄ |


 |
| EVERYONE WAVE GOOD-BYE ! and it's back to the Villa I go ✈ elizabeth |
.jpg)

