show synopsis for "CHOPPED" -wikipedia
 |
 | ||
| Last year I ordered this gas range from Menutmon MenutmonShop in Valencia Spain Of course when it came, it was looking brand spanking shiny and new which was not what I was needing for my villa's kitchen so I dulled the finish with a little watered down black acrylic paint and lead pencil, because I like OLD I had the stove in the kitchen trying to work out a floor plan etc. and basically just killing time by fooling around, trying to avoid making a commitment to the wiring or gluing the walls, floors and the staircase into place. Dry fitting is only good up to a certain point but eventually you HAVE TO GLUE SOMETHING DOWN. I was gradually working up to it, but before I did, I decided to play with the stove by using some of the food and kitchen accessories which I've been saving for it. And before long, I found myself AUDITIONING to be The Next FOOD NETWORK STAR! yes, what initially began as a few photos just for the heck of it, turned into full out mini cooking show segment, using some familiar and unfamiliar ingredients which I found inside various "mystery storage boxes" These ingredients included chalks, inks, dyes, sponge, and resins, (an ingredient which I've been too chicken to use until now.) For 2 days, it was a gastronomic feast of food experimentation. but before I get started- please check out the gas stove at Galchi's miniatures https://galchi.blogspot.ca/2017/05/blog-post.html ***
|

 |

 |
| Frankly, I don't know who would wish to wear these as lights in their ears since they look like headlights, but that's beside the point. |
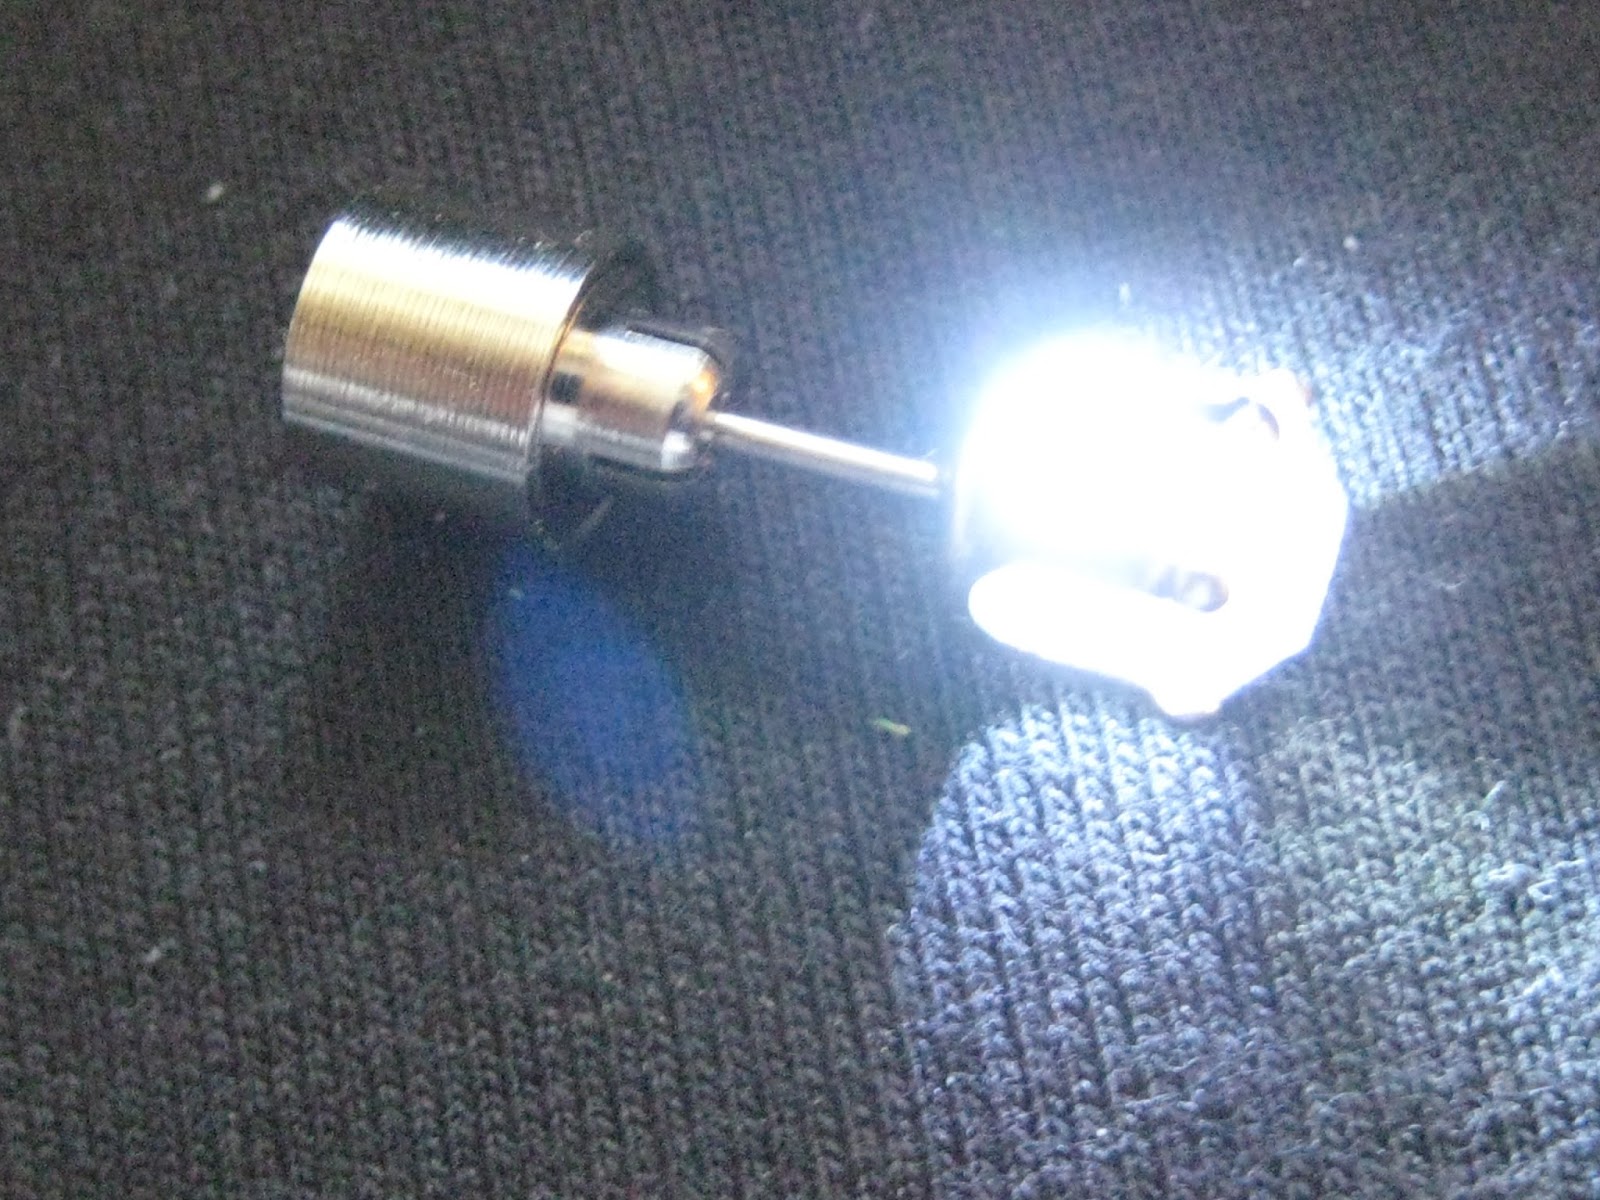 |
| I removed the stone by bending back the prongs and then cut them off as close to the center hub as I could |
 |
| You can see how tiny the LED light chip is |

 |
| I colored the light with a blue Sharpie |
 |
| I drilled a hole into the bottom of a plastic pot and fed the light into the bottom |

 |
| I pushed the battery pack onto the post from the inside of the pot, then hooked the pot onto the grill of the stove. |
 |
| Now I'm Really Cookin' with GAS! |

 |
| Here's a Grated cheese board by Erzsebet Bozse of Hungarian Miniatures |
Erzsebet's cheese board is the first
ingredient I found in my
CHOPPED MYSTERY BASKET


I've made it into the
FINAL ROUND-
"THE DESSERT COURSE"
This time inside my
 |
| A basket of fresh vegetables which was made by Janine back in the 90's I've been waiting to use it Forever, and I think that it will fit right in and so by using Janine's veggies, and adding Erzsebet's grated cheese, I was ready for - |
 |
| the "APPETIZER ROUND " I had already made some olives which I showed in my earlier post- Dining al Fresco http://studioeminiatures.blogspot.ca/2017/04/dining-al-fresco_14.html My intention had always been to display the olives in brine, so I decided that I would finally swallow my fears, and try out the 2 part resin which I've had on stand-by for quite a long time. It was easy but messy. *Next time I'll wear latex gloves because it got all over my fingers no matter how careful I tried to be.* 😩 With the clock still ticking, I mixed up a small batch of resin for the brine then stirred in the olives PERFECT! |
 |
I still had lots of time and some resin left over, so I mixed up a batch of grainy stuff ($1 store clothes dye powder and sand) with some red glass paint and the resin and got a pretty good representation of a fresh tomato sauce, so half of my menu was now done. |
 |
| I chopped up some railroad model lichen for the cilantro to use as a garnish and filled a smaller bowl using more resin, points for presentation I was on a roll! |
 | ||||||
 However, the next day, I found that my bowl of stewed tomatoes had leveled out and now looked more like tomato paste arrrggh 😡 but I had to keep moving because my time was almost up! I made "beef patties" from air dry clay, sand, paint and glued them onto plastic wrap  By gluing the beef to the plastic wrap I could add "drippings" without damaging the interior of the fry pan.
|


 |
| TIME'S UP! Whew! I Just made it before the clock ran out! I finished the first round and made it through to the next one without getting chopped. onto the "ENTREE" I began with a polenta |
 | ||
| Made with the yellow Play-doh, sand and sealer found inside my CHOPPED basket. I made the Polenta for the starch and decided to do a roasted chicken as my main course using the porcelain bisque chicken forms also found inside the mystery basket. Below are the original raw bisque forms.   The yellow dye is used in soap making and was purchased at Michaels |
 |
I thinned the dye with water which I applied on the bisque with a brush then painted over that with grated brown and orange chalks mixed with water for the browning the cooked chicken.
I textured it with fine dark sand mixed with glass paints, then glued the bird onto a circle of clear plastic wrap which was also painted with glass paint and more sand.
I textured it with fine dark sand mixed with glass paints, then glued the bird onto a circle of clear plastic wrap which was also painted with glass paint and more sand.
 |
| I reduced a"basting broth" for the bird from a mix of water, yellow ink and grated chalk, simmered it in the copper saucepan (which was a gift from from Linda Park, with a ladle, which was a gift from Fatima.) I was so focused on reducing the sauce that I nearly forgot about the chicken still roasting in the oven! WHOOPS! |

 |
| I made a matching stew pot from a copper end cap from The Home Depot, and made the handles using fishing clevises purchased from the local bait and tackle shop. Things were moving along fine. I had vegetables boiling in the kettle almost ready to drain- but then, the HOST called out "TIME'S UP!" It was too late to plate up the vegetables! ☁☁☁ /////// Whaaaa! I presented the chicken with the polenta along with a generous serving of the reduced balsamic wine sauce. After debating between themselves for a while, the panel of judges said that although they missed having the vegetables, they LOVED the flavors of the crispy roasted chicken with the wine sauce over the polenta, ♡ and so thankfully I didn't get CHOPPED Hooray for me!!! :D |


I've made it into the
FINAL ROUND-
"THE DESSERT COURSE"
This time inside my
Chopped mystery basket,
I found a package of light switch sealers, (used for insulation behind the cover plates), glue, glass paint, acrylic paint and chalk. I quickly decided that for my dessert, I would make a 3 layered sponge cake with a rich chocolate frosting and a raspberry jelly filling between the layers-
here's the recipe for the cake:

 |
| The cake layers were cut from the sponge insulation |
 |
| For the jelly between the layers, I mixed Glossy Accents dimensional glue with a few small drops of Crimson glass paint by Pebeo |


 |
| I spread the jelly onto the sponge cake layers. |

 |
| Once the cake was assembled I made A DARK CHOCOLATE FROSTING with Liquitex Soft Body acrylic paint in BURNT UMBER. |

 |
| After it was dry, I glossed it with Mod Podge and sliced the cake to show the layers then presented it to the judges. |
 |
| And although they raved about the Flavor and the Creativity I lost points for Presentation because I didn't include an any extra raspberry sauce and /or whipped cream with the cake AND I neglected to use the chalk which was still inside the basket! 😬 |
 |

 |
and SO I LOST THE $10,000 PRIZE MONEY and yet looking on the bright side I had fun being on the show AND who knows- I might even get invited back! how cool is that? |
 |
| Thanks for watching! :D ♡ elizabeth |
.jpg)

