Thursday 25 April 2013

"THANK YOU, CHRISTEL JENSEN!'


Often times inspiration hits when you least expect it and this is how it happened to hit me.
 While spending valuable sleeping hours surfing through the internet and of course Pinterest, I chanced upon a tutorial by the well-known and incredibly talented Fimo artist, Christel Jensen.  This one was on YOU TUBE, which I hadn't scanned for a while so I decided to watch Christel in action once again, as I really enjoy her videos.

 CHRISTEL JENSEN HAS THE NICEST VOICE! 
 I watched tutorial after tutorial just so I could listen to the sound of her voice.  She is  so unhurried and treats her craft with the utmost respect and gentleness that is inherent within her.  After watching about 5 of her How-To's I decided that I wanted to give it a try.  She made a wonderful little tea shelf with the pot and the tea boxes and other cute little pieces. all out of Fimo and all of them were wonderful.  I, however, do not have a pasta machine and I don't cut straight either and this tutorial required both.  (SIGH)  I decided to try my luck and do a shelf anyway but my way.  My way required only one teeny tiny cut and NO fimo and NO baking!  In fact almost NO skill and it took me all of around 15 minutes to put them together.   So are you curious?
Then come right this way.......
*****
This is the shelf!

And this is how I did it
These are the tools
tweezers, snips, needle-nosed jewelry pliers and a pair of scissors

Then we have the pre- cut wood pieces  They are WOODSIES  and they come in a package from Michael's craft store but they are pretty common.  The package is RECTANGLES ONLY.  You can buy a mixed bag but for $5 dollars I want what I use the most and so I bought the assorted rectangle and there are tons of them in different sizes in the bag. These ones are 4cm long x2cm wide or
 1 1/2" x3/4".  I'm sorry that I didn't show the package but I threw it out long ago. Also you will need a wooden stir stick.  I bought a huge box of these years ago and I can't remember where but there were 1,000 in the box!  They come in handy for many things but for this tutorial you don't need 1,000, you only need
1.  That is you will only need one if you are NOT ME.  I not being able to cut a straight line had a few slips and needed a few tries before I got it right!  That is why I have shown more than one stir stick in the photo. hahahha    You will need glue and because I am impatient I am using Quick Grip and it holds fine for this project.  You will also need sandpaper and that is about it.
WHOOPS!I nearly forgot these.... decorative brads from the craft store.
I bought mine from Michael's in the scrapbooking section.
When I first saw them I thought they looked like wrought iron and I wanted to use them some how.  I decided to use them for the brackets for the sides of the shelves.  Christel used fimo cut outs for the sides of her shelf.  For me this was easier.
In the package there are only 2 styles and they all face the same way.  So there is going to be a little cheating on the application of them to the wood but more on that later.  I decided to use the bigger of the two styles but I am demonstrating on the other one.

This is what it looks like out of the package.

Spread the prongs apart because you are going to cut them off.


I used the metal snips but the prongs are thin so they are easy to remove.

This is what it looks like after the prongs are removed.
DO NOT THROW THE PRONGS AWAY!
So this is what the shelf is made of
 let's begin.

Lightly sand the wood pieces smooth.


Glue the longest edge of the woodsie and but the other shelf piece to the top to form a right angle.
Let dry.
 
When dry sand the edges smooth and make sure that there is no glue globs any where.  I say this for my benefit.  I have been known to try and ignore excess glue and to paint over it, trying to hide it.
More grief when you do it the lazy way. So take a lesson from me the Queen of the Short Cuts.  Clean up the glue, you'll be happy that you did.
Here is where the stir stick comes in.  Measure the length and cut the stick to fit the length of the back of the shelf.  I used scissors for this which is why I needed to re do it so often.  Sand the edges of the stir stick and then stick the stick onto the back of the shelf about 1/2 cm from the bottom. That is approximately 1/8 th inch in Imperial measurements.
Should look like this

Now you take one of your metal filigree brads and glue it at 3 points to ensure the most stability.
Again, I am using the Quick Grip glue and it works well for this.

Both sides done.  Notice that the outside of the right bracket is indented.   All of the brads faced in the same direction and so I had to accept this minor flaw. It is what it is!
Now here is what you do with those cut off prong pieces.
You are going to form coat hooks and you will need 3 to 4 of them.
They will be made by wrapping them around the needle nosed pliers.  You will need to have a little
bit of a lip on the back end of the hook.  I forgot to measure the length of the metal before I began to shape them but you will be able to adjust them if you get it wrong.  Don't worry about it not being perfect ...
 I didn't!

This is why you need the lip on the back of the hook.  You will want to have it hooked to the top of the stir stick that runs across the back of the shelf.  The hooks will be glued on but they look more secure with the little bit of extra metal.

Glue the hooks on with Quick Grip and leave to dry
And there you have it!
All done
 
They were so easy that I decide to make some MORE!
I even made one with cut down decorative toothpicks.  For that one it did take me longer than 15 minutes but that was the only one.  I placed the band of the stir stick up under the top shelf.
The rest of the shelf process was for fun and experimentation,  In her tutorial, Christel Jensen made a tea shelf for the kitchen.  I was still undecided as to what I was going to put on top of mine so I tried a number of different finishes and not all of them were pretty.  I made some big messes and had to try and fix them afterwards.  I began by painting the whole shelf with a base coat of off while acrylic paint.  Then I decided to try Dale Flutey's school glue crackle technique again.  I had used it on the shutters of "#43 Green Dolphin Street" and also on the interior door.  On the shutters the crackle was ultra fine, on the door Wow!  Did it crackle!  There was so much crackle that the door was looking derelict and I had to sand it down and repaint it in the blue, which it is now, so I know that this will work..... 


Yup,  it Crackled


I then decided to make it look really old and I added brown glass paint and  you don't have to say a word.  It is looking GREASY and Nasty!  Would I want this is in my kitchen!!!???
NO!
I had to scale back the aging business because the cute little shelf was now looking very
 Skid Row.
Back to the sand paper and a lot of buffing and white washing and a restoration of
 'Shabby' once again.
And this is what the final collection looks like
So what do you think?
  ***

I still wanted to try a tea shelf
I have some paper doilies that I had purchased at the March 2013 show and so I pulled them out and this is what the package looks like.  This is how much I paid for them and it seems pretty steep but I like them and I knew that I would use them so, LIVE DANGEROUSLY.
The sticker shows the vendor that I bought them from and gives you the phone number if your interested.
These are the variety pack that I have used in the Victorian Sea side Cottage.
I really like the fine detail in these
 
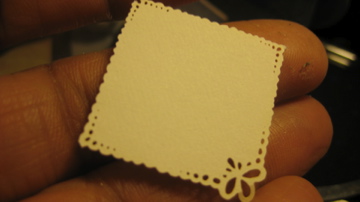
These are the second package that I purchased and they are table runners and napkins.
I used one of the napkins for the shelf.


I folded the napkin over the shelf and let it fall over the front edge of the shelf.  In hind sight I will not have it as long in the front as it is.  It is just a fraction too long when I see it in the photo.
Although, I make my own teapots and have used them many times for the tea trays that I make to sell, I decided to try and use up some of the surplus perfume bottles that I have stockpiled.  I had fun filling the shelf with items that are far removed from a kitchen tea shelf but I still might do one with the other 7 shelves but I like the look of this one it is very romantic.
The mirror is made from a hair clip also from the dollar store.  It used to have big bright rhinestones in the centre, which I removed and inserted an acrylic oval mirror also from the dollar store.   I added a bit of extra gilt using nail enamel and then touched the edges of some of the perfume bottles to add a little PIZAZZ!
This is the lower part of the shelf with a bracelet on the hook and also a pink hair ribbon


SO THERE YOU HAVE IT!
project complete
Sometimes inspiration comes from the most unlikely sources,
from tea shelf to boudoir...... Go figure?

Thank you
Christel Jensen!


elizabeth


Wednesday 17 April 2013

GOD IS IN THE DETAILS ( parlor is finished? )


 Back in the mid 1970's,  I  began dating my future husband who took it upon himself to "educate" me in what was considered "good design" according to him and from his viewpoint as a "professional".  He hadn't been out of design school all that long but he did have a 'good eye' and he definitely did  have Talent!  A whole lot of talent and even though I was not always the willing student, I was schooled about what was considered noteworthy.  I recall one date when we went up to the local university and he spent the whole afternoon taking pictures of... an egg!  Egg on the wall, egg on the grass, me, ... holding an egg.... The whole afternooooooon!!???  I couldn't see the point of it at all, but that is because "I" didn't fully appreciate the singular beauty of the Shape and the Form and the Simplicity of  THE EGG.!????   Well, what can I say except we were both very young and every thing was 'artsy- fartsy' and often made no sense even though it was all the rage to 'DO' art.  That was an memorable afternoon which I've never forgotten, but here is another thing he told me which I think is much more interesting....
                                                        "GOD IS IN THE DETAILS"  

Mies van der Rohe a world famous designer from the early 20th century is credited with this particular quote.  When I was told this I didn't know exactly what it meant and so it was explained to me, that it is in the minute details of everything that supports anything.  In other words "even the grandest project depends on the success of the smallest components."   You can see it in how the whole of nature operates.  From the tiniest bug to the biggest mammoth, every little thing is hard at work doing their assigned job, supporting the TOP of the food chain from the BOTTOM.  Details!  So why am I telling YOU all of this?  Because although this was all new to me then, when I was totally green and didn't know "nuthin  'bout  nuthin," I came to know and understand how this translates into miniatures in a Big Way.  When I decide to make a room or a shadowbox or even a vignette, I load in all available materials to start rounding out the details of the story and that means -                                                              
                                           ACCESSORIES!  ACCESSORIES! ACCESSORIES!
There is this funny quote from the 1989 movie STEELE MAGNOLIAS where one of the characters says to her friend,
                   "The only thing that separates us from the animals, is our ability to Accessorize!"

To me accessories are the key to making the mini space feel lived in and inviting.  They are the DETAILS that breathe the life into inanimate objects and make a house, a home.  So I chose to emphasize them and think of them as the adjectives that make a plain story more exciting to read and become involved in.  For #43, I used a lot of clichés from the novel to relay the feeling of the Victorian-style cottage by the sea. If it wasn't for the electric lamps and a few other tiny contemporary accessories, this would look just like something from the 1800's.  It is in a kind of is limbo, straddling the centuries.  So here are the pictures of the "finished" parlor of #43 GREEN DOLPHIN STREET.  There are just a few little things left to do but I wanted to get this posting out, so they will have to wait.  I hope that you will enjoy the tour of this ONE room ( so far).  There is still so much yet to do on the rest of the house but I would like to show SOMETHING that  IS FINISHED!  Enjoy!

Do come in!
Needlepoint cushion by my friend Pamela Grant who used to send me packets of them  through the mail back in the 80's.  I painted the chair frame that used to be a mahogany to look like a fruit wood and then had to reupholster this chair 2 times before I got it right.  It is filled with bird gravel on a bed of sponge.  I wanted it to look like it would be cushy and comfortable to sit on for a while. Tai the cat usually likes to hang out on it, but has switched chairs for today.
I placed the lovebirds William and Marianne, where Tai the cat can't reach them.  They can get the sun and have a fantastic view of the sea, and the little merchant vessel "The Green Dolphin" out in the harbor.  The open Bible on the desk is marked at Psalms 107: 23-30

"They that go down to the sea in ships that do business in great waters;
These see the works of the Lord and his wonders in the deep....
... He makes the storm calm, so that the waves therefore are still.
Then they are glad because they be quiet;
so He brings them to their desired haven."
Here is a sewing chest of unknown origins but signed GL.  I'm sure that I bought it in Seattle back in the 1990's.  All the little drawers open and both of the rounded ends of the top, lift up!  In the novel, Marianne was a superb with a needle and sewed her own clothes and did outstanding needlepoint.  This sewing chest is very useful and slides nicely into the story.
The chair is one of a pair that I bought last year also in Seattle from a vendor that sells also on Ebay.  I made one of the chairs shabby and you can see it in the post 

"Shabby Dabby Do" (Jan.23 2013)
I haven't done Anything to this chair, it just the way I bought it.
The bellows in the log basket actually works!  The folding screen is something I made from a picture in a magazine and then I decopaged it onto some matt board.  The glass in the window is the acetate that used to enclose the self-healing craft mat that I use to cut on.  I had saved it and when I cut out the shape of the insert, I noticed that it was NOT perfectly clear.  It is kind of watery looking like old imperfect glass used way back when.  It was dumb luck.  I could change it but I like it this way.
This is an arm chair that used to have canvas inserts on the back and also on the side panels which I removed and replaced with the fabric that you see now.  I never liked the chair the other way and it banged around from box to box until I eventually lost the side panels altogether. I think that I will probably put some kind of trim on the arm chair to fuss it up a bit more.... what do you think?  I stuffed the seat cushion with bird gravel to make it a bit saggy and imperfect.  I'm pretty good at imperfection.  I have NEVER been able to ANYTHING without messing it up somehow. So if I mess it up deliberately then I can say,  "I meant to do that" and it gets me off the hook!  Close ups with the camera can be quite embarrassing.   The silver service is wonderful!  I forgot that I had it.  I was reading a posting from Ilona, of MiniMumLoon ( March 26,2013) and she was talking about white being too strong for flowers and that cream would be better especially for photos and when I reviewed my pictures she was right, the white china set was like a bull's eye for the camera.  The contrast was too strong.  "What would be nicer would be silver."  I thought, and then I remembered I HAD a silver service and I had posted it at the very beginning of my blogging career, in 'More American Country' ( Dec. 28, 2012)  It is by Ken Chellis and I have been holding onto it for many years.  I am glad that it has now found a permanent home.  The little china teacup is from a set that I bought from an antique store.  It is from a set by Kaiser.  The set had 6 cups and saucers with a matching serving platter and a coffee pot and lidded sugar and a cream pitcher.  Somewhere are 2 cups and saucers from the set, that have been lost  and are waiting to be found.   I have looked everywhere for them but not found -Yet.
                                                                                  (sigh)
Nate is giving Tai the cat, an "I'm the boss of you," look.
Tai doesn't seem to be too concerned about it at all!
" Oh, No, you're not" he purrs
Here is an overview of the fireplace wall.  Now let me tell you what happened.  I had the 2 wall lamps stuck on with Blu Tack and when I removed them they left a greasy blue/ black mess that would not come off clean.  So I got a little water and began to rub and rubbed a hole into the paper. Then it turns out I had RUN OUT OF WALL PAPER!  I was so mad at myself.  
Back to Michael's craft store and hit the sale and found cardstock in a lovely warm beige that was only slightly deeper than the original paper and at 16 cents a sheet, sale price!   I bought 5 sheets and used 4 in the room.  I am very happy with it, it's even better looking than what I had before and more durable. Once it was installed, I proceeded to dirty it up a little to make it look older but not too shabby.
The ceiling beams are lengths of balsa wood that I painted cream and glued to the white card stock on the ceiling.  I added the dark smudges along the length of the beam but I haven' touched the ceiling itself.  Now this must be corrected because dirt does not stop only on the beams, does it?
It is another thing on my 'to-do' list, make the ceiling 'dirtier.'
Details of the dressed mantle.  The french style clock is from a belt toggle a button on the back and a clock button on the front and then a good dose of Tripple Thick which heaps up and stays rounded so that it looks like a glass casing on the clock.  I made the candlesticks from a stack of beads and the candles from cut down cotton swabs filled with fine grey wire and glue.
The 'china' sheep are from a railroad scenery store.  I painted them and added the flowers and lots of clear nail polish to make them glossy.  The sheep are used to reflect a time in the novel when William and Marianne are settling down as sheep farmers in another part of New Zealand;  The 'country of Green Pastures'.  I made these little sheep ornaments many years ago and only just remembered them again.  The little 'capodimonte' style flower pot, I also made and it sits in the middle.
A closer look at the details.
Picture frames are also buttons with picture inserts and a thin bit of acrylic over layed for glass
the doily is laser cut paper from Dale R. Kendall.  Love them!
A good look at the fireplace from Bespaq.  I stained the wood to look pickled and then finished it with an oil based product called Age-It that I have had for AGES!
I also lit some matches and blew out the flame and then held the smoke under the mantle to try to get some smoke markings and there is just a little bit but that is enough.
The fire screen is re-painted from the reddish color that it used to be and the button that is covering the center hole is of a little anchor.  I cut the center foot that used to be part of the medallion off and I think that it looks much better.  The fire is not as raging as it used to be only because the I have worn out the batteries!  Not to worry Marisa, I shall have it stoked again for you very soon!


I felt that having these daisies in the room was important since one of the main characters in the book is
named Margarite which is translated from french origins as "daisy flower." I have no idea when or where I bought these flowers but I love the blue and white of the china and I am glad that these now have a home as they were also taking a beating after kicking around in storage  boxes for who knows how long!  The tile floor was a humbling exercise.  They are made from decoupage scrap-booking paper onto matt board and then cut by hand and glued individually onto the wood floor.  I sealed and aged and stained them over and over to try and disguise the mistakes I made.   I can't cut a straight line and I didn't lay them as straight as they should be either.  Because they were not all square they had to be RE-CUT before I glued them down.  What a job!  Even after re-cutting them they were still not square.  Did I say that I Always mess stuff up!?  When I see how beautiful the floors are of Giac and brae and Josje and Sab and (the list goes on) who are all so meticulous and precise.....  Okay, so I can't sew and I can't lay tile either!  Fortunately the rug covers a multitude of my most obvious errors.


This is another of the unfinished things in the parlor.  I ran out of an ink cartridge just after I made the test copy of this area rug. This it the photocopy of the rug on copy paper.  Later, I shall print it out onto cotton fabric and then use that instead.  Oh, about the curtains, they are as stiff as boards!  I used the foil back method that I used previously on "Foiled and Foiled Again" (Jan 2013)  I hadn't planned on having a ruffle on the valance.  I was going to use a swag but once I started making the curtains things changed on me.  I had sewn brass rings to the top of the curtains and then couldn't figure out how to incorporate a swag, too.  So I opted for the ruffle.  I sewed it on.  I had to glue the rod finials to the wall because the board that lines the walls inside was very dense and I couldn't drill through it without tearing a big hole into it and so I went the easy way and used Quick Grip and so there they are.  It is probably the weakest feature in the room.  They do however look home-made and cottagy.
                                                             I never said I could sew!
   After I  got the wall sconces installed I realized that I hung them lower than I had  originally planned.  Now I am fretting about it.  Little mistakes like this are maddening.   The last time I tried to correct a mistake I made, I made it WORSE!
I shall leave it for now and see how much it bugs me later.
DETAILS, DETAILS, DETAILS!
I don't go in for doilies on furniture in my Real Life but  I like them in miniature.  This is by Dale R. Kendall.  They are laser cut paper and I bought them at the Seattle Show this past March, just during the last minutes before the show closed, and I am glad I did.  I used another one on the fireplace mantle and also a paper napkin that is on the tea table is a Dale R. Kendall piece.  I really like the blue and white china that is in this little space.  I would like to add some more, if not here in the parlor, perhaps in one of the other (not yet made) rooms.
***
 The following photos are the First, second and the Third transformations of the living room in the $20, Arthur dollhouse from the thrift store.
I like to see how the different stages evolved hope you do too!


Stage 1                      
The first installment,  everything in and all the wires everywhere!  Windows are held in place with blue tack.  Nothing on the walls except primer.

Stage 2 
The second transition, some changes in accessories but most of the furniture is in the same position as originally outlined.  

Stage 3
Stage 3, Lights are on the wall and the fireplace is now extended from the exterior wall for a little architectural interest.  All the lamps will be in operation once I get them all connected to another transformer.  The transformer for the wall lamps is only 6 volts which makes the bulbs dimmer.  I tried a 12 volt transformer and the lights were way too bright!  I shall see what kind of light the other 2 will emit.  It would have helped the interior shots if they were all up and running but I just didn't feel up to doing it right now.  I'm bushed.  When I say I'm 'bushed', I am saying that I am tired but I wonder if it translates to 'I am a shrub', in another language? 
 ( That would be funny!)
******
Well that is it! 

 I do so hope that you enjoyed the tour of the parlor. 
 Thanks for stopping by
and please,
 come again!

elizabeth 

DO OVERS! a Glencroft Living room redecoration

    Back in April of 2022, I made up a storyline for my Glencroft renovations, which went something like this...   "After due considera...